The Radiator
 While
getting the car ready to start I found a
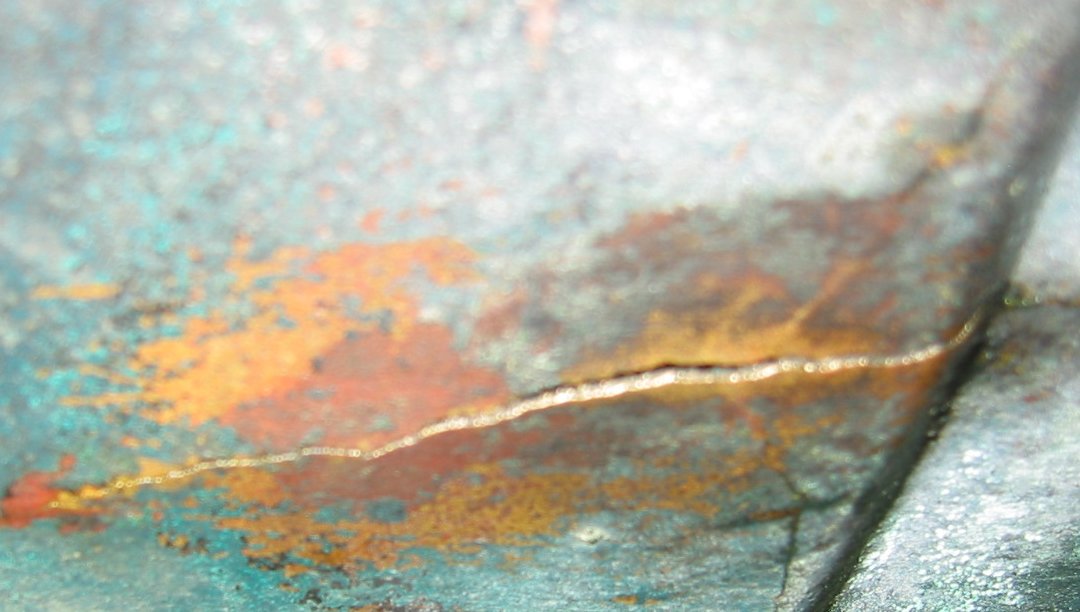
problem with the radiator. There is a crack in the top tank where the red
circle is at right. There is a close-up of the crack below. It is an
odd crack. I have no idea what caused it but I am tempted to try and
reduce strain on the radiator. One quirk of this car is that the hood prop
rod actually rests in a bracket soldered to the top of the radiator (see the
green circle at right). The radiator is a huge brass construct and has
held up for a very long time but why put strain on it for no reason? I am
thinking of bolting a length of 3/4" angle iron between the two cowl
stiffeners (you can see one of them running from the lower left to upper center
of the picture) and putting a hole in that for the prop rod. There would
be no permanent changes required for that.
While
getting the car ready to start I found a
problem with the radiator. There is a crack in the top tank where the red
circle is at right. There is a close-up of the crack below. It is an
odd crack. I have no idea what caused it but I am tempted to try and
reduce strain on the radiator. One quirk of this car is that the hood prop
rod actually rests in a bracket soldered to the top of the radiator (see the
green circle at right). The radiator is a huge brass construct and has
held up for a very long time but why put strain on it for no reason? I am
thinking of bolting a length of 3/4" angle iron between the two cowl
stiffeners (you can see one of them running from the lower left to upper center
of the picture) and putting a hole in that for the prop rod. There would
be no permanent changes required for that.
 The
crack is high enough in the radiator that it will not cause any immediate
problems. Keep in mind this is not a pressurized cooling system. The
radiator is vented to the atmosphere. So as long as the coolant level
remains below the crack it should be fine. I will attempt a repair later.
The
crack is high enough in the radiator that it will not cause any immediate
problems. Keep in mind this is not a pressurized cooling system. The
radiator is vented to the atmosphere. So as long as the coolant level
remains below the crack it should be fine. I will attempt a repair later.
The Fix (much, much later - 10/17/04)
I have been driving the car more than working on it but the antifreeze
seeping out of this crack finally started to bug me. I found a sheet of
1/64" brass at a hobby shop and began cleaning the area of the crack.
I quickly found the cracking was much more extensive than I had thought. The entire area was also bulged out of shape. It was
obviously freeze damage rather than any trauma or mechanical damage.
thought. The entire area was also bulged out of shape. It was
obviously freeze damage rather than any trauma or mechanical damage.
I began shaping a patch to cover the bulge and it was not going well. Then my Dad looked at it while babysitting my kids and simply pushed the brass back into shape and cleaned it all up. So I only had to shape a patch to match the damaged areas in the picture at right (damaged areas are highlighted).
 Applying
the patch with the radiator in the car was not appealing because I figured I
would get solder spatter everywhere (I have never done this kind of repair
before). So I drained the coolant and removed the radiator. Since I
did not want to overheat the radiator (it would just fall into a very expensive
pile of brass shards if the solder joints holding it together melt) I rigged it
up so it would be about half-full of water while I worked.
Applying
the patch with the radiator in the car was not appealing because I figured I
would get solder spatter everywhere (I have never done this kind of repair
before). So I drained the coolant and removed the radiator. Since I
did not want to overheat the radiator (it would just fall into a very expensive
pile of brass shards if the solder joints holding it together melt) I rigged it
up so it would be about half-full of water while I worked.
I then bent a piece of brass to cover the damaged area. Not to give away the ending but I wish I had done a better job with the shaping to get the patch to lay flatter. But I am getting ahead of myself. Once the patch was shaped I scrubbed the patch and the radiator with emery cloth (like sandpaper on cloth), carefully cleaned the area, then applied a paste flux to the areas to be soldered. Flux is an acid compound that both helps clean the surfaces to be soldered and helps protect against oxidation. Solder only sticks to absolutely clean metal but when heated brass oxidizes very quickly.
The next step was to apply
a thin layer of solder to both the patch and the crack area. This process
is called "tinning". It worked but I needed a better tool.
A small stainless steel brush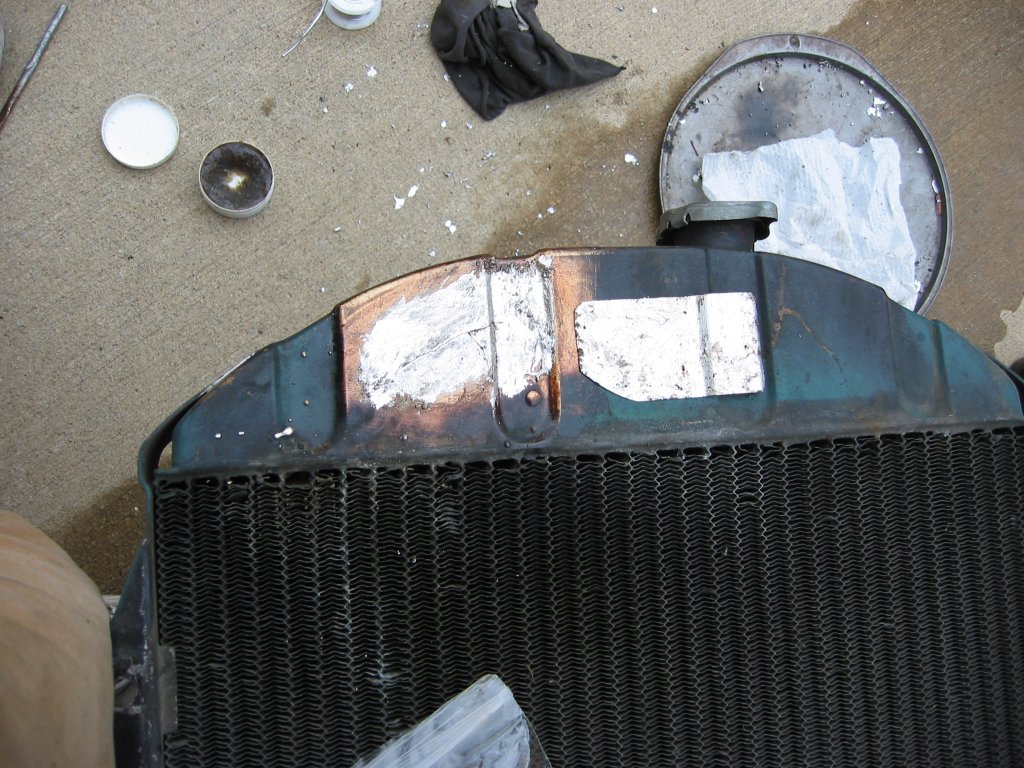 would have let me spread the solder evenly and apply more flux as I
proceeded. Stainless is ideal for this because solder will not stick
to it. As it happened all I had was a scrap of brass sheet and a small
chemical brush with horsehair bristles. Solder does not stick to horsehair
but it sure does set it on fire! It took some fooling around and a good
re-cleaning in the middle of the process but in the end both parts were tinned
and my poor brush had given its life for the cause. I also used twice as
much solder as I would have if I knew what I was doing. The patch is the
silver thing on the left. Of course it is upside down and wrong side up.
would have let me spread the solder evenly and apply more flux as I
proceeded. Stainless is ideal for this because solder will not stick
to it. As it happened all I had was a scrap of brass sheet and a small
chemical brush with horsehair bristles. Solder does not stick to horsehair
but it sure does set it on fire! It took some fooling around and a good
re-cleaning in the middle of the process but in the end both parts were tinned
and my poor brush had given its life for the cause. I also used twice as
much solder as I would have if I knew what I was doing. The patch is the
silver thing on the left. Of course it is upside down and wrong side up.
Finally the patch was put in place and the whole mess heated with a torch to melt the tinned areas together and complete the repair. When thin metal is heated it moves. This aggravated my already not-so-perfect match between the shape of the patch and the radiator. Getting the two to stay together was a chore but I think I managed it. I applied a bit more solder around the edges of the repair and re-installed the radiator. Here is the end result. It looks OK but I could do it better next time. Only I hope there will not BE a next time. When I am more confident in the repair I will probably paint it so it is less obtrusive.
