Carburetor Rebuild
July, 2005
 After
barely making it home I decided I could not let the carb go any longer.
I have had the rebuild kit for months but have been putting off ripping
into the carburetor. Partly I was nervous about messing with
it. I have not owned a carbureted car in years. I have rebuilt several small engine carbs but I have not touched a car carb since high school. After
barely making it home I decided I could not let the carb go any longer.
I have had the rebuild kit for months but have been putting off ripping
into the carburetor. Partly I was nervous about messing with
it. I have not owned a carbureted car in years. I have rebuilt several small engine carbs but I have not touched a car carb since high school.No time like the present! Here is the before picture of the carb. The shop manual for the car has a detailed step-by-step procedure for taking the carb apart and I took a ton of pictures as I went along. |
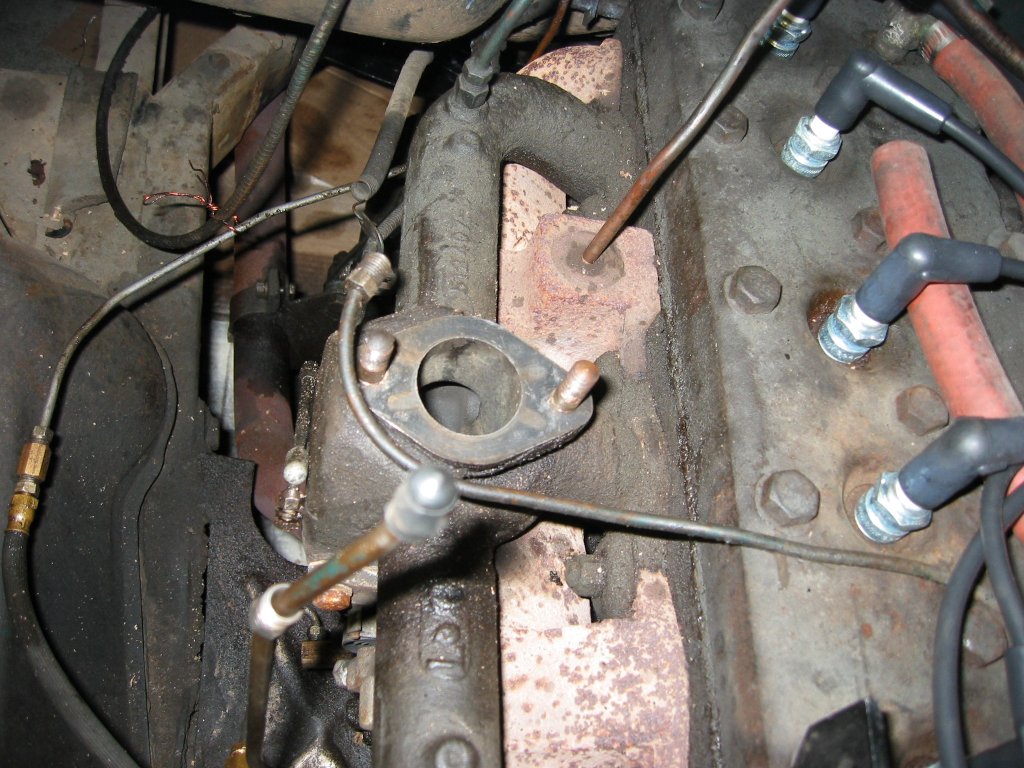
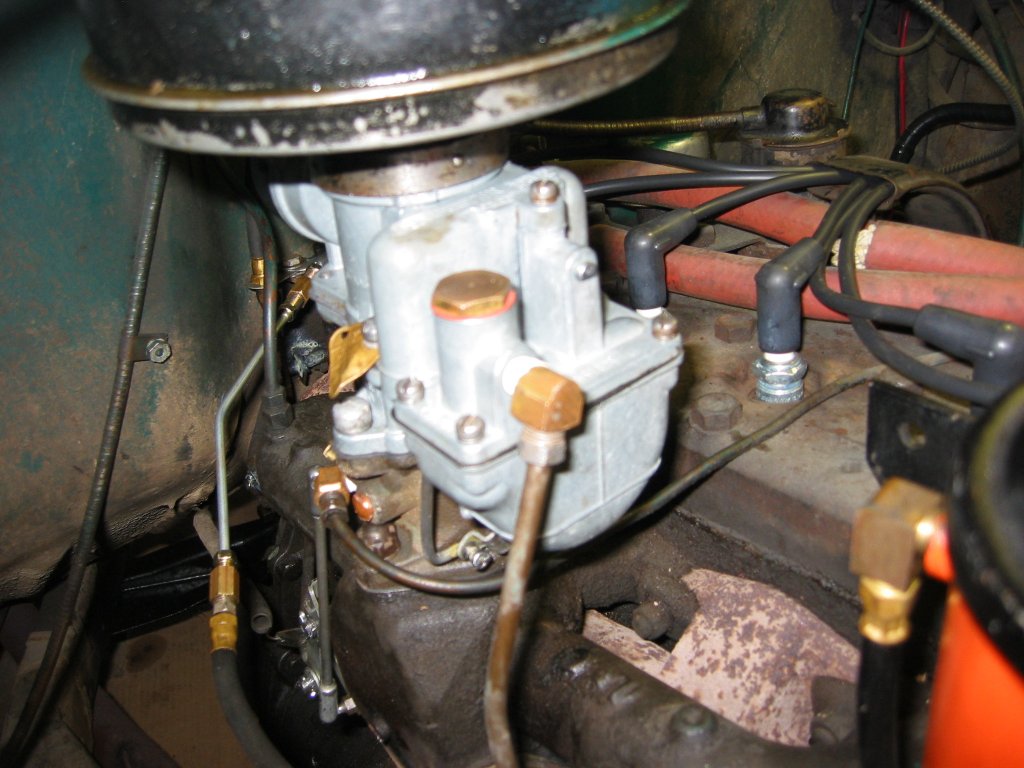
 The
carb was easy to remove but very, very gunky. After removing the
carb I washed the worst of the road grime off the outside. I then
cleaned off my workbench, grabbed a bunch of ziplock bags for parts, and
got to work. Here is one of the pictures I took before I started
disassembly. The first step is to remove the linkage cover and
choke assembly. The large picture below shows the exposed linkage.
The removed choke assembly is sitting on the bench. The linkage
you see connects all the control mechanisms together that govern the
carb. Whoever said that this is simpler than a modern
fuel-injection system was full of it. However it does make a lot of
sense when you can see all the parts move together. The
carb was easy to remove but very, very gunky. After removing the
carb I washed the worst of the road grime off the outside. I then
cleaned off my workbench, grabbed a bunch of ziplock bags for parts, and
got to work. Here is one of the pictures I took before I started
disassembly. The first step is to remove the linkage cover and
choke assembly. The large picture below shows the exposed linkage.
The removed choke assembly is sitting on the bench. The linkage
you see connects all the control mechanisms together that govern the
carb. Whoever said that this is simpler than a modern
fuel-injection system was full of it. However it does make a lot of
sense when you can see all the parts move together. |
 |
 Next
the bowl cover comes off. Here is the cover as I am removing the
vacuum economizer piston. I disassembled everything you see here
being very careful to photograph every step and bagging the parts as I
went along. Next
the bowl cover comes off. Here is the cover as I am removing the
vacuum economizer piston. I disassembled everything you see here
being very careful to photograph every step and bagging the parts as I
went along. |
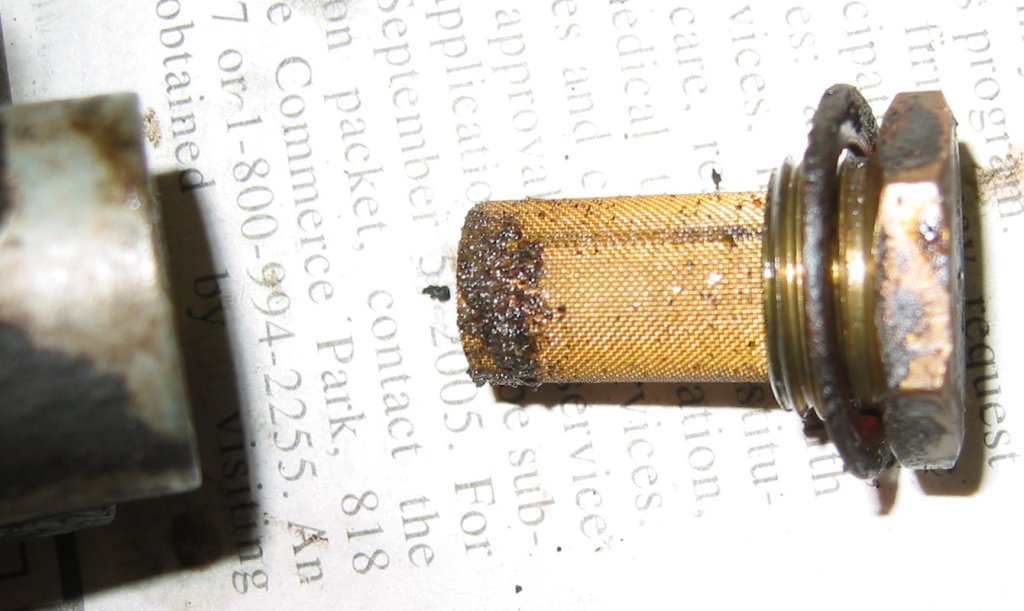 This
is what I found in the inlet screen. I think I will put a fuel
filter in this guy before it runs again. Most of the crap is
rust--presumably from the fuel tank. This
is what I found in the inlet screen. I think I will put a fuel
filter in this guy before it runs again. Most of the crap is
rust--presumably from the fuel tank. |
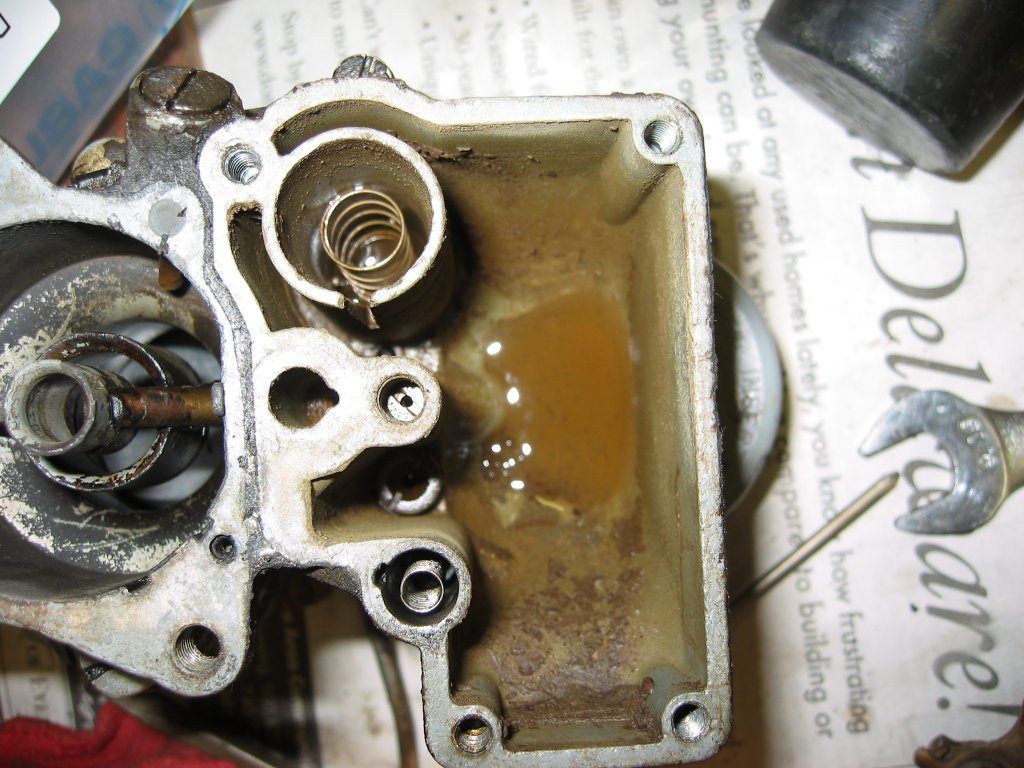 Here
is the bowl. What a mess... After taking the parts out I
knocked all the loose varnish out of the bowel and got the pile below.
Nasty. Here
is the bowl. What a mess... After taking the parts out I
knocked all the loose varnish out of the bowel and got the pile below.
Nasty.
|
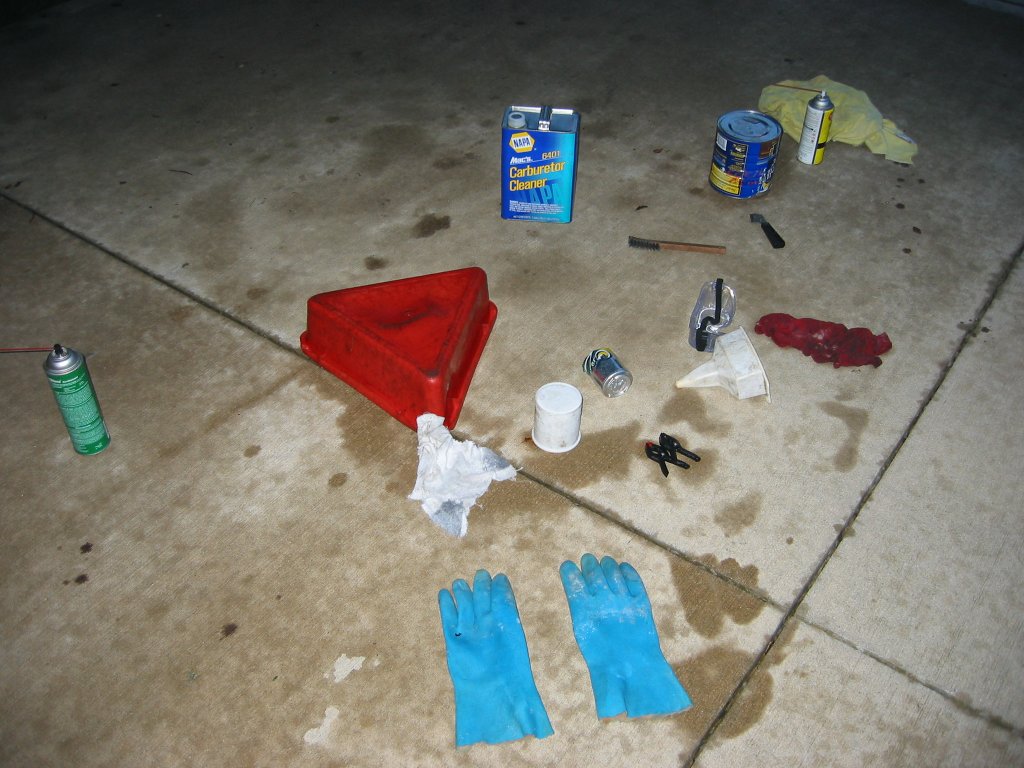 Once
the entire carb was stripped of parts it was time for some cleaning.
The tool of choice is some really nasty stuff made for carb cleaning.
I got mine at NAPA. In times gone by it was easy to get carb
cleaner in a gallon paint can with a built-in basket for dipping the
parts. Nobody local seem to have that any more.
Dipping carbs is not as common as it used to be. So I rigged up my
own basket from a pop can for dipping the small parts and just lowered
the big stuff in with a wire. This is all necessary because carb
cleaner is evil stuff. Just being around it makes my eyes
burn and if it gets on exposed skin it starts to burn immediately.
I wore chemical gloves and goggles while I worked with it. Here is
my cleaning stuff as I was cleaning up. Once
the entire carb was stripped of parts it was time for some cleaning.
The tool of choice is some really nasty stuff made for carb cleaning.
I got mine at NAPA. In times gone by it was easy to get carb
cleaner in a gallon paint can with a built-in basket for dipping the
parts. Nobody local seem to have that any more.
Dipping carbs is not as common as it used to be. So I rigged up my
own basket from a pop can for dipping the small parts and just lowered
the big stuff in with a wire. This is all necessary because carb
cleaner is evil stuff. Just being around it makes my eyes
burn and if it gets on exposed skin it starts to burn immediately.
I wore chemical gloves and goggles while I worked with it. Here is
my cleaning stuff as I was cleaning up. |
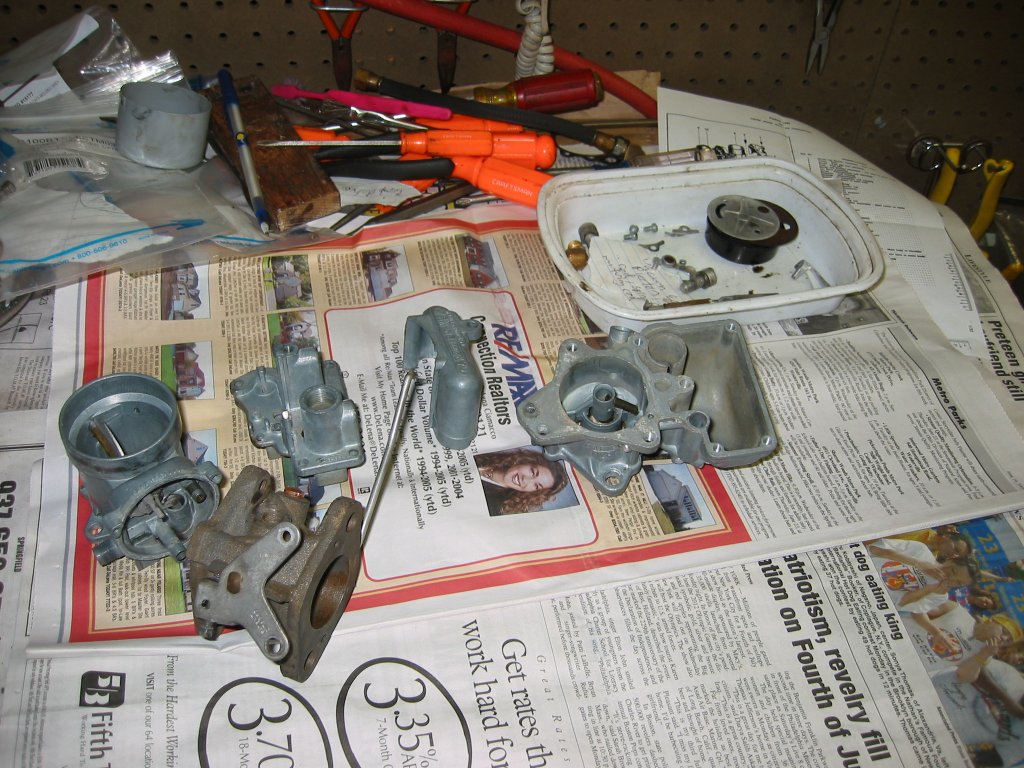 The
good news is that the cleaner works very well. Here are all the
major parts after cleaning. After a few minutes in the bath
I would rinse the parts thoroughly then blow them dry with compressed
air. The parts look much better! The
good news is that the cleaner works very well. Here are all the
major parts after cleaning. After a few minutes in the bath
I would rinse the parts thoroughly then blow them dry with compressed
air. The parts look much better! |
 After
everything was clean and dry I began reassembly. Using new gaskets
from the rebuild kit I assembled the throttle body and venturi/bowl
assembly. Next it was time to put the bowl cover
together with new parts from the kit. That is when the fun
started. In the picture at right you can see the cleaned inlet
screen (how pretty!). Above the screen is old needle valve seat on
the left and the new one on the right. At the lower right is the
old needle valve on top and the new one below. Notice that
they are totally different. Damn! After
everything was clean and dry I began reassembly. Using new gaskets
from the rebuild kit I assembled the throttle body and venturi/bowl
assembly. Next it was time to put the bowl cover
together with new parts from the kit. That is when the fun
started. In the picture at right you can see the cleaned inlet
screen (how pretty!). Above the screen is old needle valve seat on
the left and the new one on the right. At the lower right is the
old needle valve on top and the new one below. Notice that
they are totally different. Damn! |
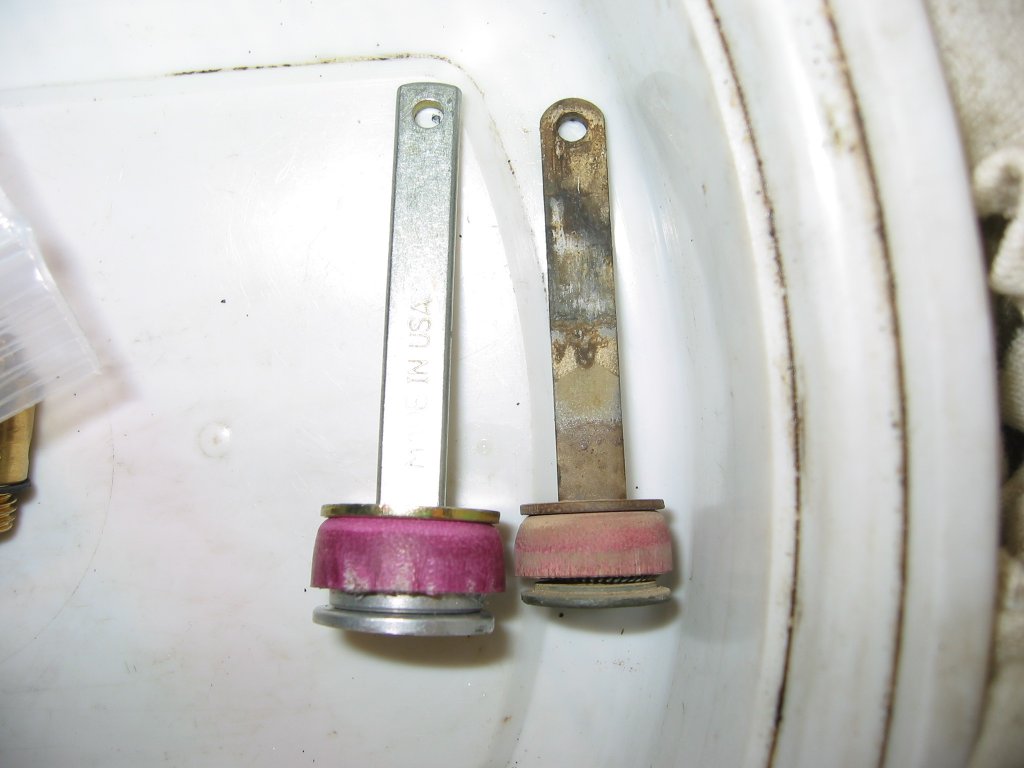 So
then I started comparing the rest of the parts. At left is the new
accelerator pump piston next to the old one. Not even close.
On closer inspection some small parts did not match in the kit.
Damn twice! I double-checked the part number for my carb kit and
verified it was indeed for a 41 Champion.
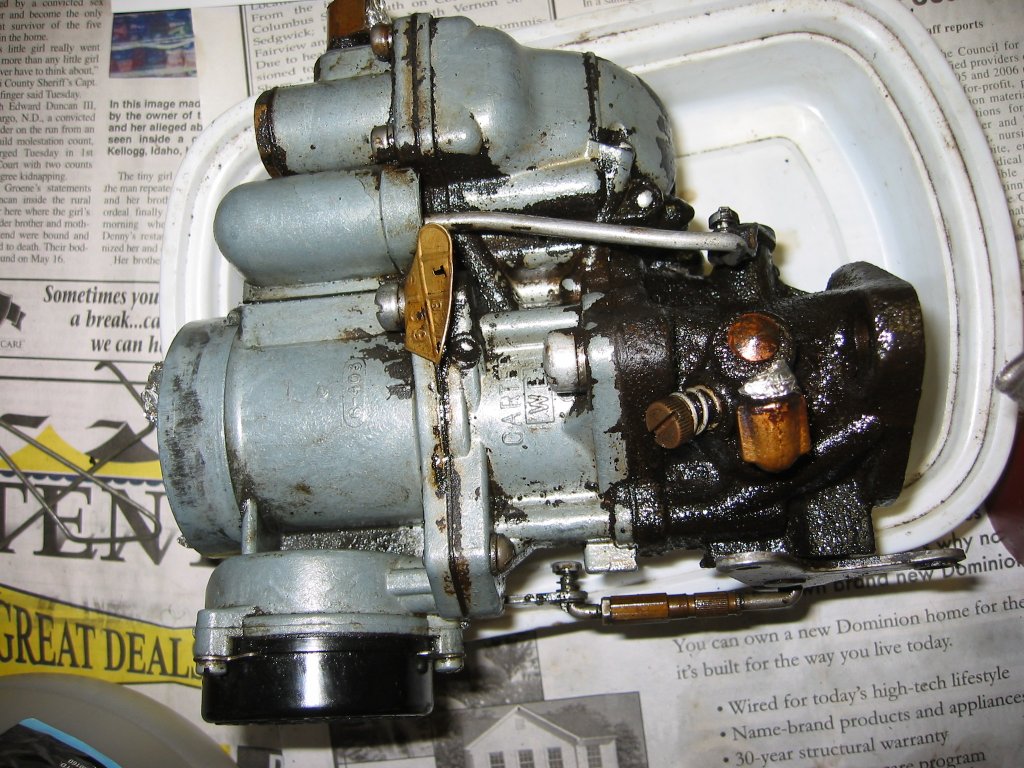
I
was all set to make an angry phone call to the guy I bought the kit from
when I started looking at the part numbers on the carb. My car
left the factory with a Carter WA-496S carburetor. So
then I started comparing the rest of the parts. At left is the new
accelerator pump piston next to the old one. Not even close.
On closer inspection some small parts did not match in the kit.
Damn twice! I double-checked the part number for my carb kit and
verified it was indeed for a 41 Champion.
I
was all set to make an angry phone call to the guy I bought the kit from
when I started looking at the part numbers on the carb. My car
left the factory with a Carter WA-496S carburetor.
As you can see in the close-up at left this is a Carter WE with a part number of 661S. No wonder! I really, really should have checked these numbers before taking anything apart. Lesson learned! |
| The Carter WE was used on 46-58 Champions and 41-48 pickup trucks with
the Champion 170CID engine. It is an improved model with a better
automatic choke and a smarter check valve for the accelerator pump.
I would like to put the proper carb in the car but this is the carb I
have. So I am going to fix it. I ordered the proper carb kit
(another $45 to
StudebakerParts.com!) but
now I have to wait until the new kit gets here. Meanwhile I have
some other projects going on the car. But more on that later...
|
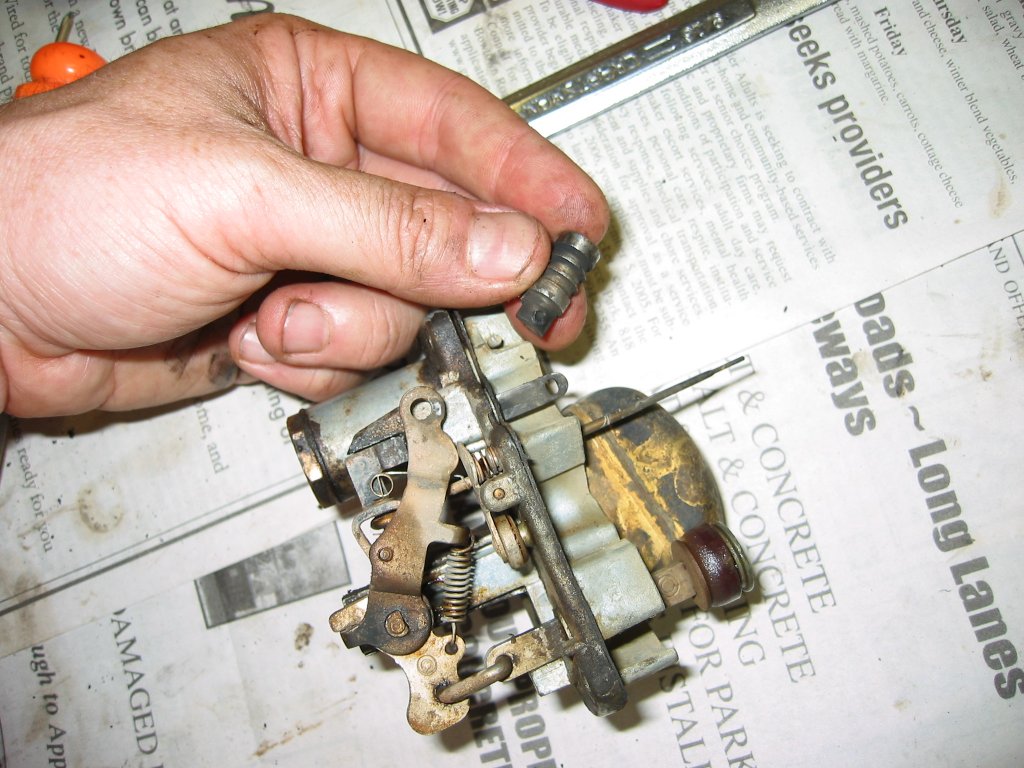
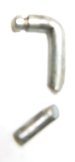  Once
I got the new carb kit the job proceeded nicely. Unfortunately I
did not have the digital camera so I don't have many pictures. All
was well until I went to adjust the accelerator pump. According to
the manual I was supposed to adjust the travel of the pump by bending
the linkage. Bent it a little and the travel was closer to spec.
Bent it a little more and snap! The #(*$& thing
broke. It felt like a bad idea when I was doing it. I should
listen to my instincts. Here is a before and after shot.
What a moron. The good news is that I found a piece of brass rod
the same diameter and with a little careful metal work I was able to
machine a groove in the end (hacksaw blade and a drill press) then bend
a replacement. Remember kids--stupidity and old cars are a bad
combination!. I will have to find a steel replacement or get this
one welded back together. The brass will probably hold forever but
I am a little anal. Again I don't have pictures of the fix but I
will get some soon. Once
I got the new carb kit the job proceeded nicely. Unfortunately I
did not have the digital camera so I don't have many pictures. All
was well until I went to adjust the accelerator pump. According to
the manual I was supposed to adjust the travel of the pump by bending
the linkage. Bent it a little and the travel was closer to spec.
Bent it a little more and snap! The #(*$& thing
broke. It felt like a bad idea when I was doing it. I should
listen to my instincts. Here is a before and after shot.
What a moron. The good news is that I found a piece of brass rod
the same diameter and with a little careful metal work I was able to
machine a groove in the end (hacksaw blade and a drill press) then bend
a replacement. Remember kids--stupidity and old cars are a bad
combination!. I will have to find a steel replacement or get this
one welded back together. The brass will probably hold forever but
I am a little anal. Again I don't have pictures of the fix but I
will get some soon.
I also set the fast idle to the "book" value. Turns out that at that setting it idles a little TOO fast for my taste. I will probably dial that back a bit. The car certainly has much better throttle response and seems to idle more smoothly. I think it is a winner! |