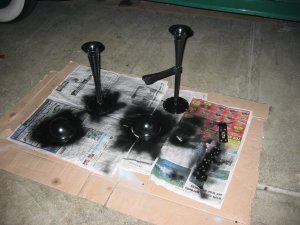
Horn Restore
August 20-24, 2005
Sometimes I just have to give in to my natural urge to make a big project out of a simple job. There are a lot of things I should do to the car but I was poking around and noticed that the fabric-covered wires from the horn relay to the horns were shedding their insulation. I could have just wrapped them in electrical tape (it is not like I have not done that before). But instead I decided to rebuild the horns entirely.
 Here
you can see the frayed wire and the modified upper bracket. There
is the remains of a mounting point between the horns that was removed by
bending it until it broke. The main mounting bracket on the right
was hacksaw-cut to fit. There was surface rust on some of the
unpainted horn areas but nothing bad. Here
you can see the frayed wire and the modified upper bracket. There
is the remains of a mounting point between the horns that was removed by
bending it until it broke. The main mounting bracket on the right
was hacksaw-cut to fit. There was surface rust on some of the
unpainted horn areas but nothing bad. |
|
|
 The
guts of the horn with the cover removed. The covers just
snap on and did a great job protecting the horn mechanism. There
was some surface rust on the diaphragm so I cleaned that with steel wool
and smeared it with a thin cover of grease. That may have
been a mistake but I can always clean it again. The
guts of the horn with the cover removed. The covers just
snap on and did a great job protecting the horn mechanism. There
was some surface rust on the diaphragm so I cleaned that with steel wool
and smeared it with a thin cover of grease. That may have
been a mistake but I can always clean it again. |
 Here
is the horn mechanism with a new wire installed. I re-used the
terminal on the end of the wire to make it look more authentic using the
same technique I have used before. Here
is the horn mechanism with a new wire installed. I re-used the
terminal on the end of the wire to make it look more authentic using the
same technique I have used before. |


