5-7-2009 to 5-19-2009
 The passenger side front motor mount had totally collapsed. Worse yet the bolts holding the mount to the engine were actually loose. I suspect these mounts are natural rubber and were softened by 70 years of oil. The rubber was so goopy I had a hard time getting the metal parts out. The passenger side front motor mount had totally collapsed. Worse yet the bolts holding the mount to the engine were actually loose. I suspect these mounts are natural rubber and were softened by 70 years of oil. The rubber was so goopy I had a hard time getting the metal parts out. |
 I had some help cleaning the engine. She has been working hard and making a huge mess. I had some help cleaning the engine. She has been working hard and making a huge mess. |
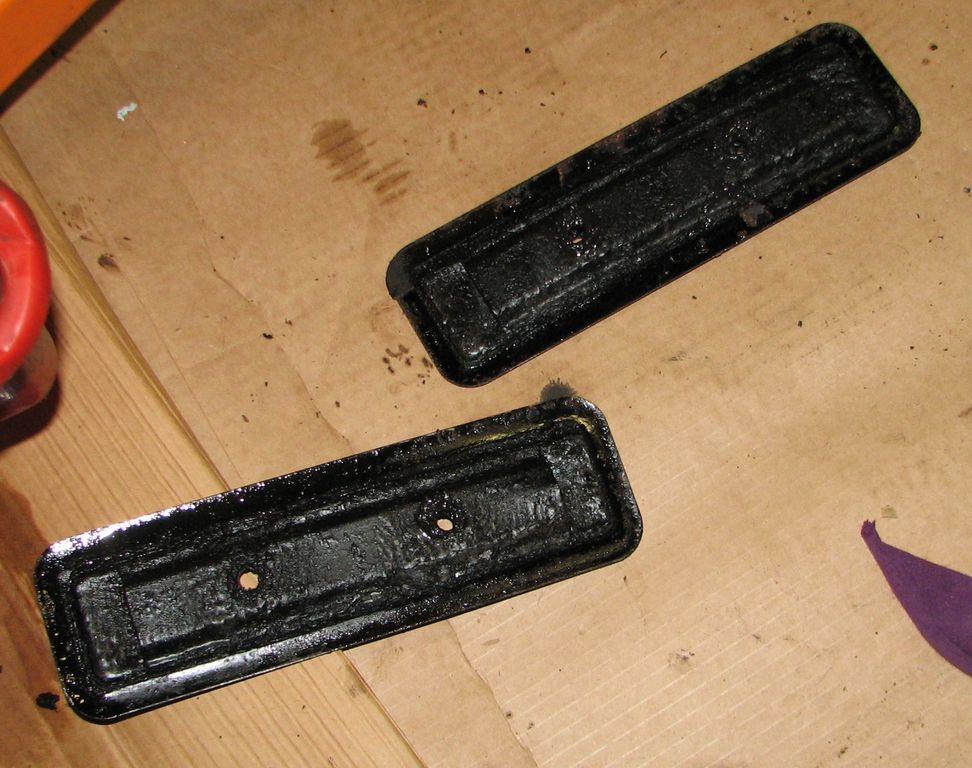
 The beauty of my car is that it was always garaged. There is rust and various kinds of road rash but it is incredible how much is still intact underneath. Here are the engine mounts cleaned up. The mounts still have some of the factory cadmium plating and green engine paint on them. All the metal hardware I salvaged from the old mounts. The lower rubber mounts (like the one with the sticker) are reproduction parts. They seem a little odd but I hope they will work. The upper rubber mounds are NOS and fit perfectly. The beauty of my car is that it was always garaged. There is rust and various kinds of road rash but it is incredible how much is still intact underneath. Here are the engine mounts cleaned up. The mounts still have some of the factory cadmium plating and green engine paint on them. All the metal hardware I salvaged from the old mounts. The lower rubber mounts (like the one with the sticker) are reproduction parts. They seem a little odd but I hope they will work. The upper rubber mounds are NOS and fit perfectly. |
 Since the weather was supposed to get colder I figured I should get the freeze plugs out and the engine block flushed right away. There was a little gunk in the water jacket but not too bad. Since the weather was supposed to get colder I figured I should get the freeze plugs out and the engine block flushed right away. There was a little gunk in the water jacket but not too bad. |
 The rear freeze plug is right behind the oil filler tube. The tube is just a friction fit into the block but I could not wiggle it out with a strap wrench and bad language. I could get the freeze plug out with the tube in place but to get the new plug in I will have to pull this tube. I will try clamping blocks to the tube and tapping them with a hammer. I just hope it is not glued in somehow. The rear freeze plug is right behind the oil filler tube. The tube is just a friction fit into the block but I could not wiggle it out with a strap wrench and bad language. I could get the freeze plug out with the tube in place but to get the new plug in I will have to pull this tube. I will try clamping blocks to the tube and tapping them with a hammer. I just hope it is not glued in somehow. |
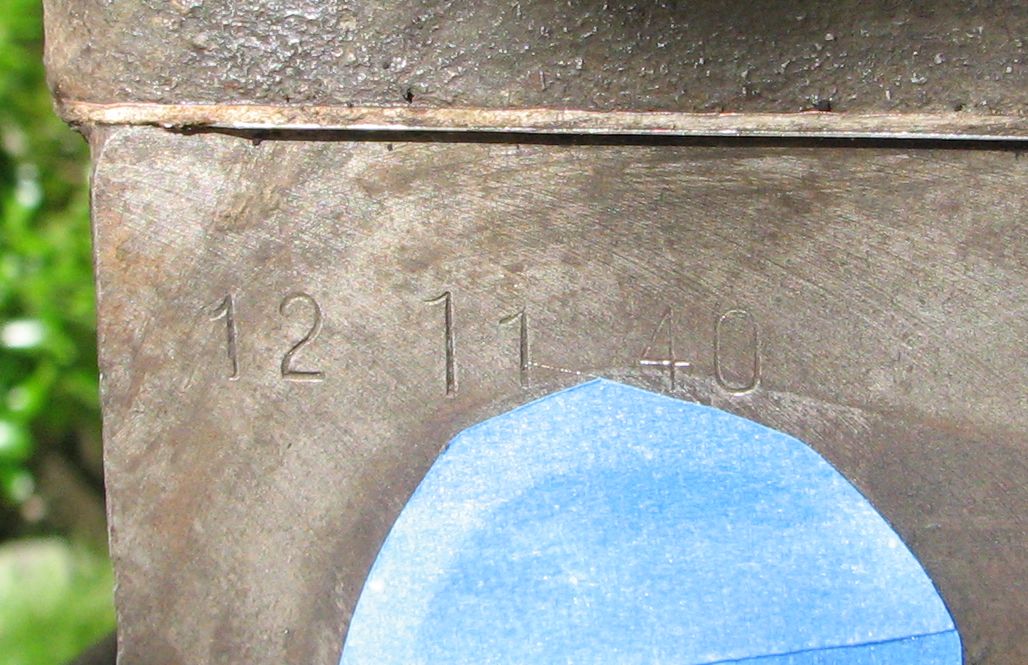
 More evidence of the joys of a solid car to work on. Here are the block casting numbers after some scraping. A lot of the factory paint is still here. The number on the left is the part number. The number on the right should be a date code for December 9, 1940. If that number and my production order are correct this block left the foundry on 12/9/1940 (a Monday) and was shipped in my finished car two days later on 12/11/1940 (a Wednesday). Seems really quick to me. The serial number on the block does match the production order so this is the engine my car shipped with. More evidence of the joys of a solid car to work on. Here are the block casting numbers after some scraping. A lot of the factory paint is still here. The number on the left is the part number. The number on the right should be a date code for December 9, 1940. If that number and my production order are correct this block left the foundry on 12/9/1940 (a Monday) and was shipped in my finished car two days later on 12/11/1940 (a Wednesday). Seems really quick to me. The serial number on the block does match the production order so this is the engine my car shipped with. |
  The head has a casting date of 11/28/1940 (a Thursday) which seems more reasonable. I also found this date stamped above one of the intake ports. 12/11/40 matches the “Ship Date” on the production order. The head has a casting date of 11/28/1940 (a Thursday) which seems more reasonable. I also found this date stamped above one of the intake ports. 12/11/40 matches the “Ship Date” on the production order. |
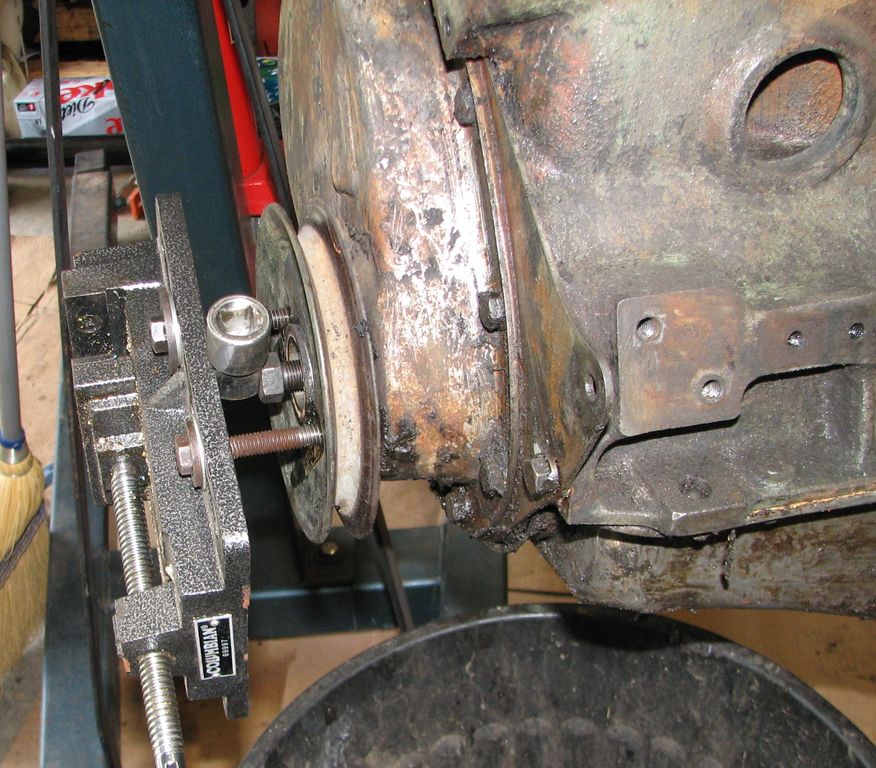 Pulling the crankshaft pulley. This engine does not have a harmonic balancer like most cars do ( and many did at the time). The manual says none is needed because the engine is just that good. But they started using them in 1946. Go figure.Corporate BS aside I needed a puller to get the pulley out and none of mine fit. So I rigged this puller up from two bolts, a 3/4″ socket adapter, and the vice from my drill press. It looks ugly but it worked great.You can see how the cleaning is progressing around the engine. Once the whole engine has been laboriously scraped of all the loose dirt I will go after it with solvent. Pulling the crankshaft pulley. This engine does not have a harmonic balancer like most cars do ( and many did at the time). The manual says none is needed because the engine is just that good. But they started using them in 1946. Go figure.Corporate BS aside I needed a puller to get the pulley out and none of mine fit. So I rigged this puller up from two bolts, a 3/4″ socket adapter, and the vice from my drill press. It looks ugly but it worked great.You can see how the cleaning is progressing around the engine. Once the whole engine has been laboriously scraped of all the loose dirt I will go after it with solvent. |
 Time to pull the manifold. These are brass nuts and only the two end ones can be reached by a socket. So removing these fine-threaded nuts takes a while. Time to pull the manifold. These are brass nuts and only the two end ones can be reached by a socket. So removing these fine-threaded nuts takes a while. |
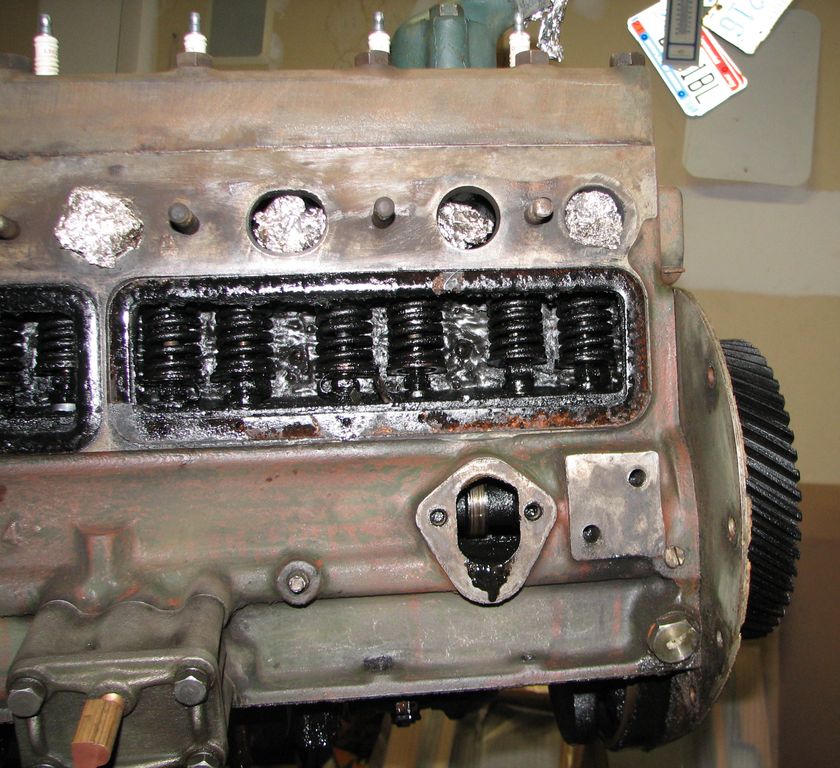
  Manifold is off. The studs are in great shape. Two of the brass nuts were a bit dinged up (NOT by me!) so I grabbed two better ones off my spare engine. Having a spare engine is about to come in real handy. Notice the exhaust leaks (black marks) around the heat riser. The heat riser directs hot exhaust up under the carburetor and intake manifold to help the engine warm up faster. It is controlled by a bi-metallic spring and a counterweight. Both are visible in this picture. As is a large crack… Manifold is off. The studs are in great shape. Two of the brass nuts were a bit dinged up (NOT by me!) so I grabbed two better ones off my spare engine. Having a spare engine is about to come in real handy. Notice the exhaust leaks (black marks) around the heat riser. The heat riser directs hot exhaust up under the carburetor and intake manifold to help the engine warm up faster. It is controlled by a bi-metallic spring and a counterweight. Both are visible in this picture. As is a large crack… |
I also got the first layer of gunk off the engine. In the pictures below you can see the engine after much scraping and a quick bath with kerosene, wire brushes, and a toothbrush. 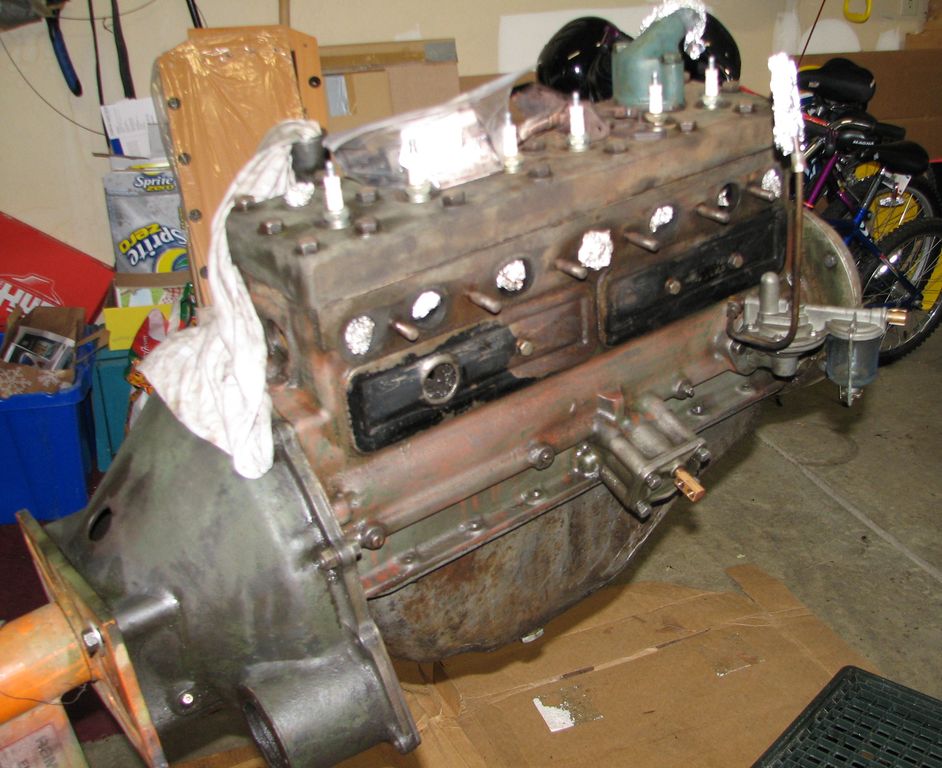    |
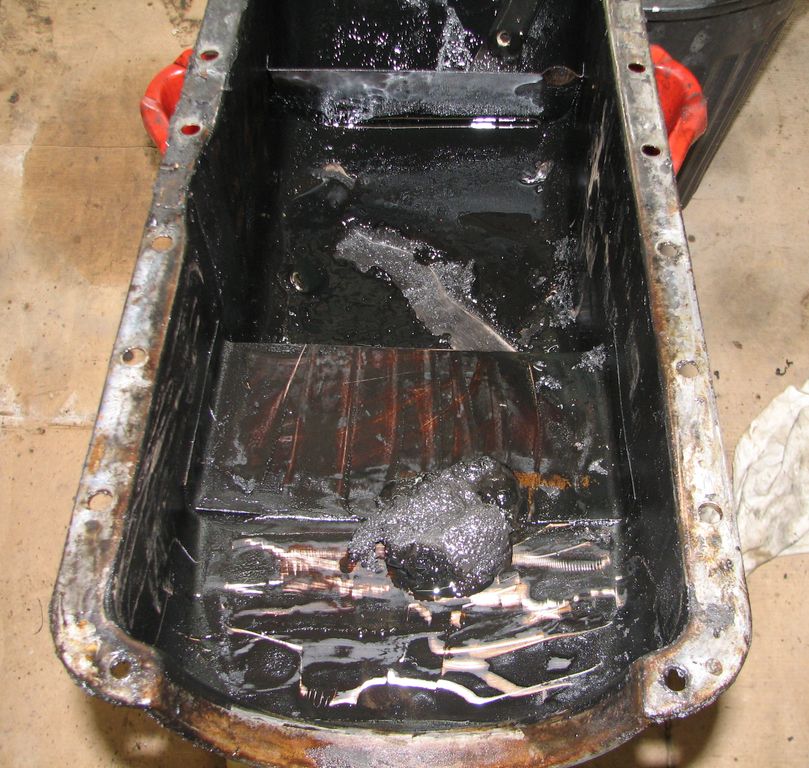 You have to be kidding me. The furrow in the bottom of the pan is about an inch deep. The lump in the foreground is the material scraped out of that furrow. What a mess! Cleaned up the pan is a lot lighter! You have to be kidding me. The furrow in the bottom of the pan is about an inch deep. The lump in the foreground is the material scraped out of that furrow. What a mess! Cleaned up the pan is a lot lighter! |
|
|
  The good news is that the crankcase is not as bad. Not good, but not as bad. The really, really good news is the cam lobes, cylinder walls, and tappets look like new. The sludge seems to be concentrated in areas without positive oil pressure. Still a mess though. The good news is that the crankcase is not as bad. Not good, but not as bad. The really, really good news is the cam lobes, cylinder walls, and tappets look like new. The sludge seems to be concentrated in areas without positive oil pressure. Still a mess though. |
 Timing gear is a bit of a mess too. I want to change the gasket on the front engine plate so these gears will have to come off. Timing gear is a bit of a mess too. I want to change the gasket on the front engine plate so these gears will have to come off. |
After a few hours of cleaning and scraping things are looking up. These pictures show the progress from bare metal to finish paint.   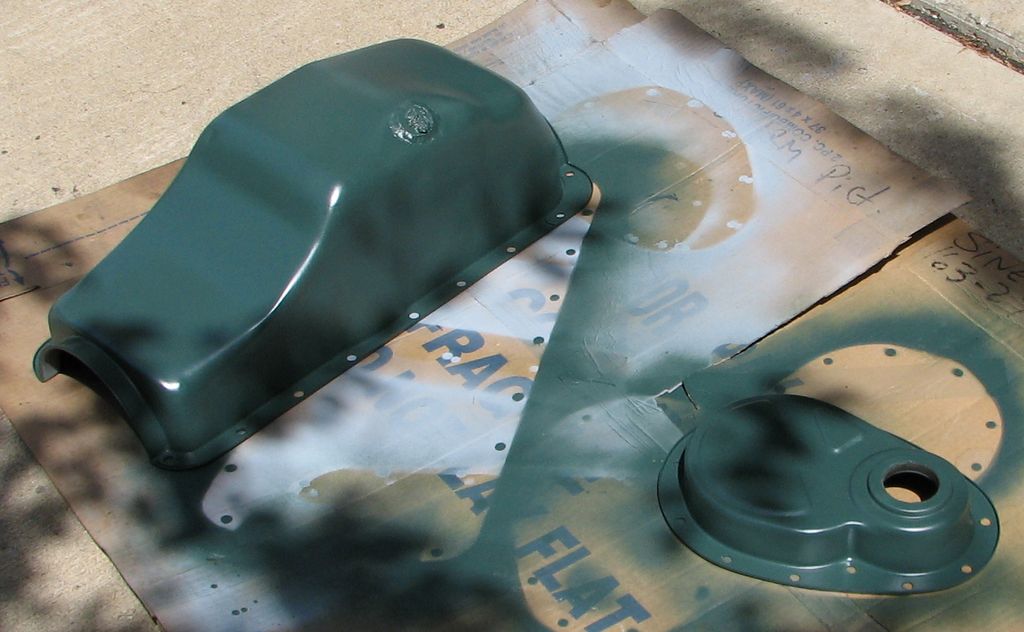  |
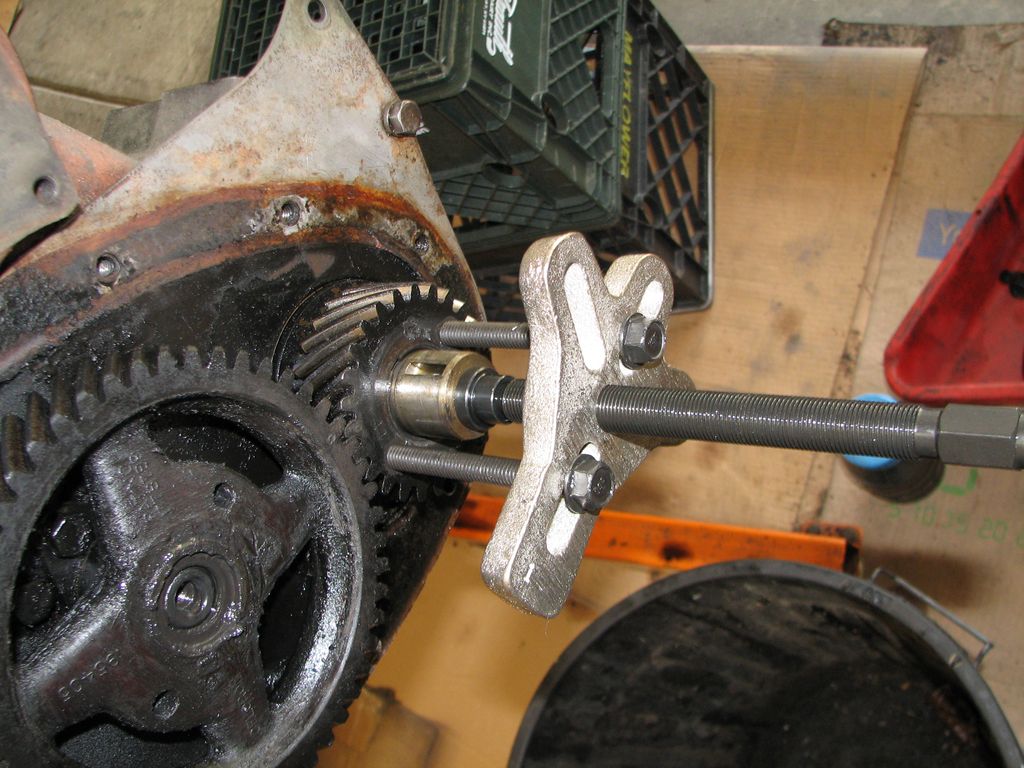  Pulling the timing gears. The large cam gear is actually made of some sort of fiber composite. It feels and somewhat looks like wood. I guess it holds up just fine though. Pulling the timing gears. The large cam gear is actually made of some sort of fiber composite. It feels and somewhat looks like wood. I guess it holds up just fine though. |
  After the gears are out of the way the front plate comes off. Underneath was yet another type of filth. I think this is a combination of oil sludge and decomposed cork gasket. Mike Rowe has nothing on me. After the gears are out of the way the front plate comes off. Underneath was yet another type of filth. I think this is a combination of oil sludge and decomposed cork gasket. Mike Rowe has nothing on me. |
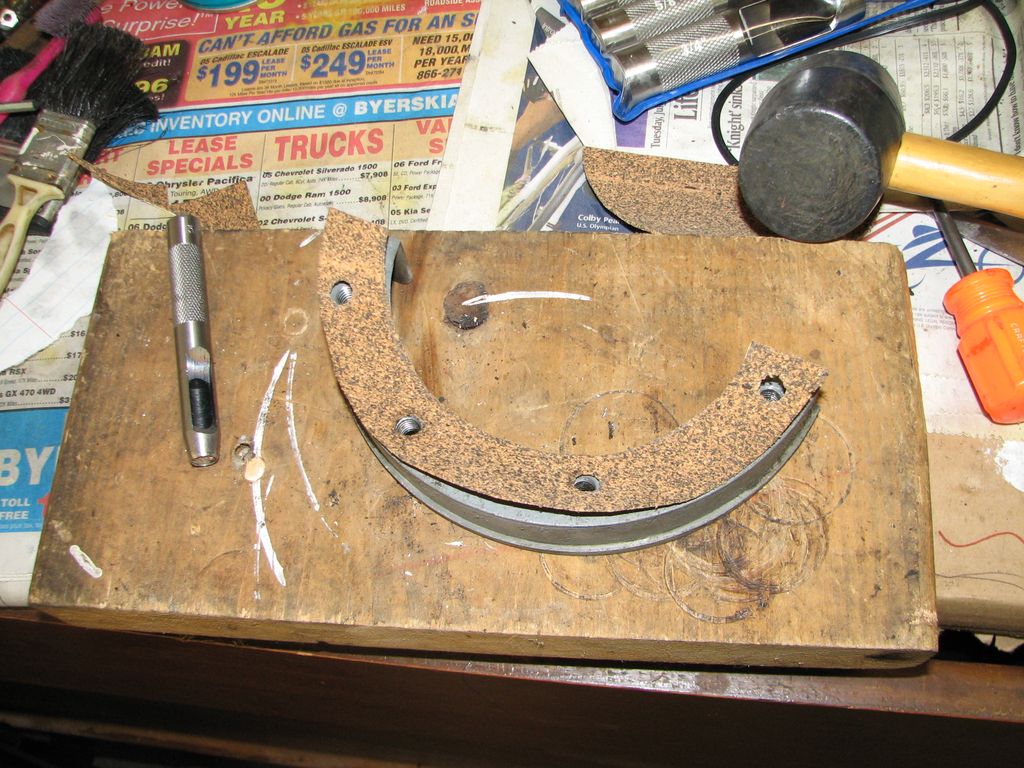 This is the filler block that goes between the front plate and the oil pan. It needs a gasket that I did not have. So I made one. I used to make a lot of gaskets when I was a broke teenager with a leaky VW. Making this one was kind of fun. This is the filler block that goes between the front plate and the oil pan. It needs a gasket that I did not have. So I made one. I used to make a lot of gaskets when I was a broke teenager with a leaky VW. Making this one was kind of fun. |
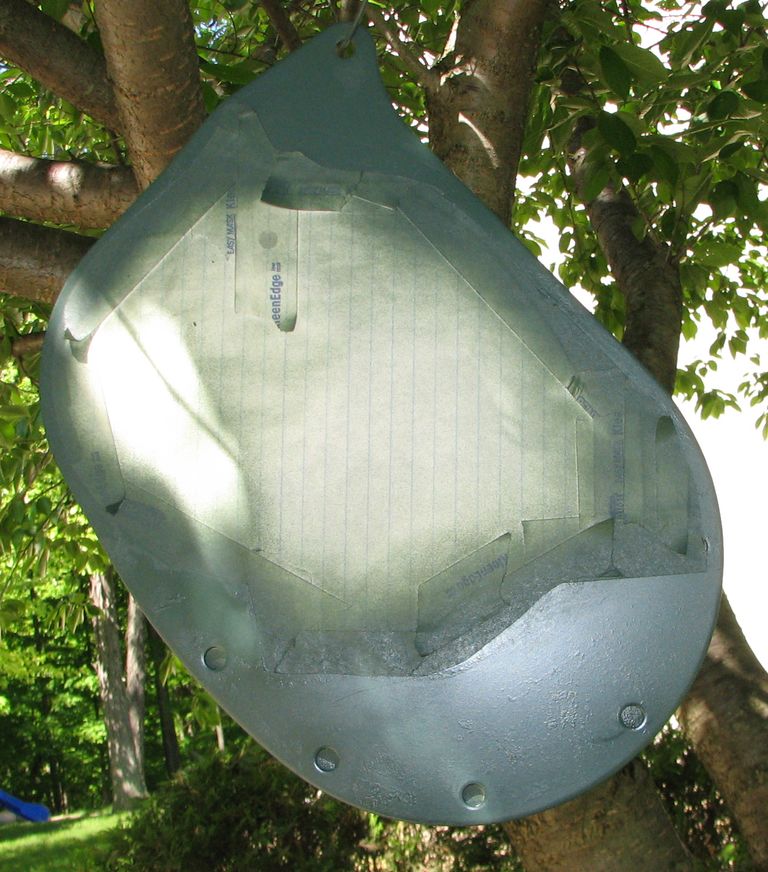 This is a bad picture of the front engine plate painted. The plate was hanging in a tree at the time). I masked it off carefully so as to only paint the parts of the plate that are exposed when the plate is installed. This is a bad picture of the front engine plate painted. The plate was hanging in a tree at the time). I masked it off carefully so as to only paint the parts of the plate that are exposed when the plate is installed. |
 Cleaning the valves was tricky. Using a small tool I scooped out the jelly-like sludge everywhere I could. Then I used kerosene and brushes to flush the remains down the oil passages, through the block, and into a pan. After blowing it out with compressed air I oiled everything up to prevent corrosion. Huge mess. Cleaning the valves was tricky. Using a small tool I scooped out the jelly-like sludge everywhere I could. Then I used kerosene and brushes to flush the remains down the oil passages, through the block, and into a pan. After blowing it out with compressed air I oiled everything up to prevent corrosion. Huge mess. |
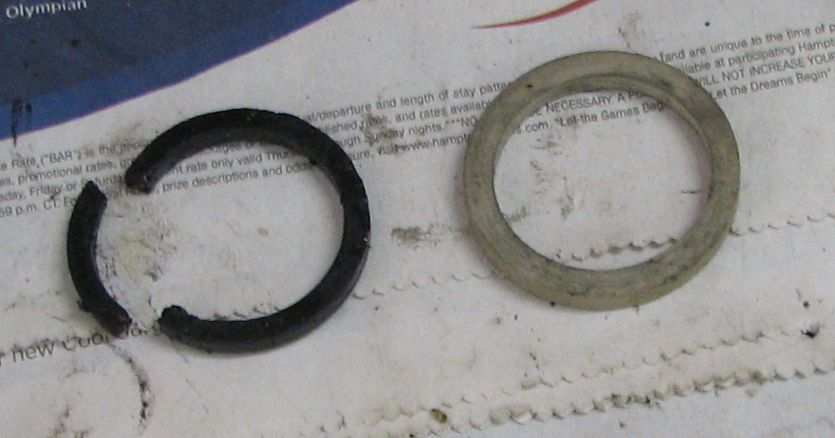 When I pulled the distributor the cork gasket broke. This one would be hard to make. Then I realized it looked like a plumbing washer. I dug around in my plumbing box and found this rubber washer. It is almost a perfect fit. I soaked it in oil for a while to make sure it would not be attacked by the engine oil. So far so good. When I pulled the distributor the cork gasket broke. This one would be hard to make. Then I realized it looked like a plumbing washer. I dug around in my plumbing box and found this rubber washer. It is almost a perfect fit. I soaked it in oil for a while to make sure it would not be attacked by the engine oil. So far so good. |
  Getting ready to paint the long block. I degreased with kerosene, brake cleaner, and naphtha (in that order). To cover the valves I taped up the valve covers and bolted them on the block. I also put old spark plugs in and stuffed whatever was handy into the various holes and covers. Gasket surfaces got masking tape trimmed with a razor blade. Getting ready to paint the long block. I degreased with kerosene, brake cleaner, and naphtha (in that order). To cover the valves I taped up the valve covers and bolted them on the block. I also put old spark plugs in and stuffed whatever was handy into the various holes and covers. Gasket surfaces got masking tape trimmed with a razor blade. |
Block is painted. The color here is “close enough green”. Hope it holds up. 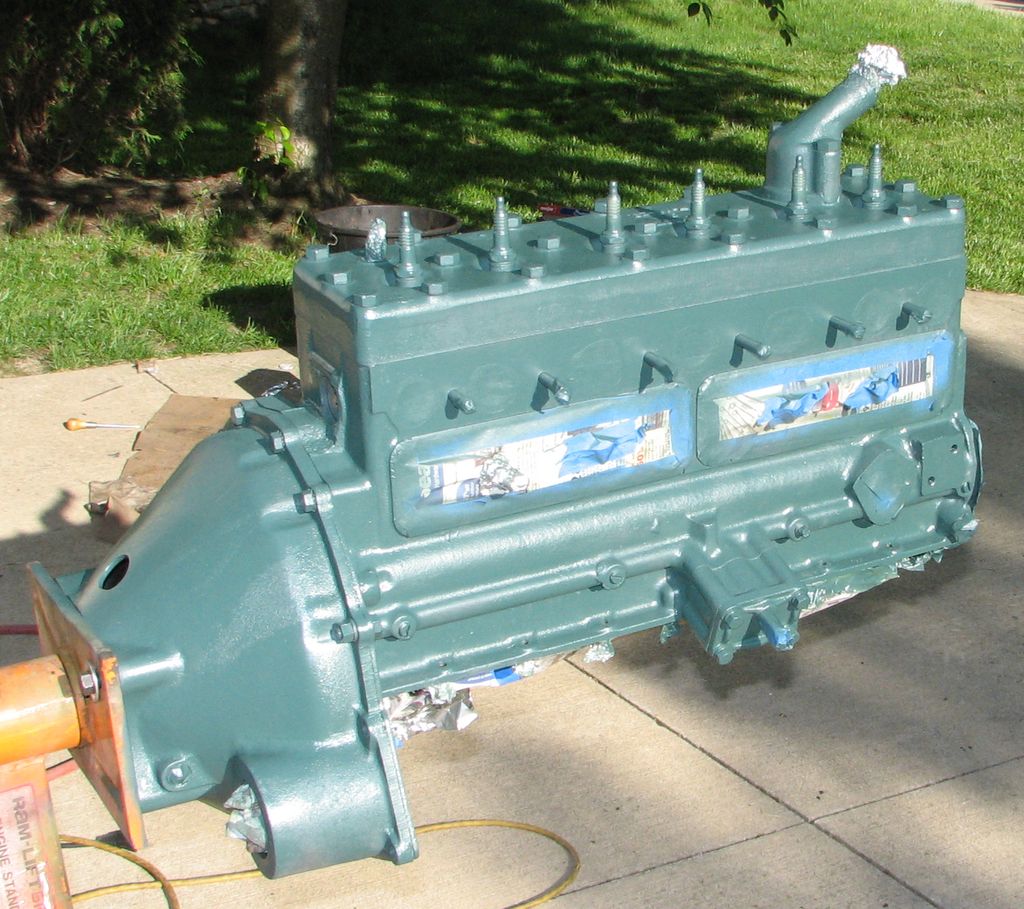    |