March, 2007
I did some e-Bay scrounging over the winter. Now that the weather has improved I installed some of my finds. I also repainted some of the chrome
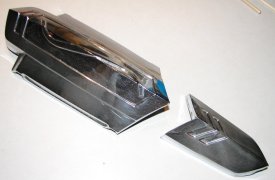  The “nose” trim on the front of the hood and just above the grill used to be painted on the inset portions. Over the years this has all word away. I matched the paint as best I could based on the surviving painted trim on the dash. Then I left it on the shelf because I was chicken. But the worst that could happen is that I have to strip the paint back off. So I pulled the chrome off the car and cleaned it carefully. These parts should probably be re-chromed. They are not badly pitted but there are pits around the edges and the rest of the chrome is thin and scratched. But I have not found a good plating shop (any suggestions?) so I will wait. You can see the condition in this close-up. The “nose” trim on the front of the hood and just above the grill used to be painted on the inset portions. Over the years this has all word away. I matched the paint as best I could based on the surviving painted trim on the dash. Then I left it on the shelf because I was chicken. But the worst that could happen is that I have to strip the paint back off. So I pulled the chrome off the car and cleaned it carefully. These parts should probably be re-chromed. They are not badly pitted but there are pits around the edges and the rest of the chrome is thin and scratched. But I have not found a good plating shop (any suggestions?) so I will wait. You can see the condition in this close-up. |
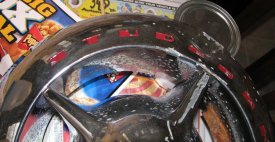 Hanging in my living room is this “bullet-nose” off a 1950 Studebaker. It is in rough shape but it still has “STUDEBAKER” embossed across the top. I figured that would be a good piece to practice on. My plan was to thin the paint way out and use a small pointed stick and a fine brush to “push” the paint around the chrome. It worked pretty well. Hanging in my living room is this “bullet-nose” off a 1950 Studebaker. It is in rough shape but it still has “STUDEBAKER” embossed across the top. I figured that would be a good piece to practice on. My plan was to thin the paint way out and use a small pointed stick and a fine brush to “push” the paint around the chrome. It worked pretty well. |
 I changed the procedure a little on the actual parts. Since the edges were mostly straight lines I tried to use masking tape to mask off the edges. It worked but did not really save me much effort. The area to paint is a bit large so it was hard to get the paint on without brush marks or blobs. Also when I thinned the paint enough to flow well it also tended to want to run. And you can’t get both sides of these angled parts level at once. So I just kept them moving until the paint set. I changed the procedure a little on the actual parts. Since the edges were mostly straight lines I tried to use masking tape to mask off the edges. It worked but did not really save me much effort. The area to paint is a bit large so it was hard to get the paint on without brush marks or blobs. Also when I thinned the paint enough to flow well it also tended to want to run. And you can’t get both sides of these angled parts level at once. So I just kept them moving until the paint set. |
  The final result was OK. The edges were not as even as I would have liked. I was able to carefully clean this up with a razor blade but it is still not perfect. If only I was not so clumsy with a brush! I think the end result looks pretty nice. The final result was OK. The edges were not as even as I would have liked. I was able to carefully clean this up with a razor blade but it is still not perfect. If only I was not so clumsy with a brush! I think the end result looks pretty nice. |
|
|
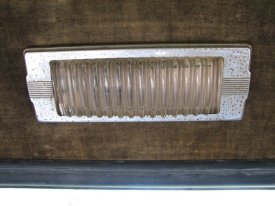
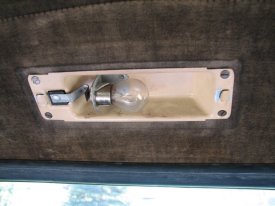 The fixture is in great shape. The bulb is even good. No power though. One of the switches is probably bad. The fixture is in great shape. The bulb is even good. No power though. One of the switches is probably bad. |
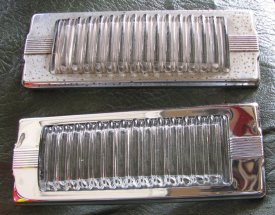 Here are the two side by side. Guess which one is the new light? |
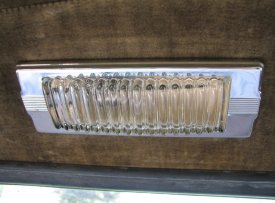
The new one snapped right in place. I need to figure out a way to clean the headliner. Years of cigarette smoke and coal dust created that lovely patina you see. |
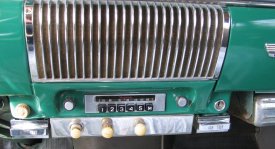 The car’s radio is not right for the car and is in the way. I pulled it out to get under the dash and never put it back (more on that here). The controls were left in since I had nothing better to put in there. The car’s radio is not right for the car and is in the way. I pulled it out to get under the dash and never put it back (more on that here). The controls were left in since I had nothing better to put in there. |
 My car left South Bend without a radio so I really wanted the correct “radio delete plate” to cover the hole. e-Bay to the rescue! I snagged a radio delete plate in reasonable shape. It is the wrong color and had a dent. Some careful hammer work flattened it out. My car left South Bend without a radio so I really wanted the correct “radio delete plate” to cover the hole. e-Bay to the rescue! I snagged a radio delete plate in reasonable shape. It is the wrong color and had a dent. Some careful hammer work flattened it out. |
 But it was still a metallic bronze color instead of the semi-gloss black that it should have been. I masked it as best I could. Electrical tape stuck to the thin edges better than paper tape. But it was still a metallic bronze color instead of the semi-gloss black that it should have been. I masked it as best I could. Electrical tape stuck to the thin edges better than paper tape. |
 I painted it with semi-gloss spray paint. The factory black is more grey (or is now after 66 years) but this is what I had. The final finish was not very even but rubbing compound and polishing made it look much better. This is right after the masking came off. I painted it with semi-gloss spray paint. The factory black is more grey (or is now after 66 years) but this is what I had. The final finish was not very even but rubbing compound and polishing made it look much better. This is right after the masking came off. |
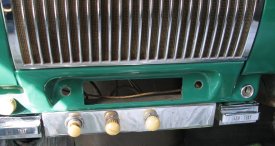  Radio controls out, delete plate in! Under the camera flash the color difference is painfully obvious. But I can live with it. Radio controls out, delete plate in! Under the camera flash the color difference is painfully obvious. But I can live with it. |

Try Paul’s Chrome, somewhere in Pennsylvania. Supposed to do show quality work but I heard they are not cheap. Good luck.