
1/16/2013 – 2/13/2013
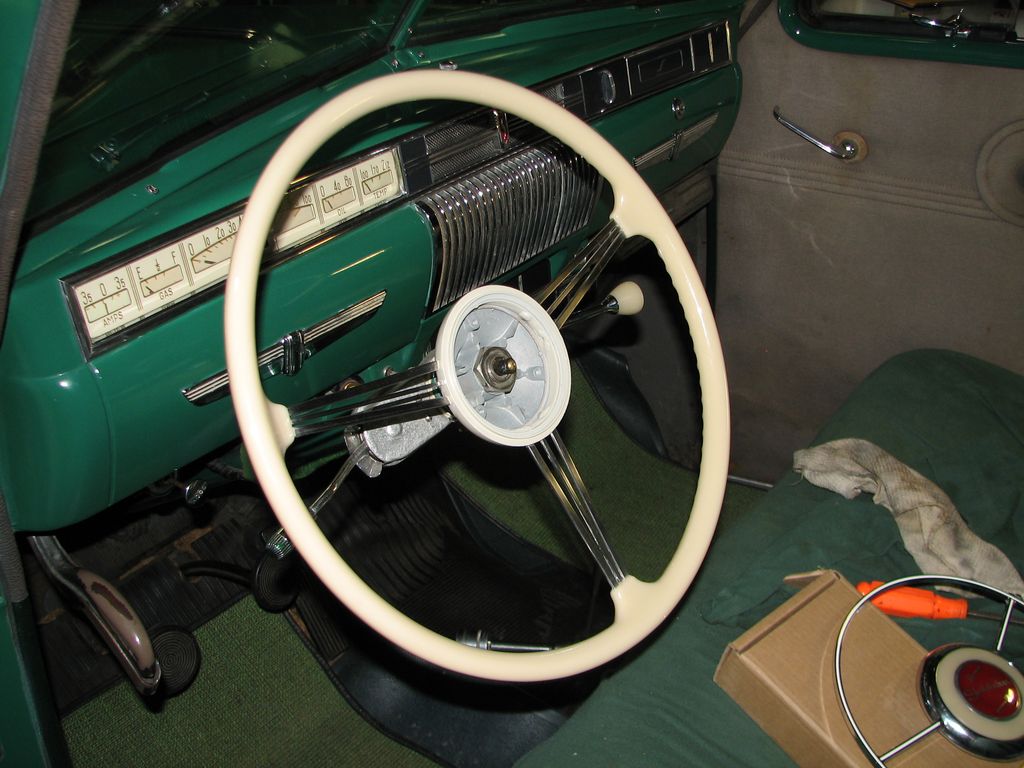
 The steering wheel on my car is the so-called “banjo” wheel. Studebaker called it a “Phantom Wheel” and it was an upgrade from The steering wheel on my car is the so-called “banjo” wheel. Studebaker called it a “Phantom Wheel” and it was an upgrade fromthe stock plastic two-spoke wheel. The rim of the wheel is covered by an ivory plastic. This plastic shrinks with age and gets surface cracking from UV exposure (sunlight). Mine has not been in the sun that much but the shrinkage has resulted in radial cracks all around the rim of the wheel. A conventional plastic wheel can be fixed by filling the cracks with epoxy and painting the wheel. But in this case the ivory plastic is translucent and the look of the wheel would be changed by painting. The only fix is to get new plastic molded onto the rim of the wheel. As far as I know the only place that has molds for this particular wheel is Shrock Brothers in Coalport, PA. These guys used to make high-quality miniature model cars (mostly of Studebakers). They also use the same plastic molding equipment to make a wide variety of reproduction plastic and rubber parts for Studebakers. Now my steering wheel is not all that bad but Shrock’s business cannot be a high-volume proposition and I have been worried that they might close up shop and leave me with no good options. So I bit the bullet and decided it was time to send them my steering wheel. |
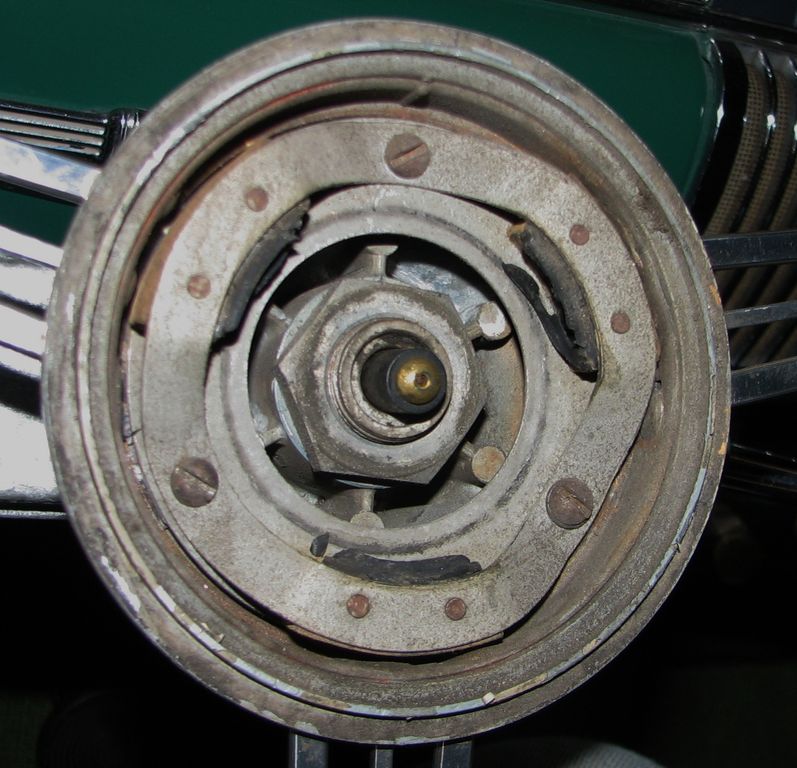 The first step in pulling the wheel is to remove the horn ring. This is held in by the three rubber blocks riveted into the contact ring. The first step in pulling the wheel is to remove the horn ring. This is held in by the three rubber blocks riveted into the contact ring.To remove the ring just rotate the ring about 45 degrees and pull it off. The problem is the rubber blocks are hard with age. I damaged two of them removing the ring. Shrock Bros. has those rubber blocks too. More $$$! |
 This steering wheel has no threaded holes for a conventional steering wheel puller. So I had to get creative. Based on advice from the Studebaker Driver’s Club forums I purchased a large bearing separator from Harbor Freight. I also have a large pitman arm puller. I think this can be made to work. |
 The bearing separator will fit behind the hub of the steering wheel to give the puller something to grab. So to prevent scratches I padded it with duct tape. |
 Welcome to plan A. I installed the bearing separator so it was clamped (gently) under the back of the wheel hub. I then put the pitman arm puller on the flat ends of the separator. A 3/8″ socket on the loose wheel nut kept the puller off the horn wire contact in the steering shaft. This looked pretty good but did not work. If you look closely you can see the arms of the pitman arm puller do not go out far enough. They are angled slightly to fit over the ends of the puller. This angle was enough that when I started putting pressure on it the arms would “walk” off the bearing separator. Remember all of this is 4 inches away from an instrument panel I really don’t want to have to fix. |
 OK, time for plan B. Two 12″ lengths of 3/8″ threaded steel rod and a bunch of washers. The bearing separator already had two holes in it. And the threaded rod fit just fine in the head of the pitman arm puller. This worked much better. |
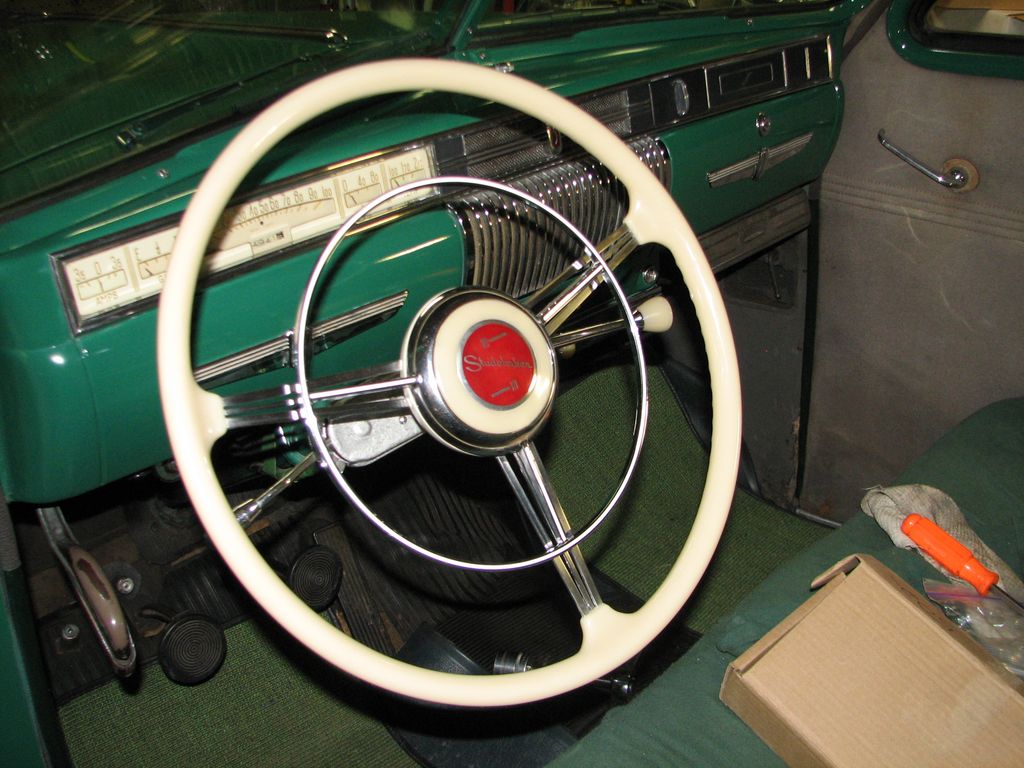
 One wheel ready to ship along with a rather large check. Last year I bought a Commander wheel on eBay. It is in very rough shape and the diameter is different but it has the same spline pattern so I installed it so I can still drive the car while this wheel is getting fixed. I did not take a picture but I also made sure the shaft and wheel were both marked so I can index the wheel properly. Now I just have to wait. |
 The Commander wheel turned out to be a waste of time. The wheel was back inside of a week and it looks amazing. |
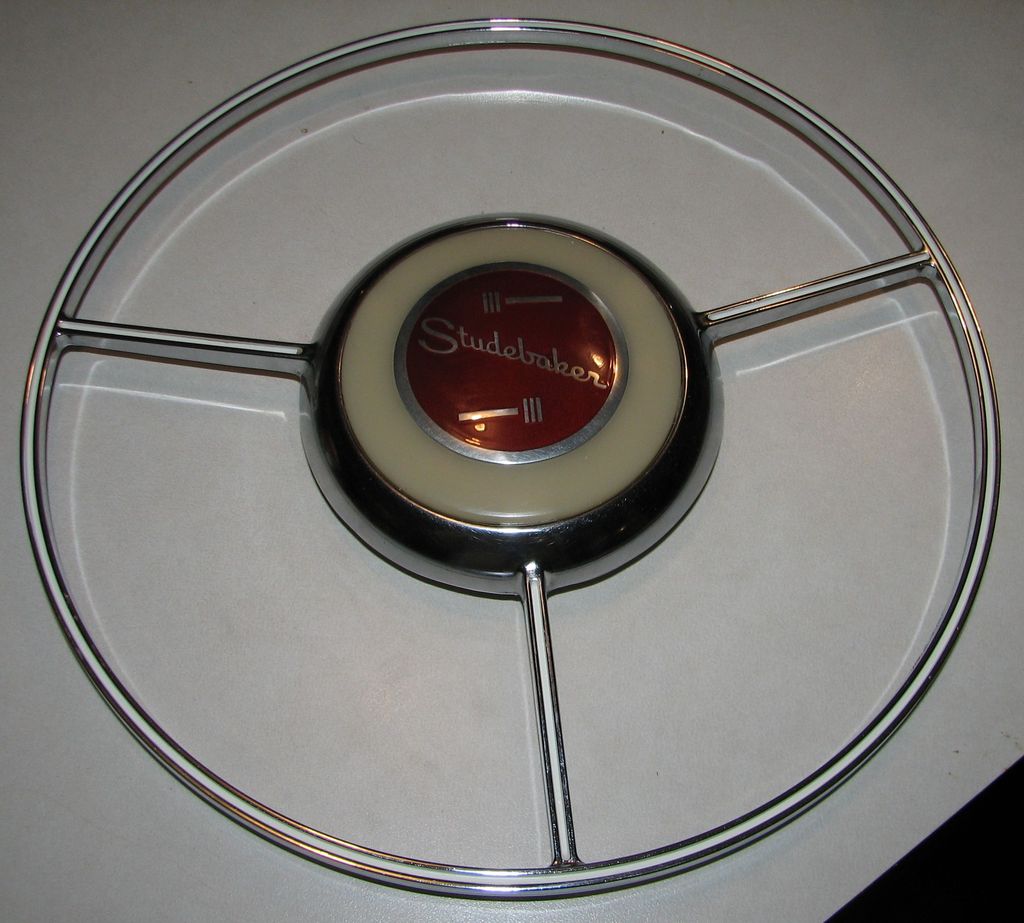
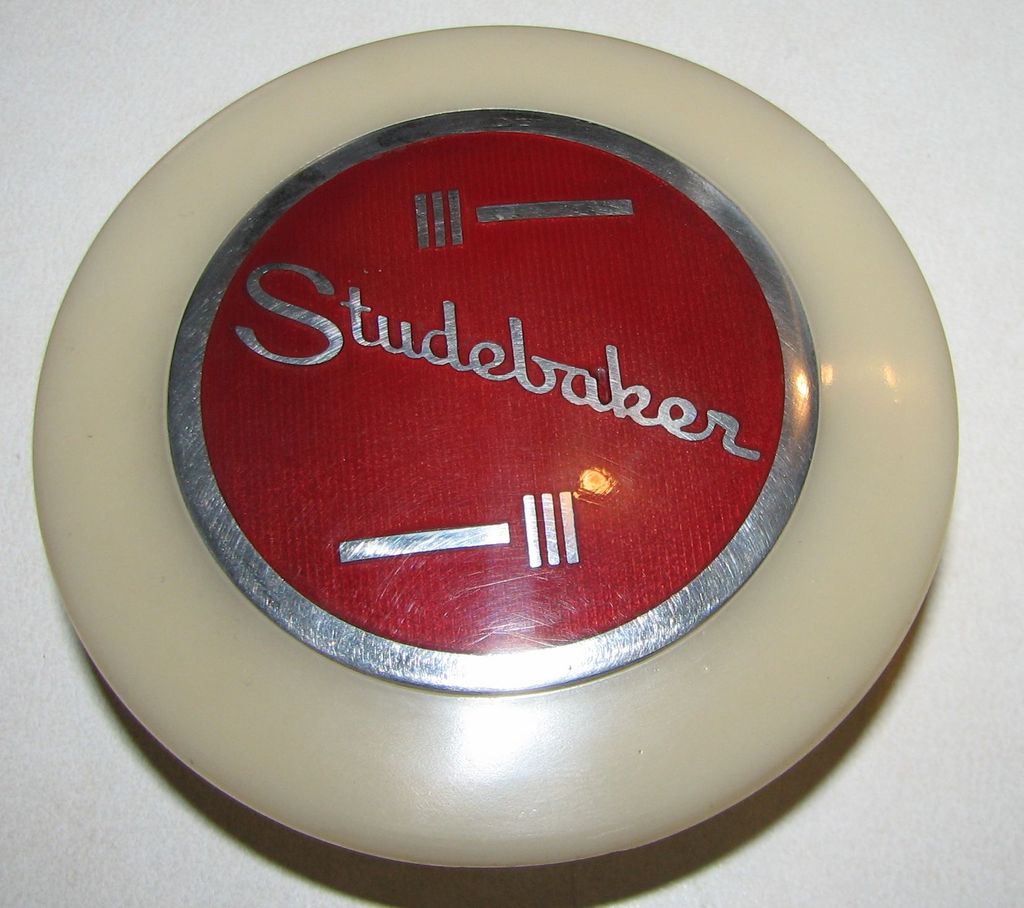 Shrock Brothers also makes reproduction horn buttons. Nice. I am going to install this in the NOS horn ring I found. |
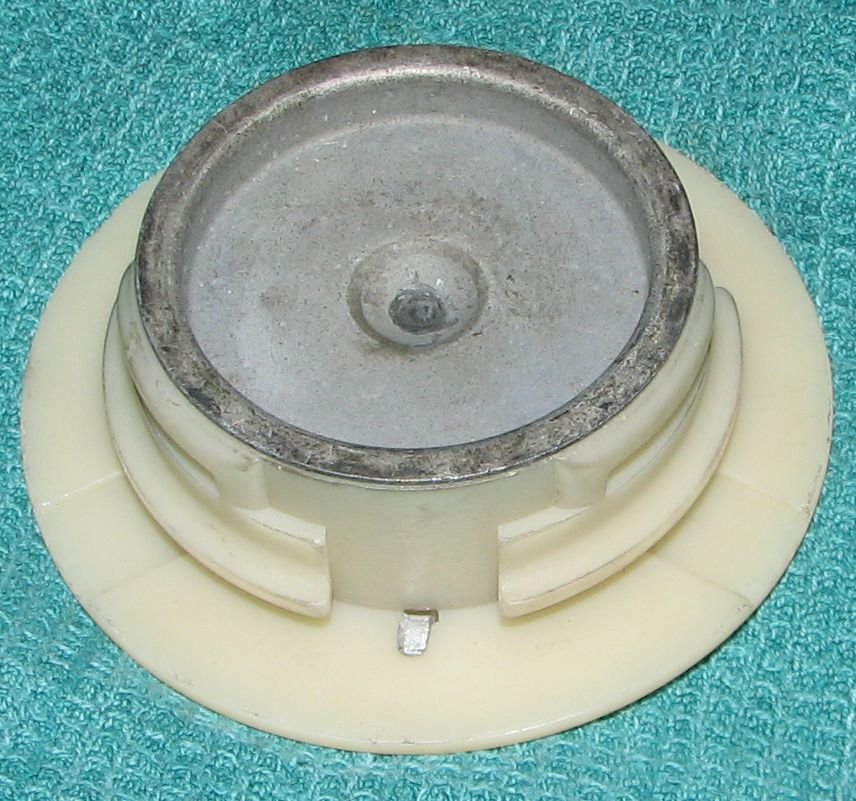
 The first step is to install the contact disk for the horn switch. This just presses in. The three indents in the button fit into three tabs on the horn ring. |
 That was easy! |
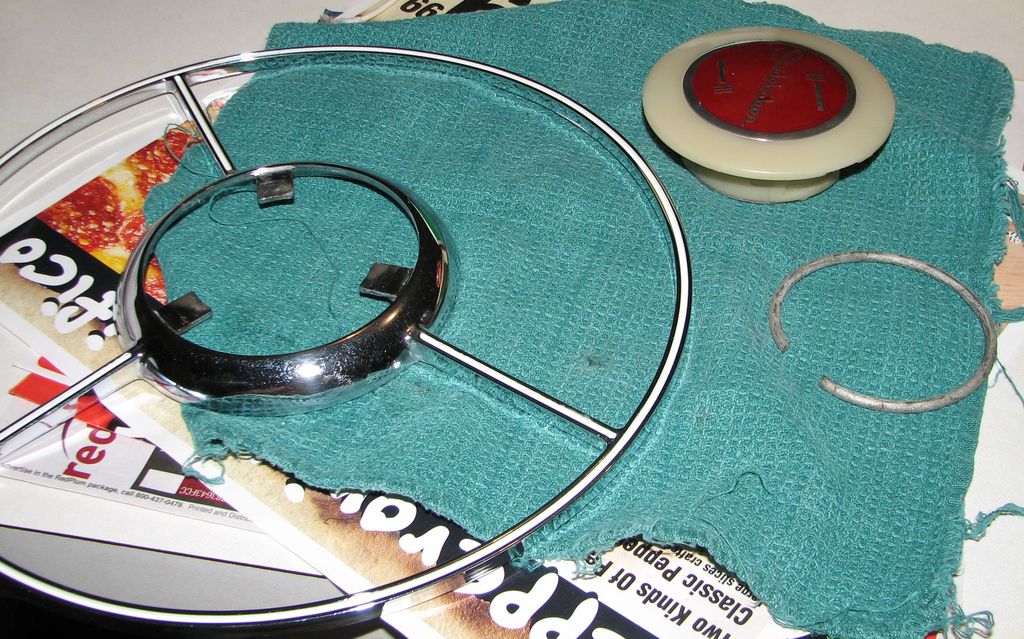 Ring parts ready to go. The assembly is held together with a giant snap ring. |
 Putting the snap ring on was pretty scary. The snap ring does not fit perfectly under the plastic tabs but I am not going to take it off again to tweak the fit. |
 This looks pretty good. On to the next job. |
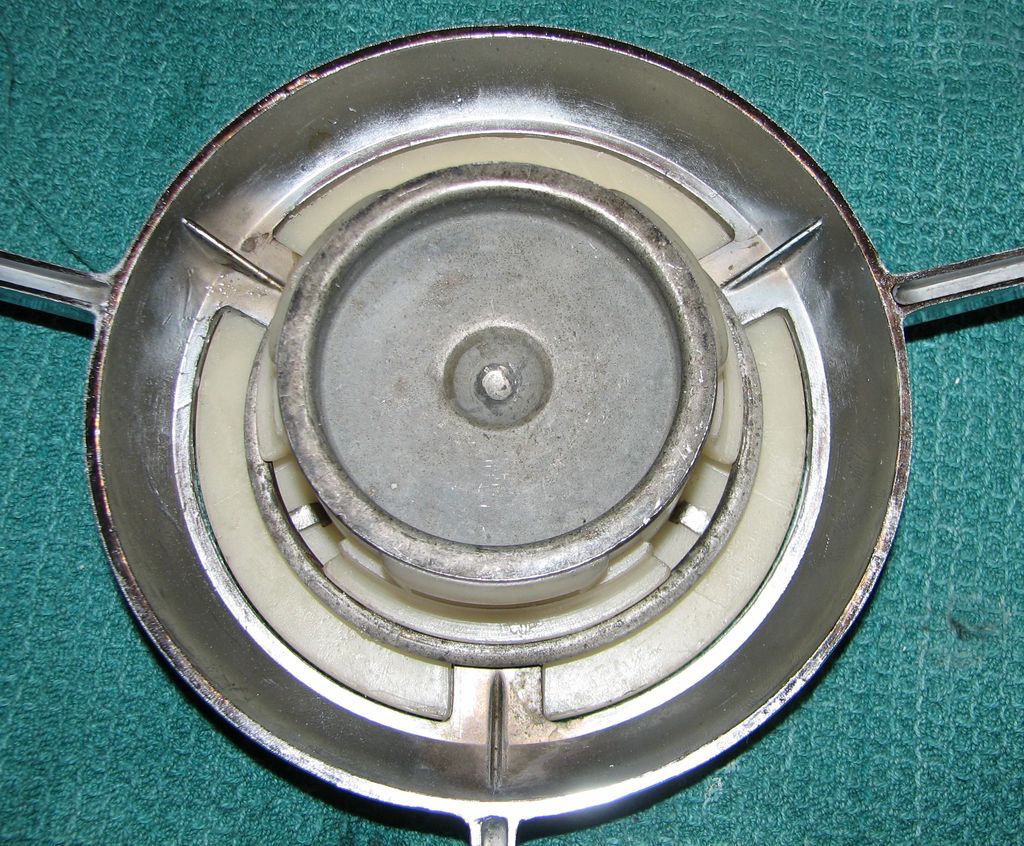
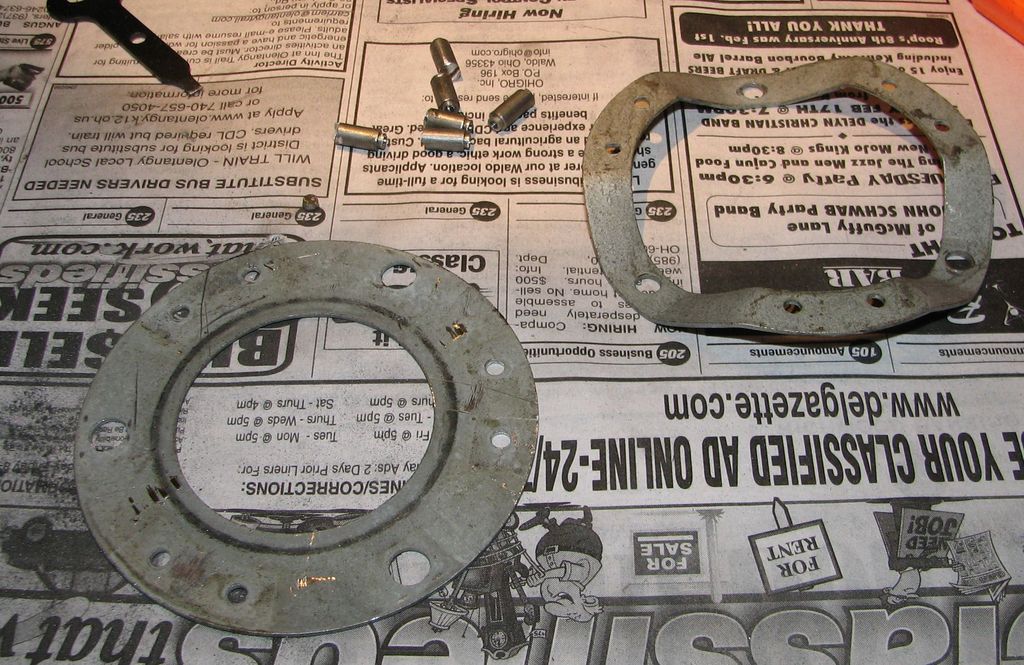
 This contact ring holds the horn ring assembly on via the three rubber blocks. The ring is made of two stamped steel rings riveted together through the rubber blocks. These blocks hold the horn button in. After 70 years the rubber is hard and cracked. Lucky for me Shrock Brothers also has reproduction rubber blocks. |

I cut the rubber out of the Commander wheel contact ring to measure the rivets. I could probably make rivets with a lathe and some luck. But I think I have a better idea. More to come later… |
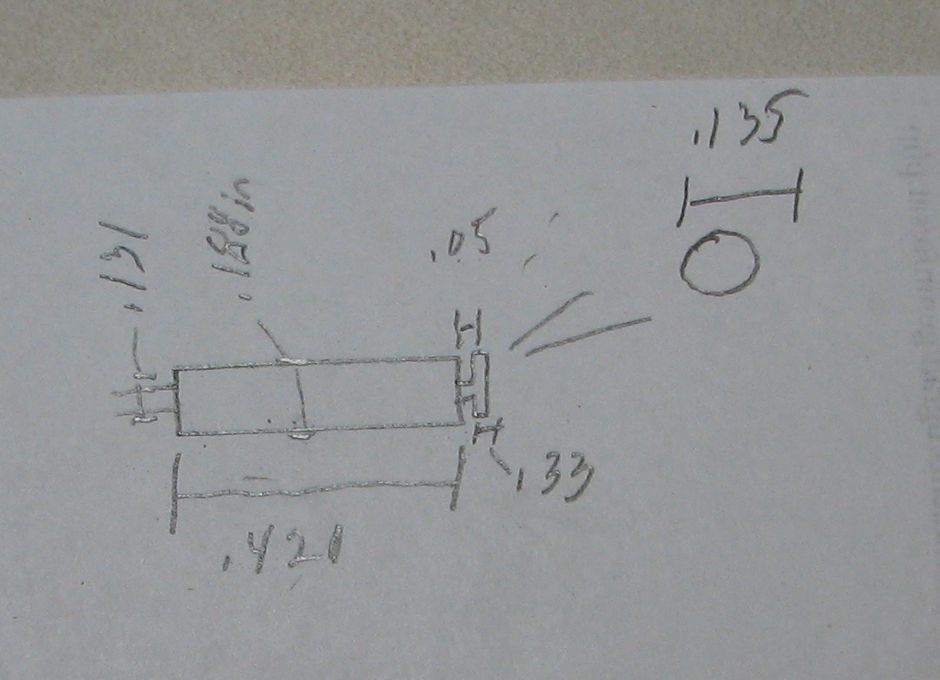 Here is the diagram I made of the rivet. All this has to do is hold the rubber in place and keep the rings from moving. A small screw would work if I can find something to use as a spacer inside the rubber blocks. |
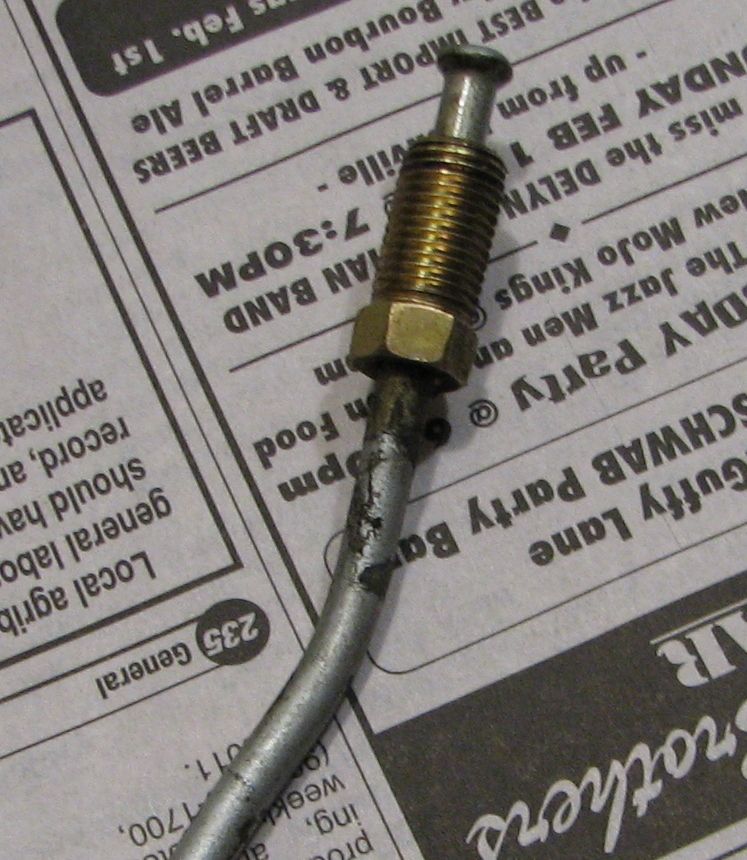 Turns out a 3/16″ brake line has the same outside diameter as the rivet! This bit of brake line is left over from replacing the brake lines on the Stude. Never throw anything away. |
 I used a Dremel tool to cut the heads off the rivets. I probably should have drilled them off but this worked. The old rubber was in pretty bad shape. |
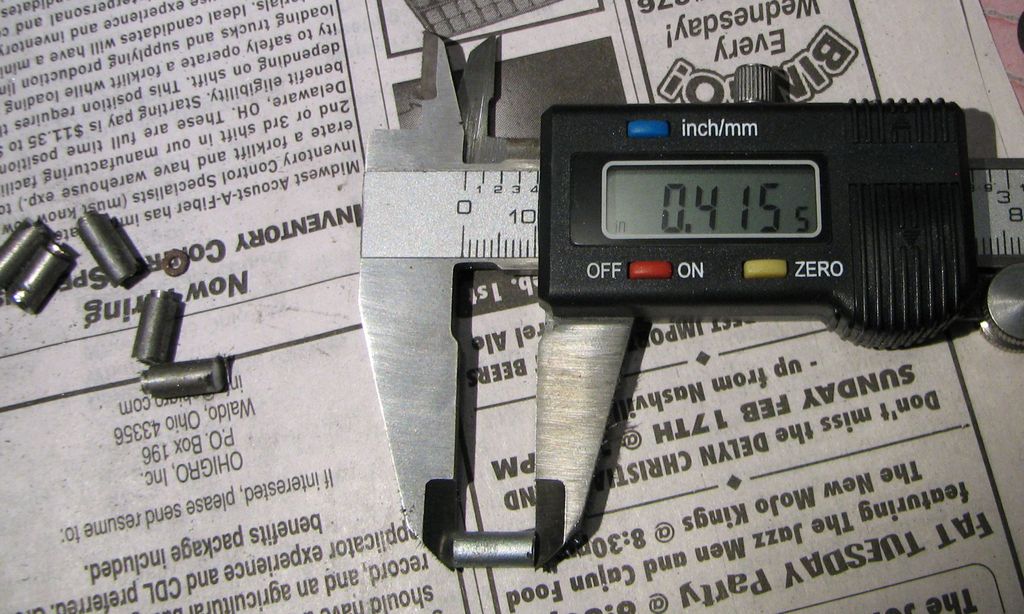 Cutting six .415″ chunks of brake lines was a huge pain. They were too short to use a tubing cutter so I chopped them off with the dremel and hand-filed them to length. Ugh. |
 After a lot of cutting and filing I had all the parts. I found six long screws that are small enough to fit inside the brake line. They even have a countersunk head so they don’t stick up far above the contact ring. |
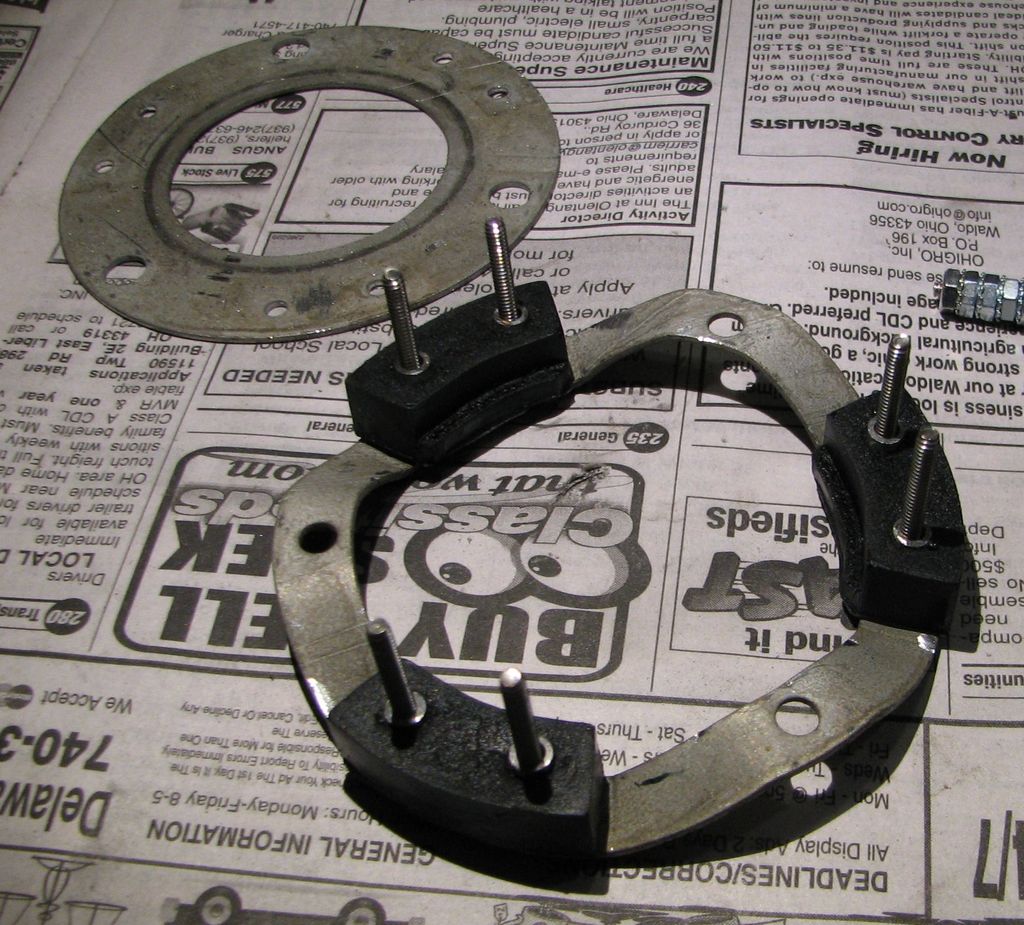 This is upside down. I poked the the screws though the top plate and put the spacers and rubber blocks over them. |
 After putting the bottom plate on I installed the nuts and cut off the protruding screws. I used some Lock-tite on the nuts just to be safe. |
 This will work. I like it! |
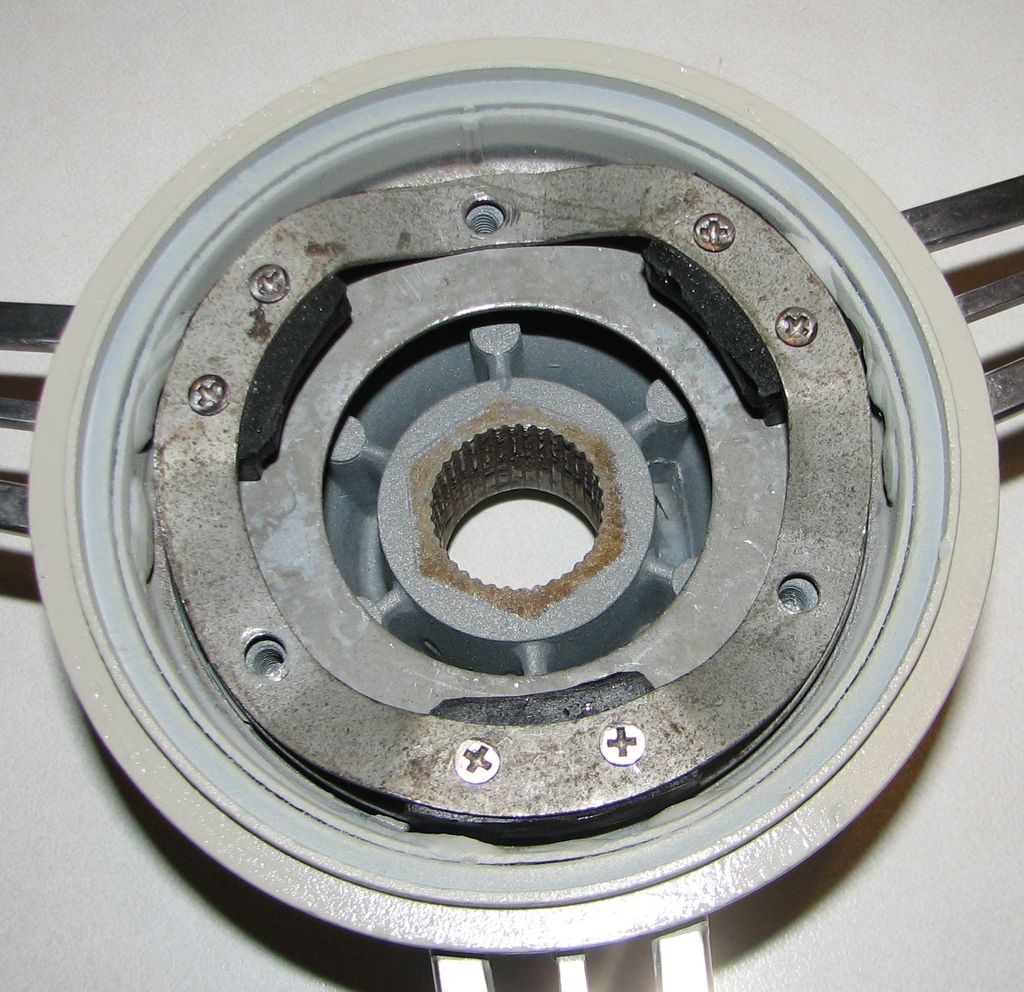
 Installing the wheel was easy. I put some grease on the splines and bolted it down. |
 The contact ring screws in with three screws. |
 The horn ring snaps into the rubber blocks. Done! |