
Friday night Maria and I took the Stude into town. We left at dusk and when I turned the headlights on nothing happened except the instrument lights got really dim. Parking and taillights work fine. So today I started tracking down the problem.

The symptoms point to a problem in one of the wires highlighted in the wiring diagram. Basically it has to be headlight switch, high/low beam switch, or the wiring between the lights and those switches.
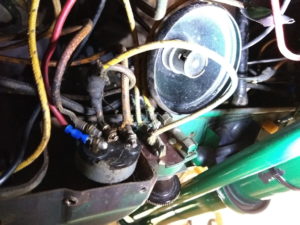
Starting at the headlight switch we find this hideous mess. From left to right the newer red wire goes to the taillights, the next wire with the missing insulation feeds power from the fuse panel. The next wire with the suspicious wad of electrical tape feeds the parking lights and the fog light switch. The rightmost wire on the headlight switch feeds the headlights.
I removed the fog lights when I installed the new bumpers so this rats nest needs to go.
I removed the wire feeding power to the fog light switch from the ignition switch. Then I removed the fog light switch. Fuse is blown. That means some sort of short happened. This all needs to go.
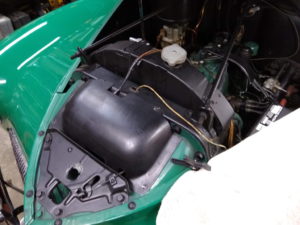
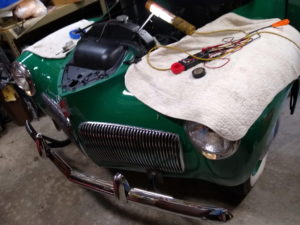
The wire from that switch runs right up to the former fog light location via that hole right in front of the radiator. I will have to remove the horn cover to get to it.
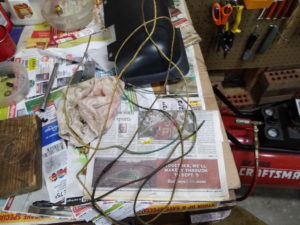
This is the wad of wire I removed. I should have done this a long time ago.
This could have been the short. Ugh. The video below is me flexing the wire.

Now what is under the wad of electrical tape? I bet I can guess…

Yup, high-end wiring for sure. I unwound the wire that used to feed the fog light switch. Now I have to deal with all the bare wires.
Heat shrink to the rescue. Using a lighter to heat the shrink tube is scary when the wire is insulated with cotton and varnish, both of which are flamable.

I also used heat shrink to insulate the power wire as well. This looks a lot better. But the headlights still do not work. Sad face.

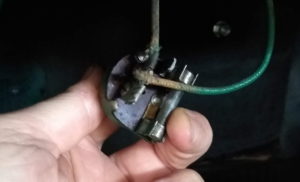
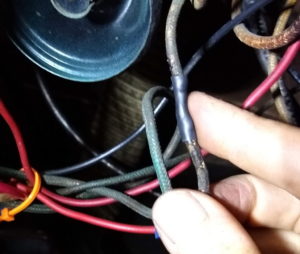
The next place to look is the high/low beam switch. This is really hard to reach. I stuck the camera down under the firewall to take this picture. The top wire is the power wire from the headlight switch. The middle wire is low beams, and the lower wire feeds the high beams and the high beam indicator. To troubleshoot I took off the power wire and checked it. I am getting a solid 6V from the headlight switch so that is all good. Since I have to disconnect the other wires I might as well remove an test the switch. By the way notice how crappy the wires look.

The switch unscrews from the firewall with these two screws. There are supposed to be three screws but one is missing. I found a replacement in my hardware stash.
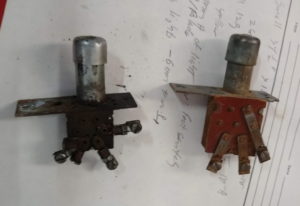
Turns out I have spare switch. I cleaned up the old one and tested it and it is fine. So we have a wiring problem. There are junction blocks on each fender so the next step is to disconnect those wires and test them.
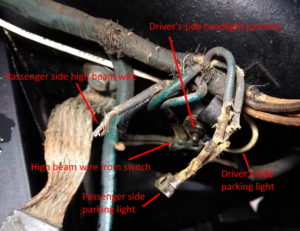
I should have taken a picture before I started but here is where I was after some troubleshooting. That ring terminal with two wires used to be connected to the junction block to feed the parking light on the driver’s side. When Dad retrofitted turn signals he removed this wire and wrapped in in electrical tape. The white wire now feeds the driver’s side parking light. The cut wire is the result of my troubleshooting. The low beam wire checked out fine but the high beam wire was shorted to ground. I think the problem is on the wire running from the driver’s side to the passenger side junction block. So I cut this wire.
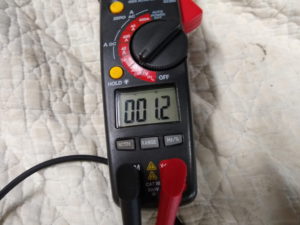
Yup. The wire feeding the passenger high beam is shorted to ground. Great.

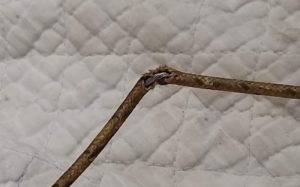
I traced the wire and found this. Bare wire? Check. Scorch marks? Check. This is probably the short.
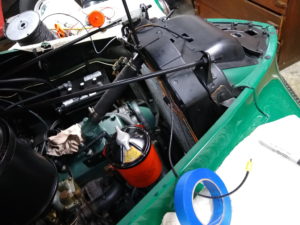
I decided to run a whole new wire rather than try and patch the old one. Here I am running a new #12 wire across the radiator and crimping ring terminals on the end. If this were permanent I would solder the wires but I see this as a quick fix until I decide what to do with these wires.
When I was testing this wire I found out the parking light wire was not working either. So I ran a new wire for that too.
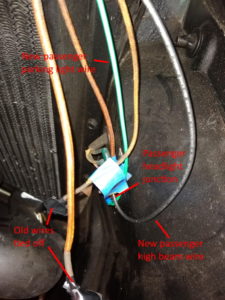
Here is what I ended up with on the driver’s side junction block. The new green wire is bolted to the old ring terminal and wrapped in electrical tape. The new black wire for the high beams is attached to the proper terminal of the junction block.
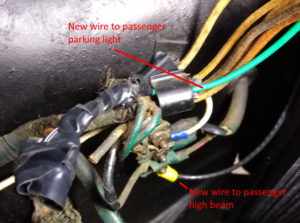
Here is the passenger side. The two new wires run down to the junction block on this side. The old wires are just hanging there. I taped them up neatly out of the way after I took this picture.

Success! We have lights again.

The high beams even work. This took about 5 hours to do and involved a lot of crawling under the dash. That was not easy when I was 35, it sucks worse at 50. I am starting to realize that the wiring in this car is downright dangerous. I think it is time to bite the bullet and install a new wiring harness.
Pingback: New wiring begins | 1941 Studebaker Champion