Last year I had a short in the headlights and decided that it was really time to replace the wiring harness. I did some shopping around and decided to go with a authentic reproduction wiring harness from Lark Works. The car’s original wiring was all insulated with woven cotton. The reproduction harness will use modern vinyl insulated wire with cotton woven over it so it looks original. I went with Lark Works because they were competitive on price and are Studebaker focused. Their harnesses are designed from factory drawings and use Studebaker part numbers. Plus they were super responsive and helpful when I contacted them. I went with a stock harness with the addition of turn signals. It was a pile of money but the harness is beautiful and the documentation is excellent. All this was late last year. I was going to do it over last winter then we moved. Next I planned to do it after the Delaware car show in July and that got delayed until October. Now I am out of excuses. Time to start.
Got to start somewhere
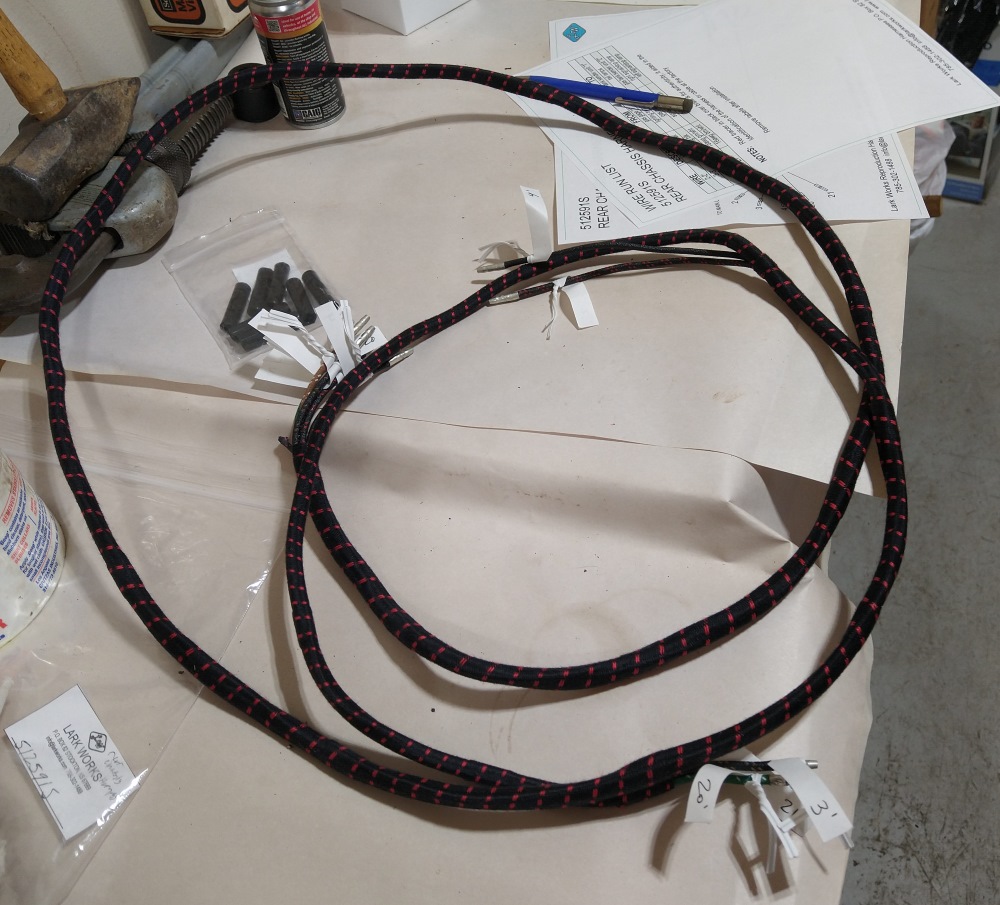
The harness is in several sections. The big one is the main chassis harness. That is most of the instrument panel and under the hood. So it goes through a lot of tight places. The main chassis harness ties into the rear chassis harness that runs under the car to the gas tank and tail lights. A separate rear compartment harness in the trunk connects all the lights to the rear chassis harness. I want to start simple so I am starting from the back and move forward.
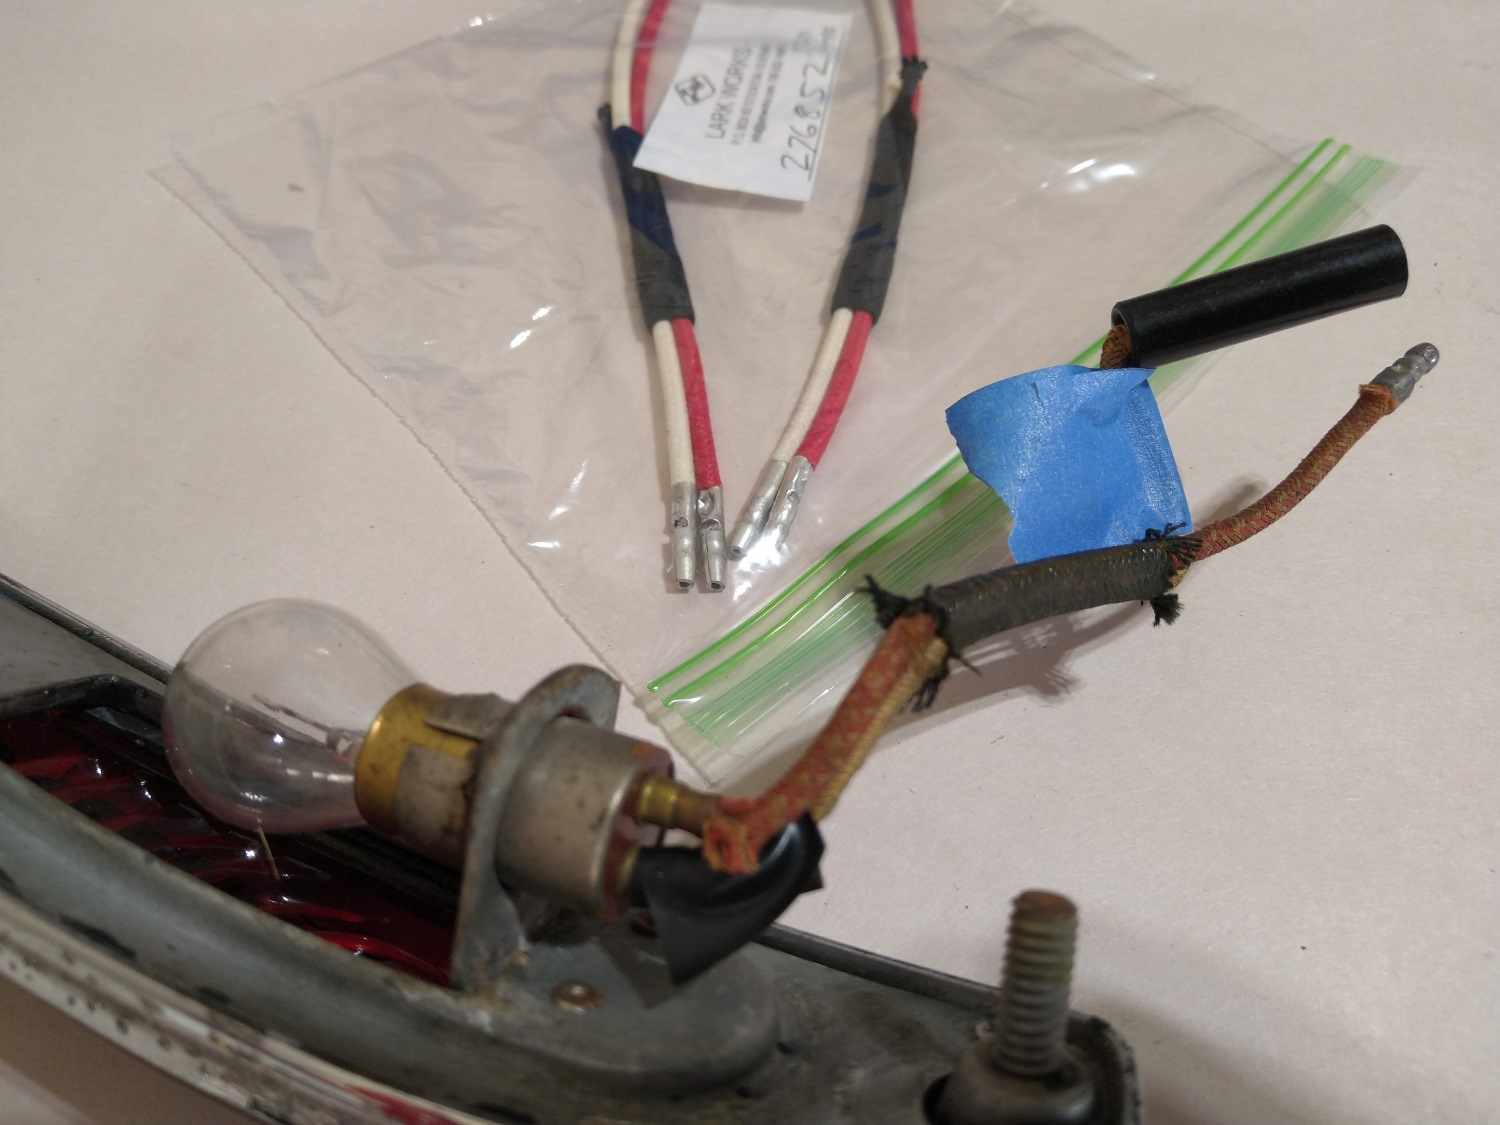
The light sockets for the tail lights are not replaceable and the factory wires are crimped into the terminals. The new wires just have a bare end, so my first challenge is how to fix this.Lets solder it!The old wire is fine, just the insulation is bad. So I cut the old wires off and stripped what was left. Then just solder the wires together. Then a little shrink tube and good to go. Shrink tube is not authentic but that is just too bad.Next the license plate light. I installed this NOS but the wiring is still old. The new harness came with all the innards for the light socket.But that means I have to tear apart he light. I wish I could find new foam washers for this. The old ones are pretty ratty.All done!Next the rear compartment harness. Someone installed an aftermarket backup light system, my father installed aftermarket turn signals, and there is plenty of repairs, modifications, and screwups. So my first task is to trace the wires. It would be super helpful if I could read the color codes off the old wires but they are so faded and dirty I don’t trust my interpretations.Here is the new rear compartment harness. Notice every wire is labeled and the harness comes with diagrams and a wire list. New wire running up to the license plate lightRear harness installed and attached with 1-1 connectors to the tail light
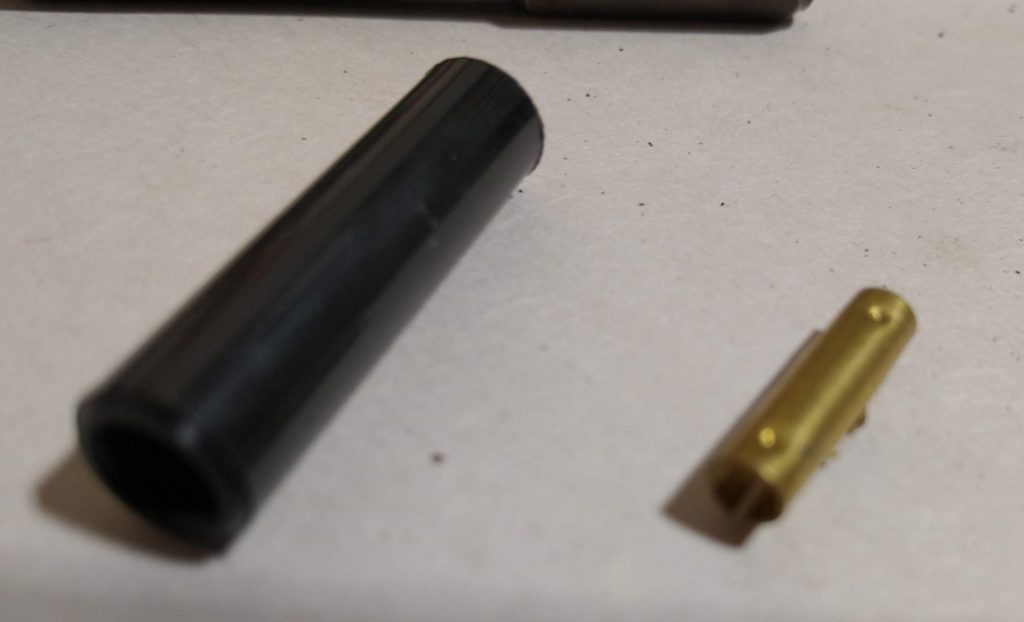
So a word about the 1-1 bullet connector splices. The new harness came with a bag of new connectors. This is one of them disassembled. The new splices do not grip the bullet tightly and the brass tube is very short so pushing one wire in can push the second wire out. Disappointing. You can see in the second connector a tiny dimple which is the only thing “snapping” the bullet in the splice. I can improve them by tightening up the brass tube but still not great. I can reuse the original connectors but the ones that have been riding under the car for 80 years are just FULL of dirt. Honestly I am not sure what I am going to do. If the originals clean up well I will use them, if I have to use the reproductions I will pull test them to make sure the wires are connected well.
Now for the rear chassis harness…
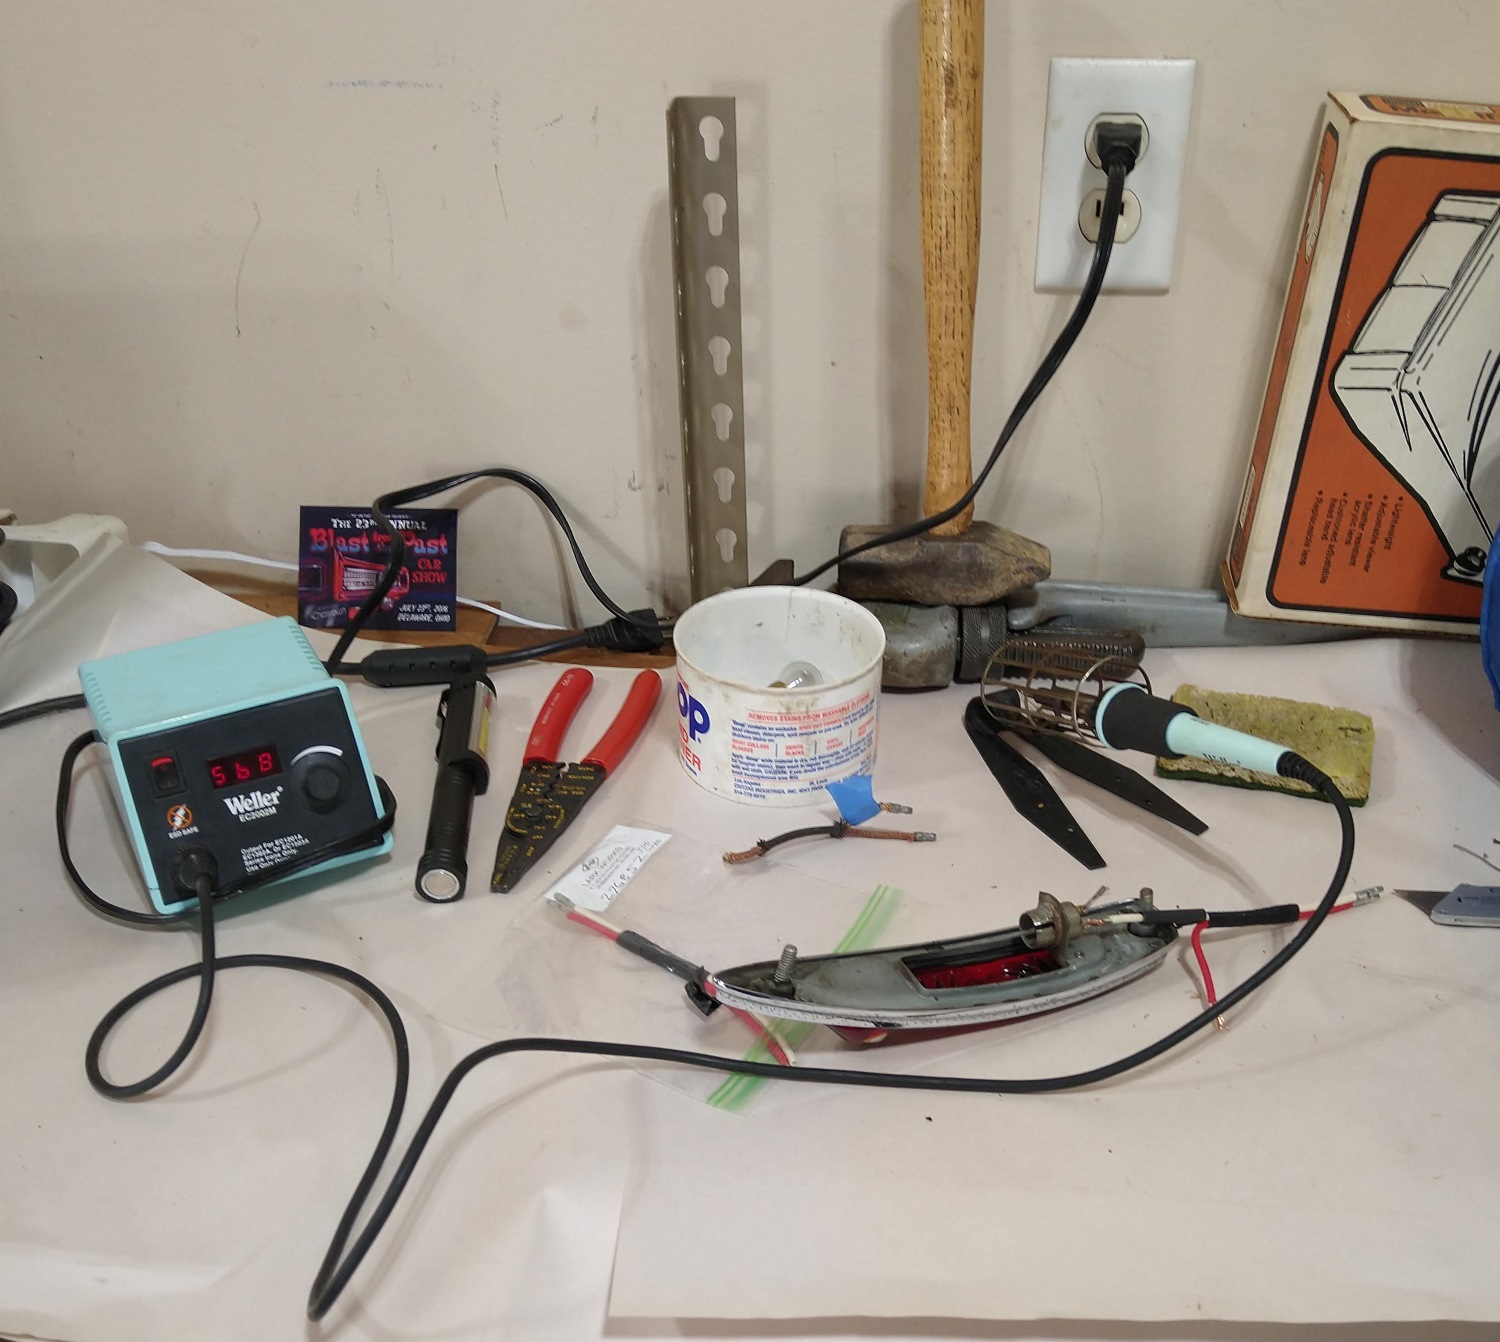
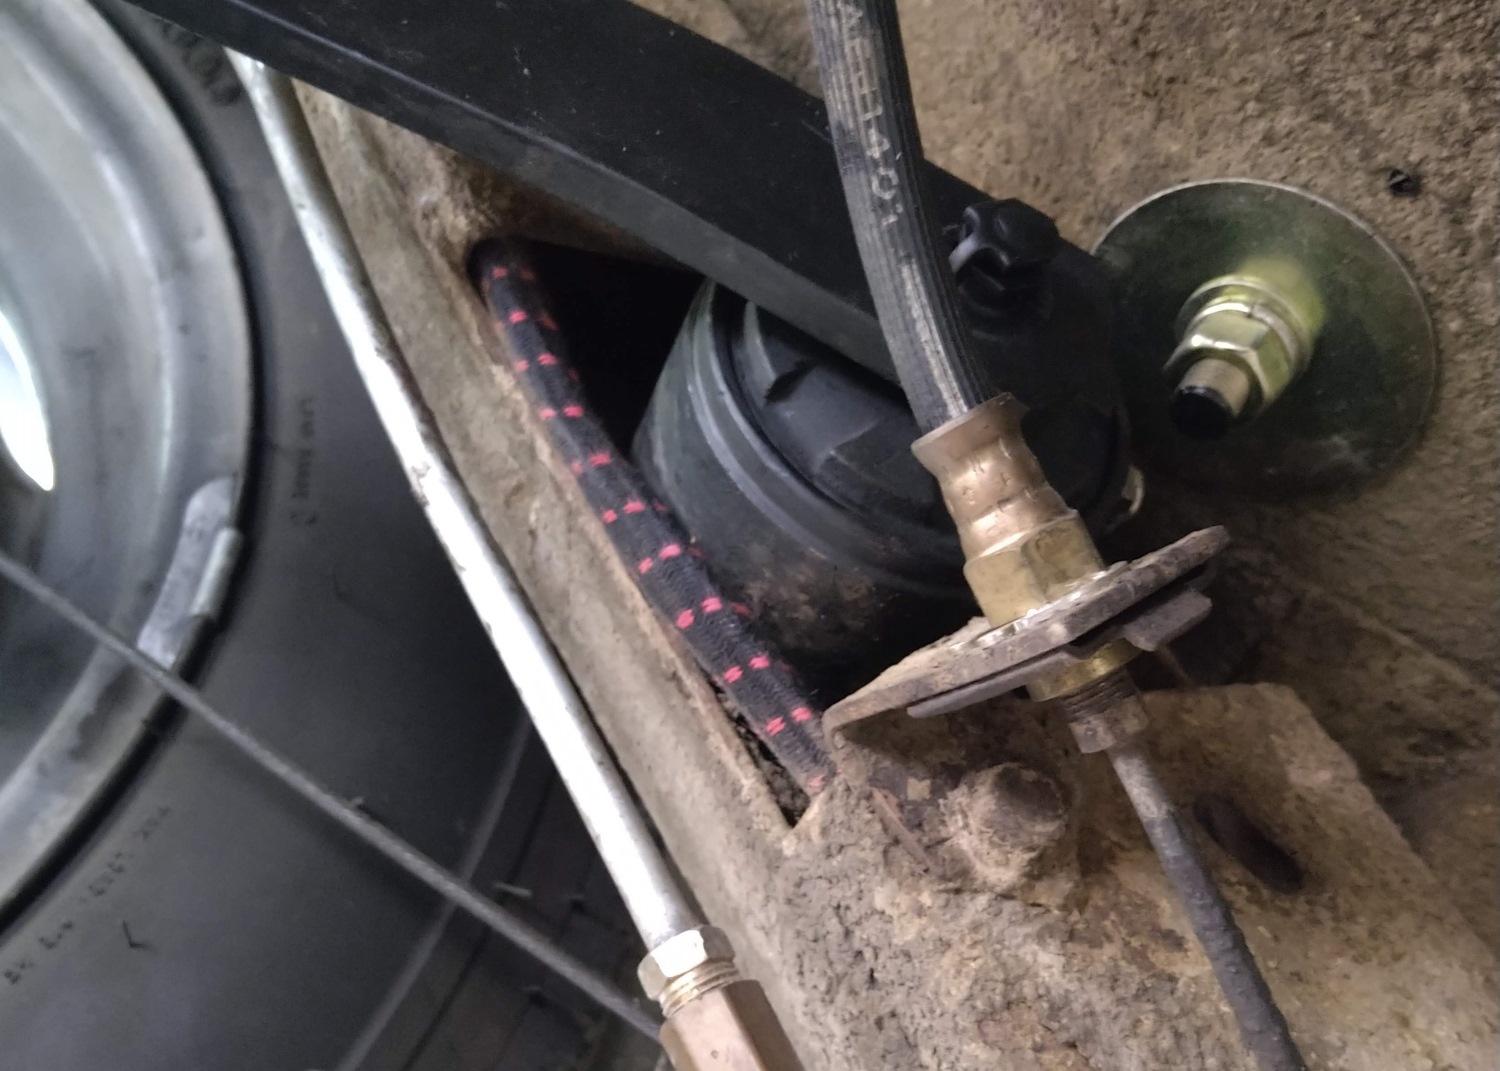
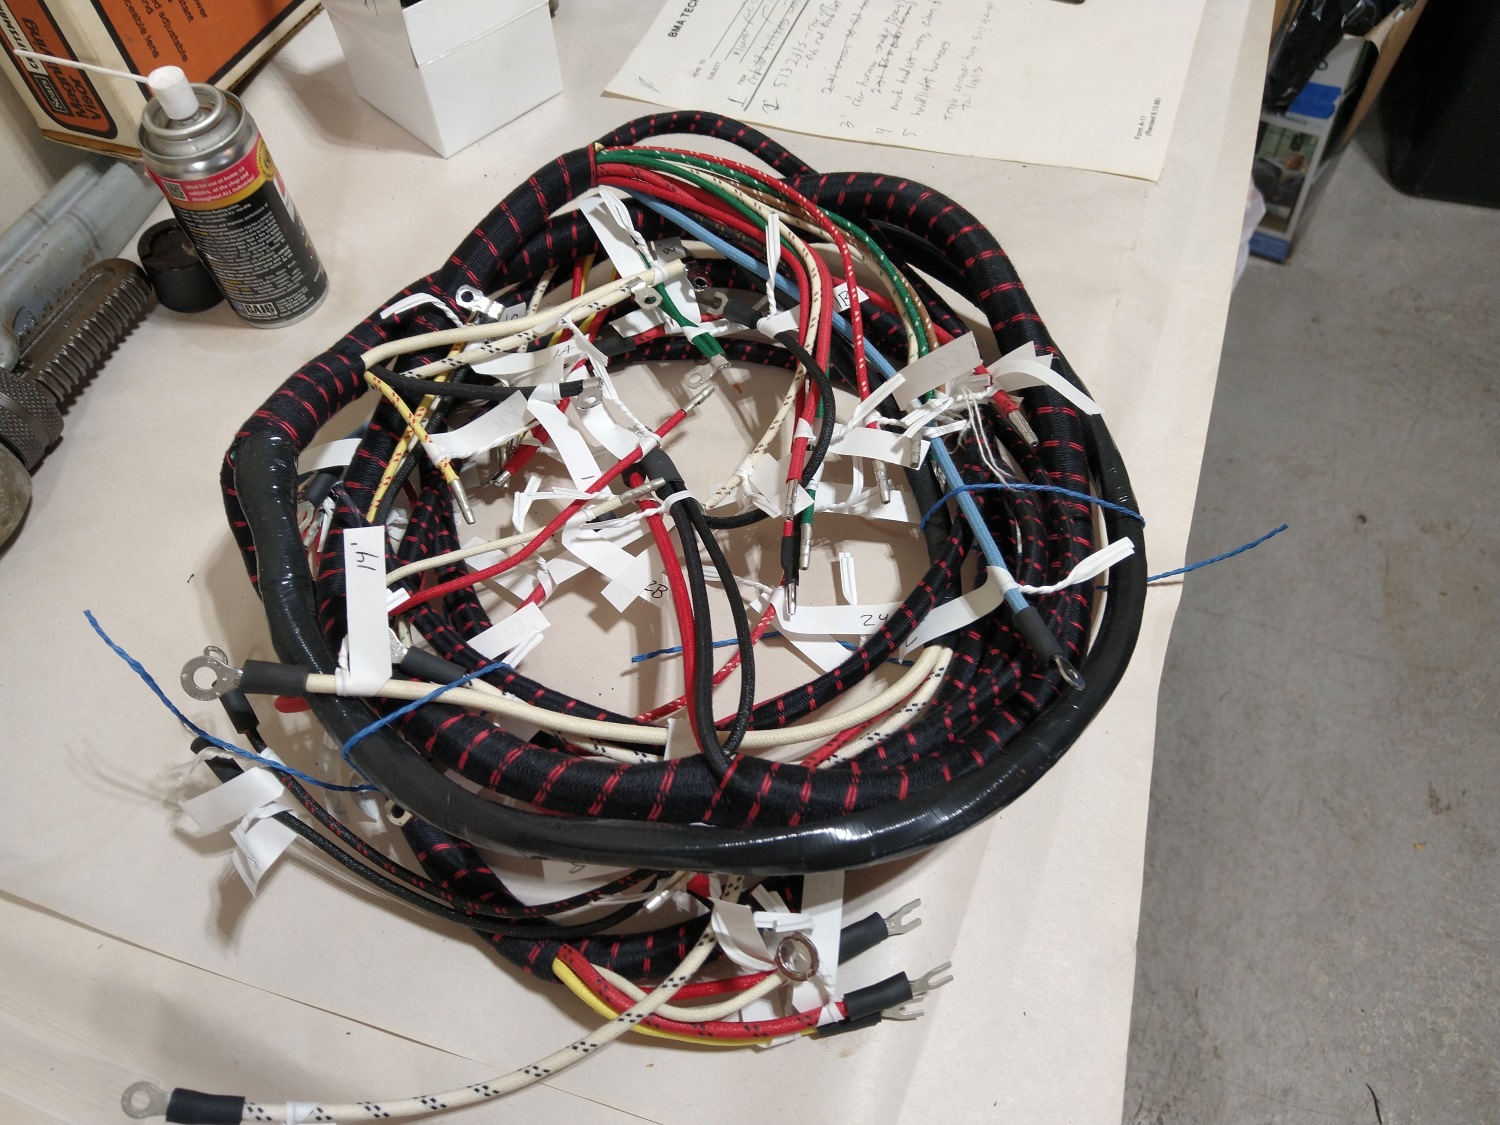
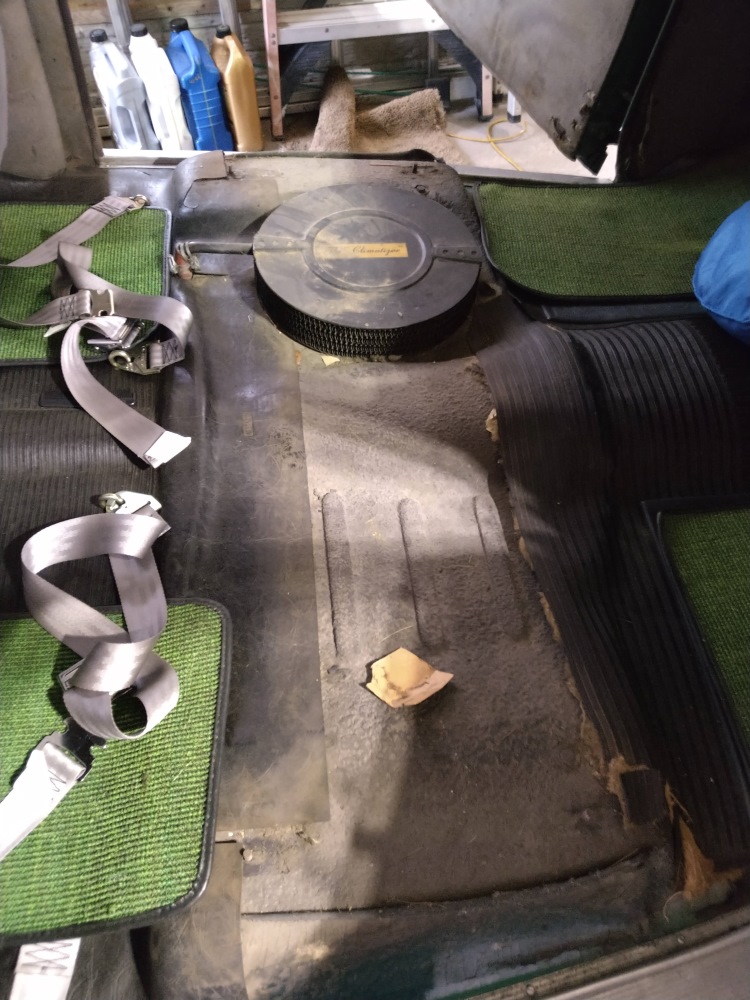
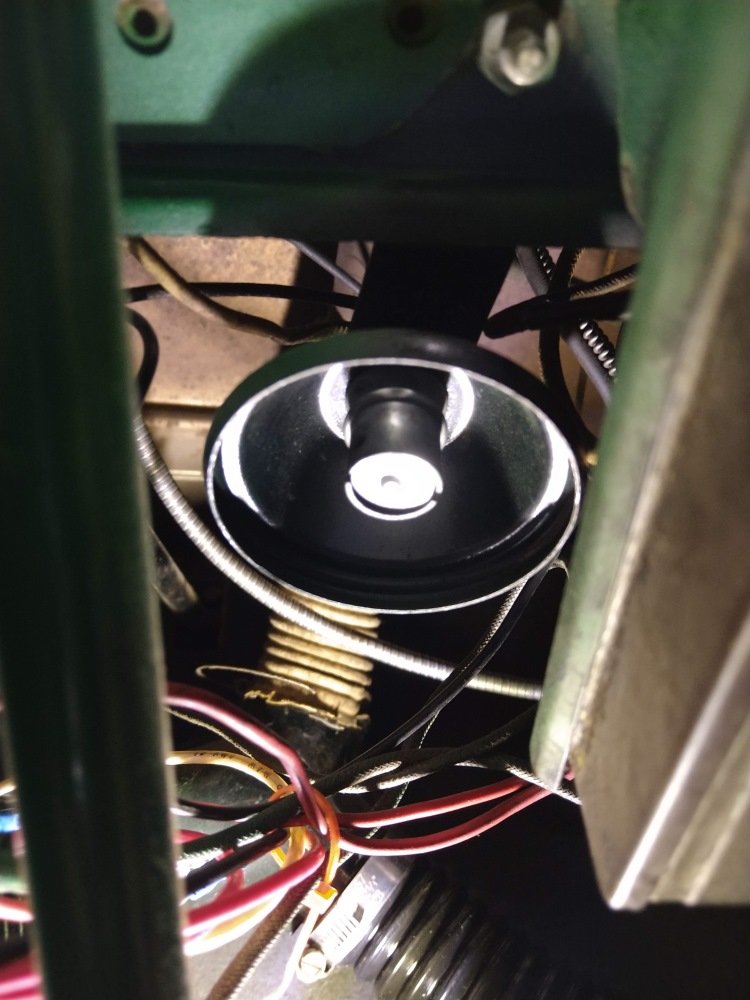
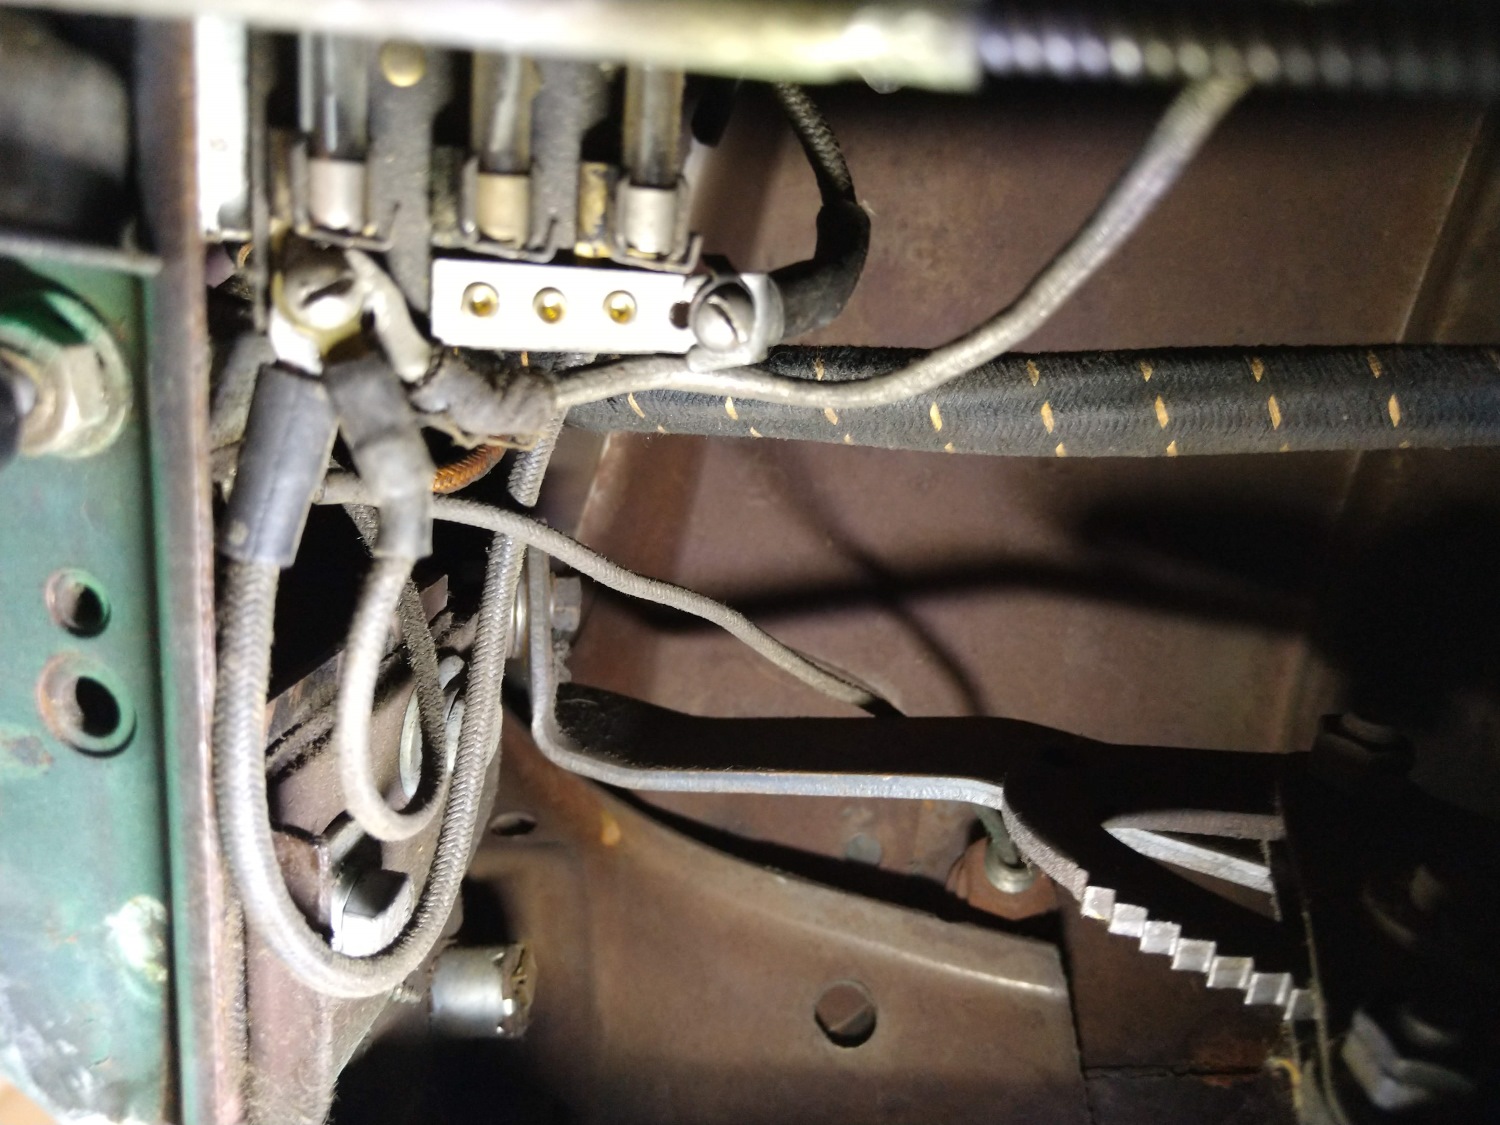
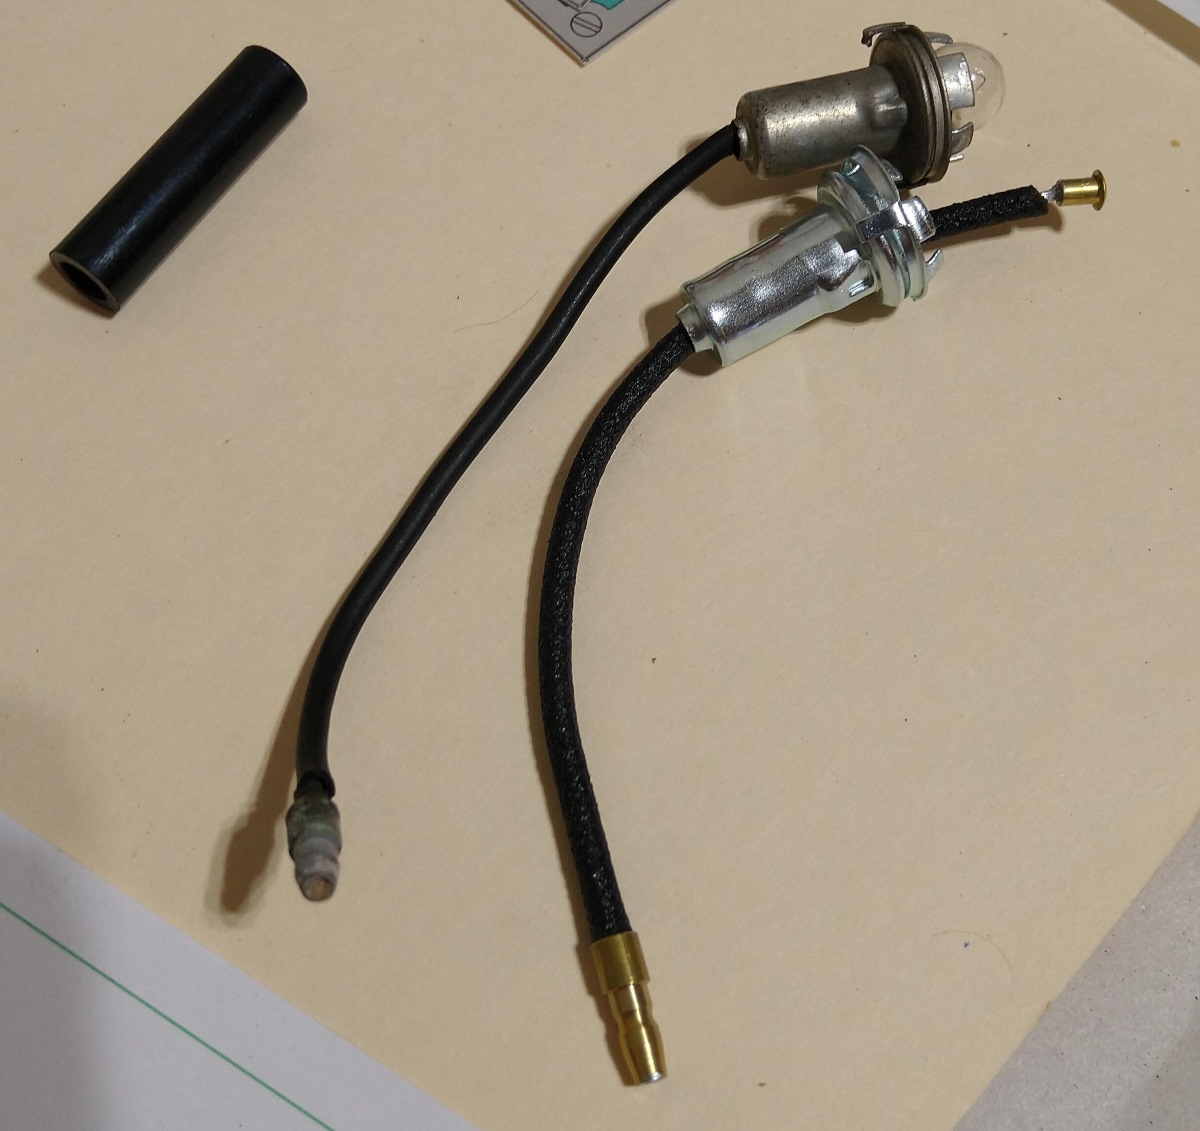
This is the new rear chassis harness. This bad boy snakes up through the driver’s side frame rail through some fairly tight places like in the picture where it is going under the rear shock. So I had to figure out how to do that.This fuzzy picture is what I came up with. I put a plastic bag over the wires on the end of the new harness and taped it tight. Then I attached that to the end of the old harness. Then it was pulling and pushing..It took some wiggling but it worked. Looks better already. And here is the old harness. I will add it to the pile of dead wires…I am not doing this any too soon. Bare wire is poking out through the “insulation” all over this. Some of the damage is probably from me removing the harness but I suspect the dirt was preventing more shorts than I care to think about.Now it is time for the main chassis harness. Here it is! Easy, right?This is the main harness documentation. I “unrolled” the main harness and used the wire list and the tape to “map” the harness.At some point I am going under the dash. To make it easier I removed the front seat. I also removed the engine pans and other bits that would be in the way. This actually the first time I have had the seat out. That big black thing is the heater core. The heater fan is in the middle. It sucks air in and blows it out through the core. A big part about this job will be removing stuff that does not belong or work. For example at some point someone put a “courtesy light” under the dash. There was also a power tap for a radio, some wiring for the the aftermarket backup lights, and a couple of loose wires that I don’t have a clue about. Here is the light removed. That bare wire was twisted around a terminal on the fuse block. The other end I think went to the door switch but who knows? It is gone now. I also removed ash trays and glove box to approve access. Before a single wire gets disconnected I need to figure out what terminal is what on the gauges and trace any wires I can’t identify. Wire colors are not much help. For example that right wire is red. Can’t you tell? Access is tough to. I took this picture by jamming my phone up behind the dash but from underneath the pedals are in the way and it is tough to see.The fuse block is another problem. I already took that courtesy light off the very busy terminal you can see but there are three other wires. Got them figured out. Two are supposed to be there, the other is feeding the cigarette lighter. That switch you can almost see on the left is for the spot light. That wire is running straight up to the spot light mount above the emergency brake. That wire is NOT in the new harness so I will have to decide what to do with that. I am not sure where it is getting power from yet. I can install one new wire. This is the indicator light for the high beams. The new harness came with a brand new bulb, wire, and socket. So I installed that. I also removed the heater and defroster switches. These look to be in really good shape. The defroster switch is just a rheostat, the main Climatizer switch is a three-position switch. I cleaned both and sprayed Deoxit into them.Working on the switches I found the first real problem with the reproduction harness. My heater/defroster switches are not in the stock locations. So the power wire that came in the harness is too short. Someone else made a longer one back in the day so I did the same thing. The “original” wire and my copy are above. I used modern 12ga wire since this is going to be replaced when I put the factory heater controls in.
I also identified all the terminals on the ignition switch, headlight switch, and the gauges. I removed the grommet in the firewall and the clamps holding the harness to the firewall. So it is about time to bite the bullet and pull the harness out from behind the dash. But it is super late and time to quit. More to come!


Pingback: CHMSL in the Studebaker | 1941 Studebaker Champion