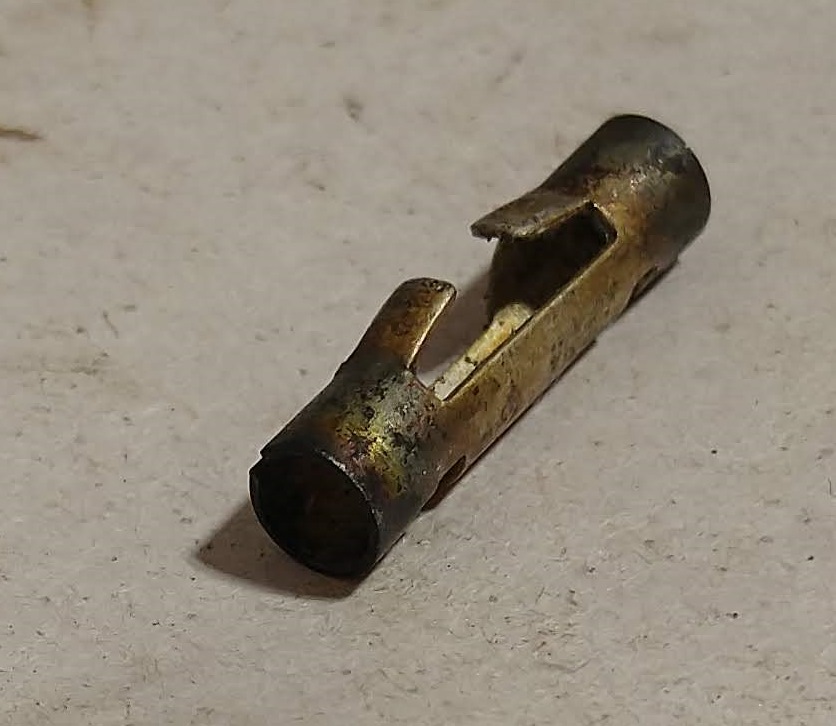
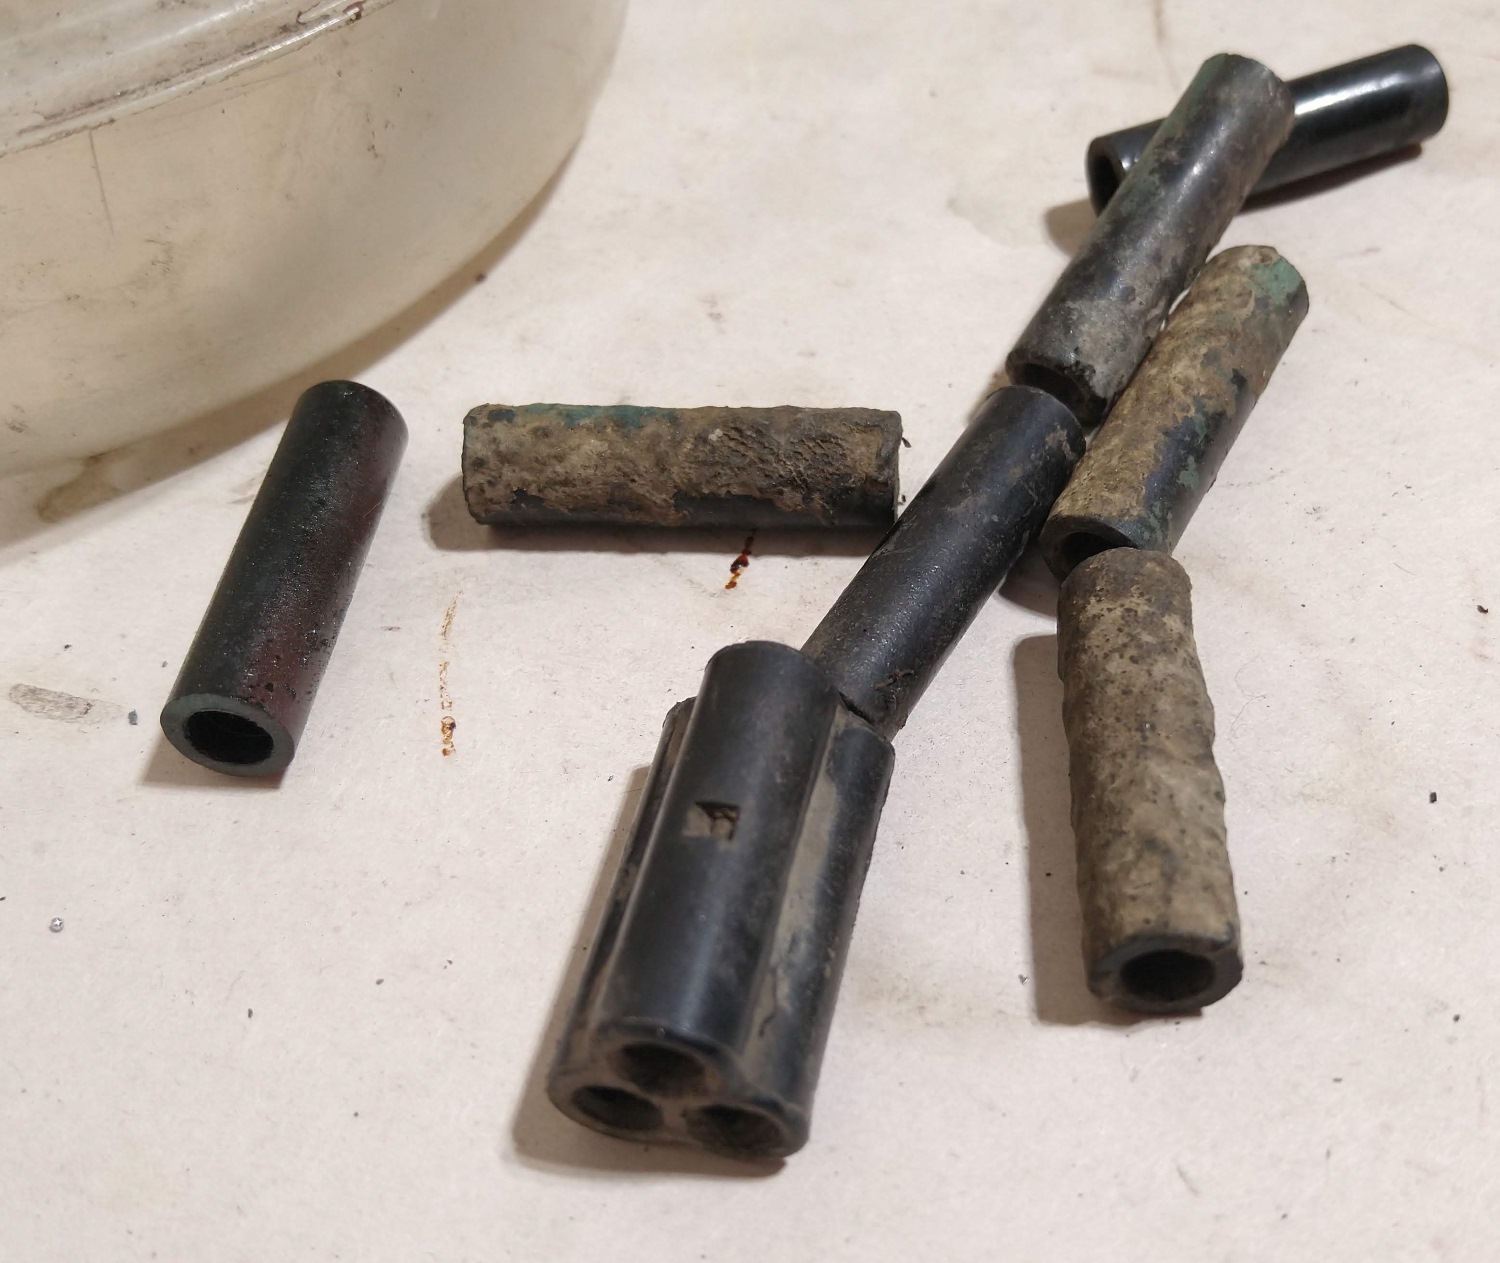
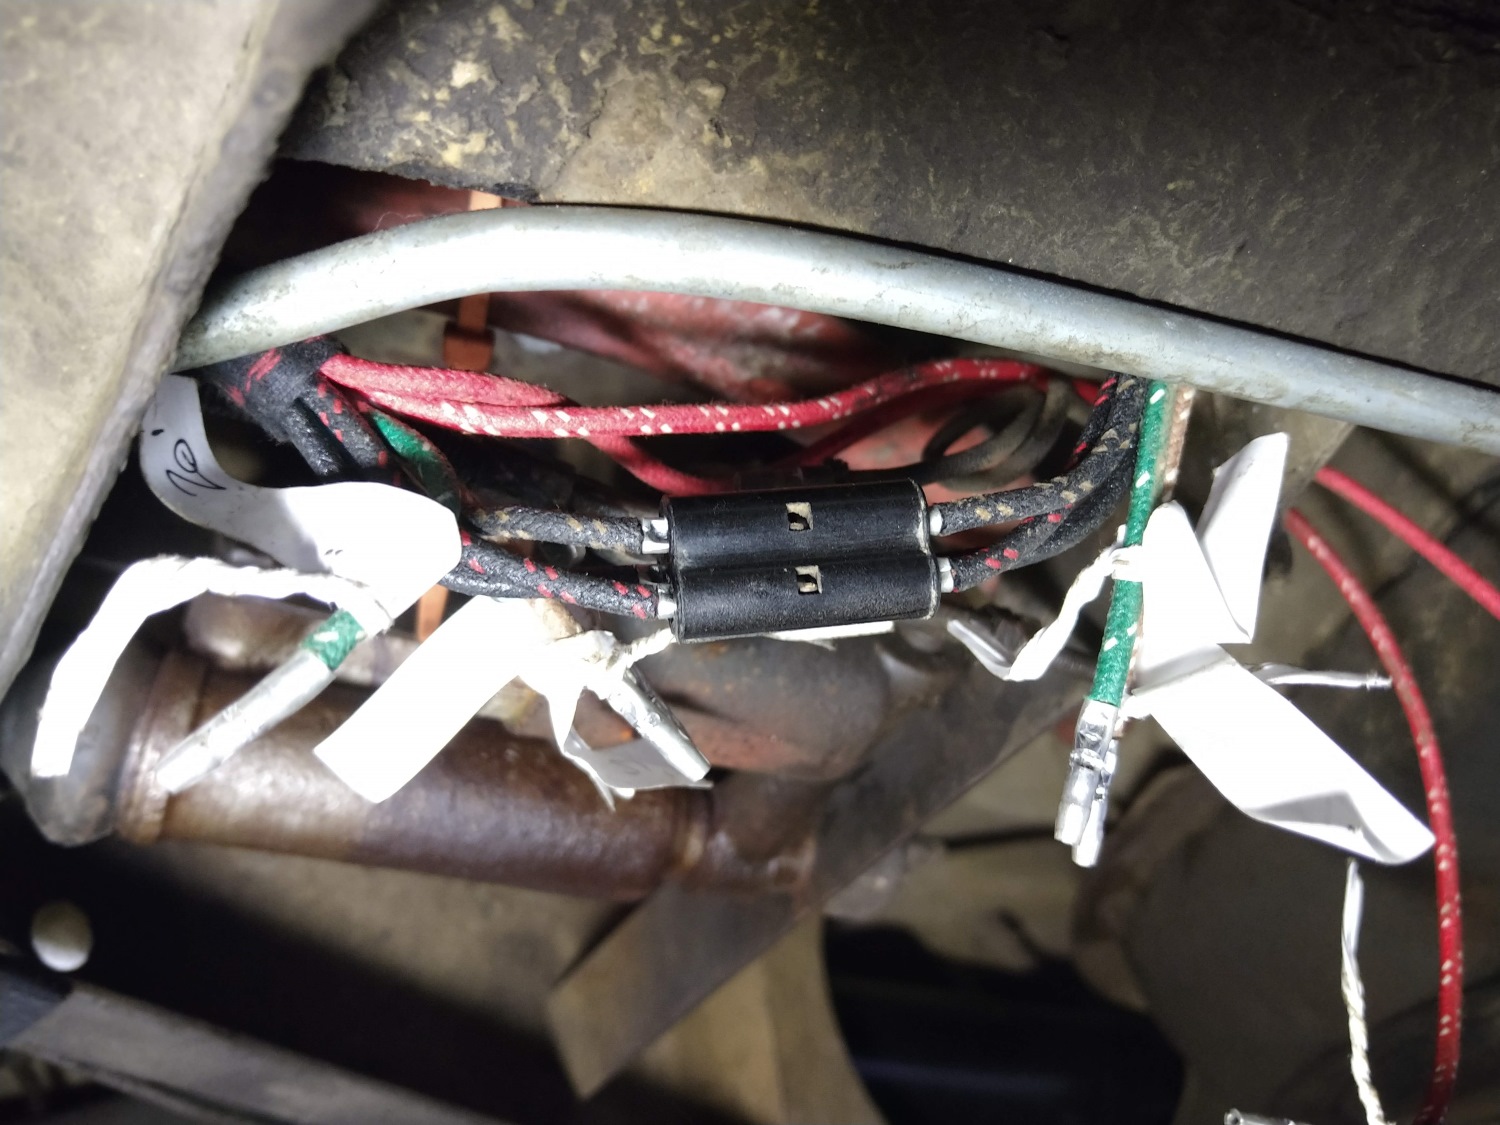
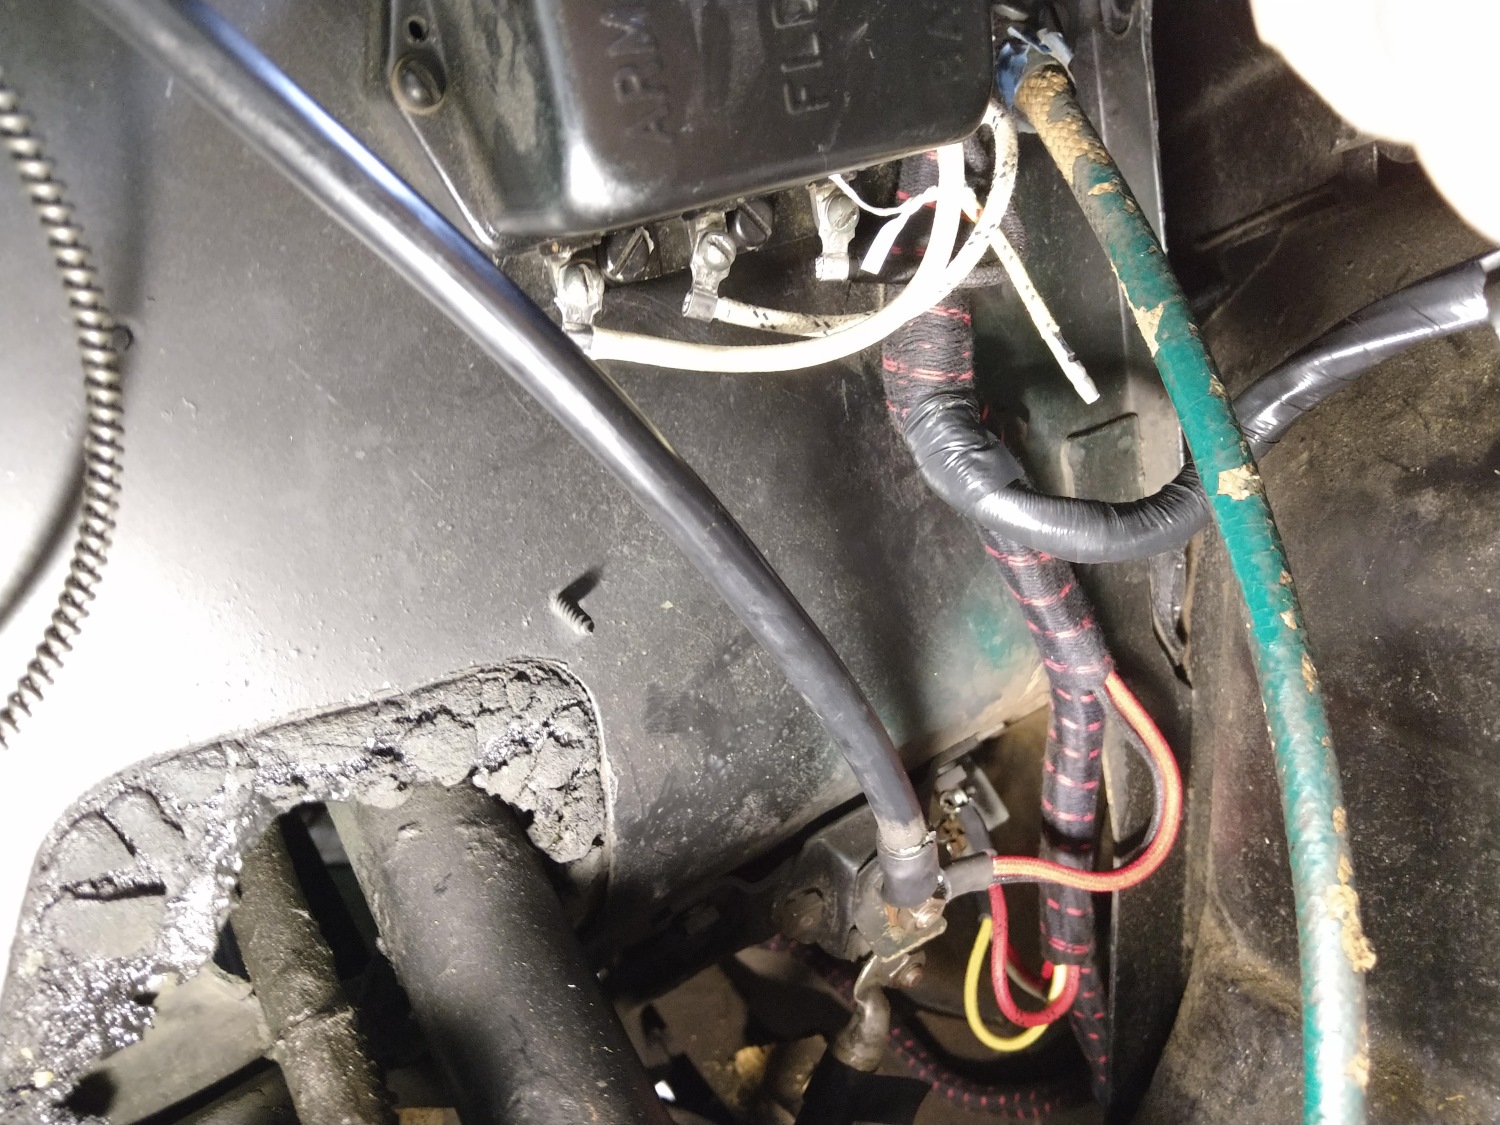
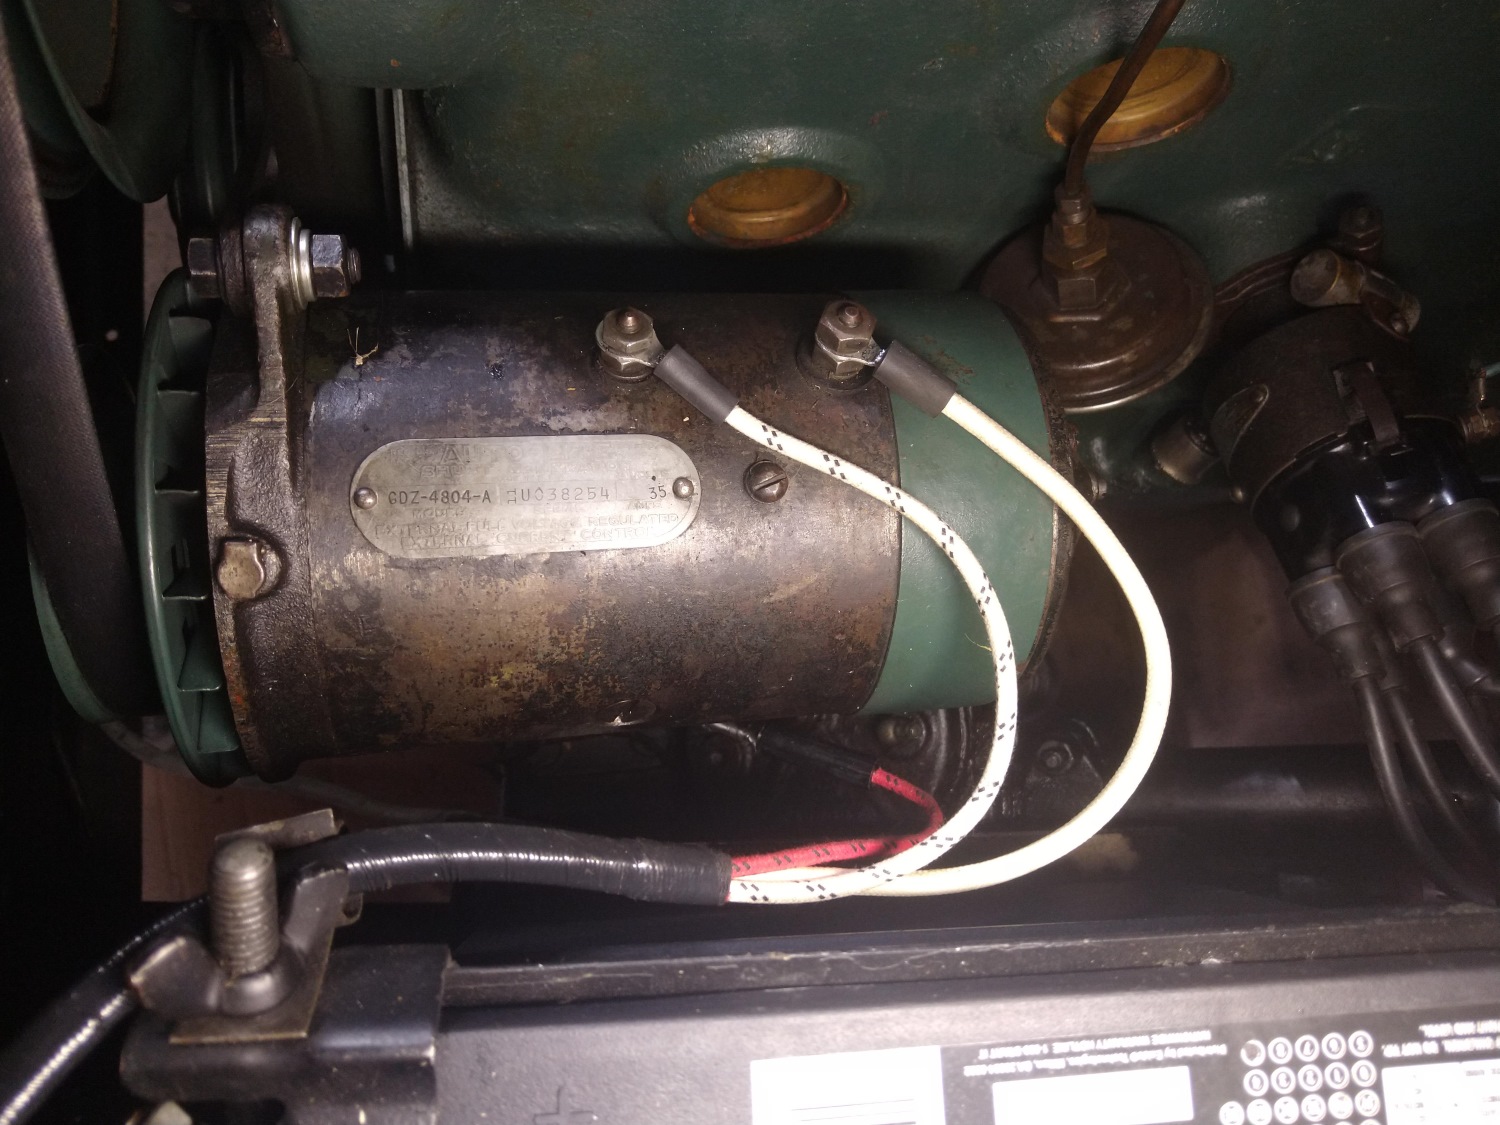
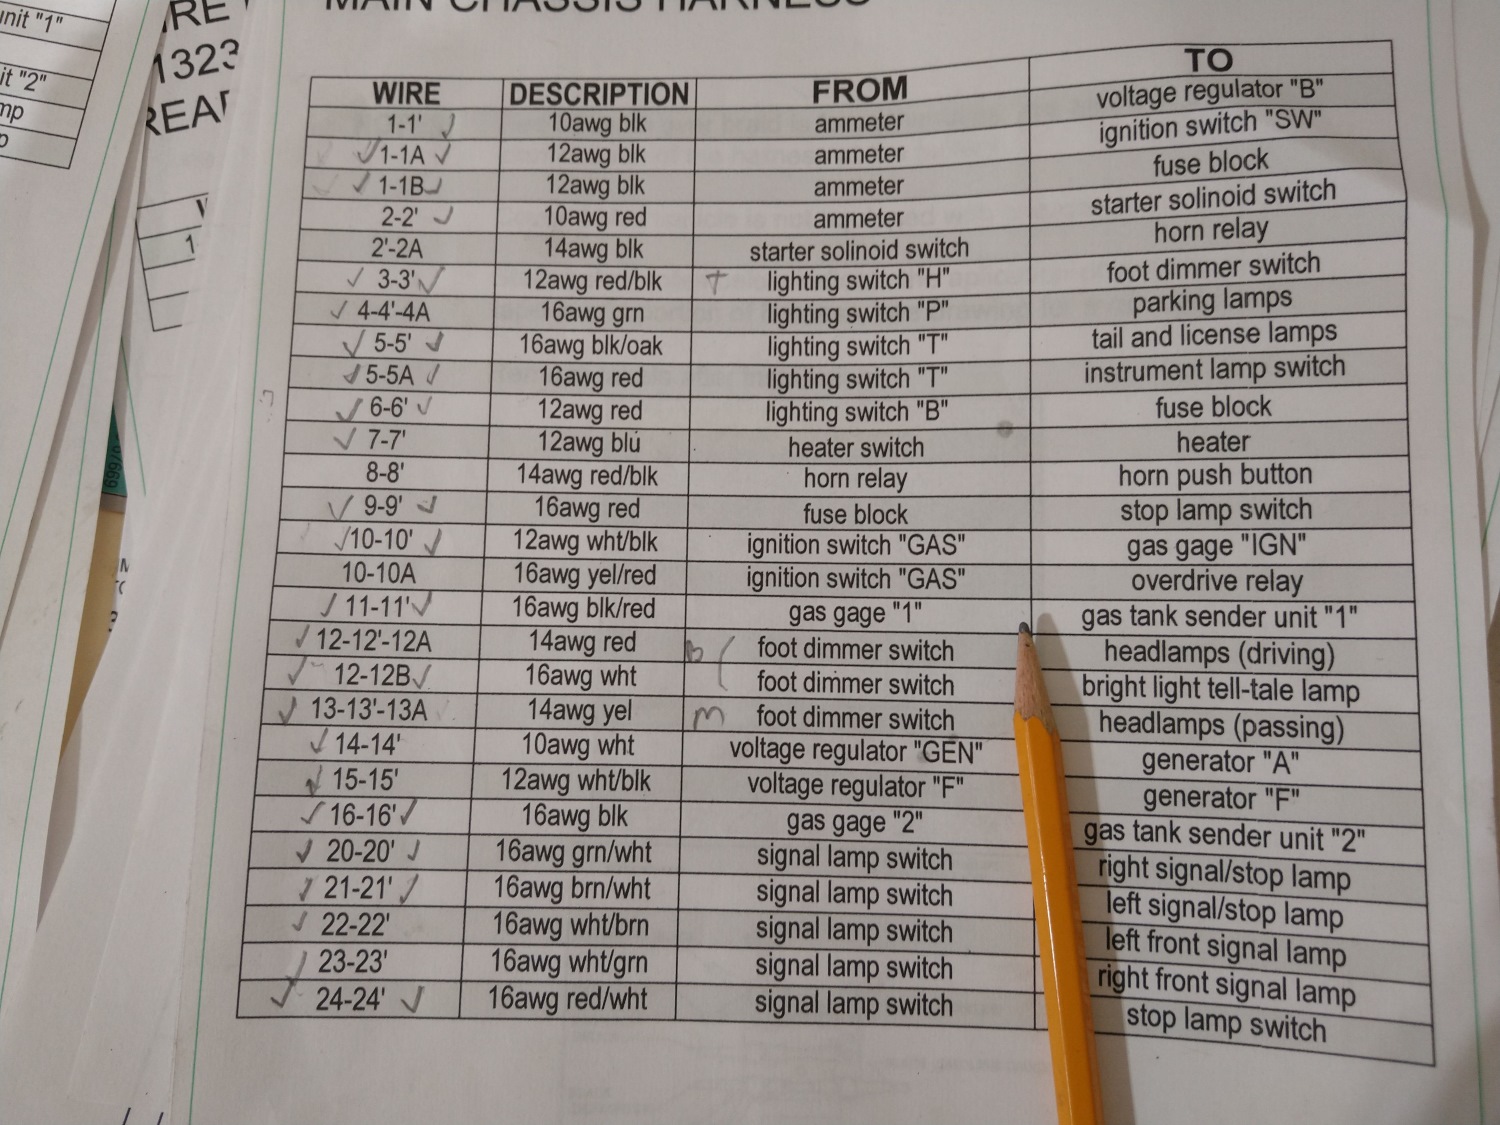
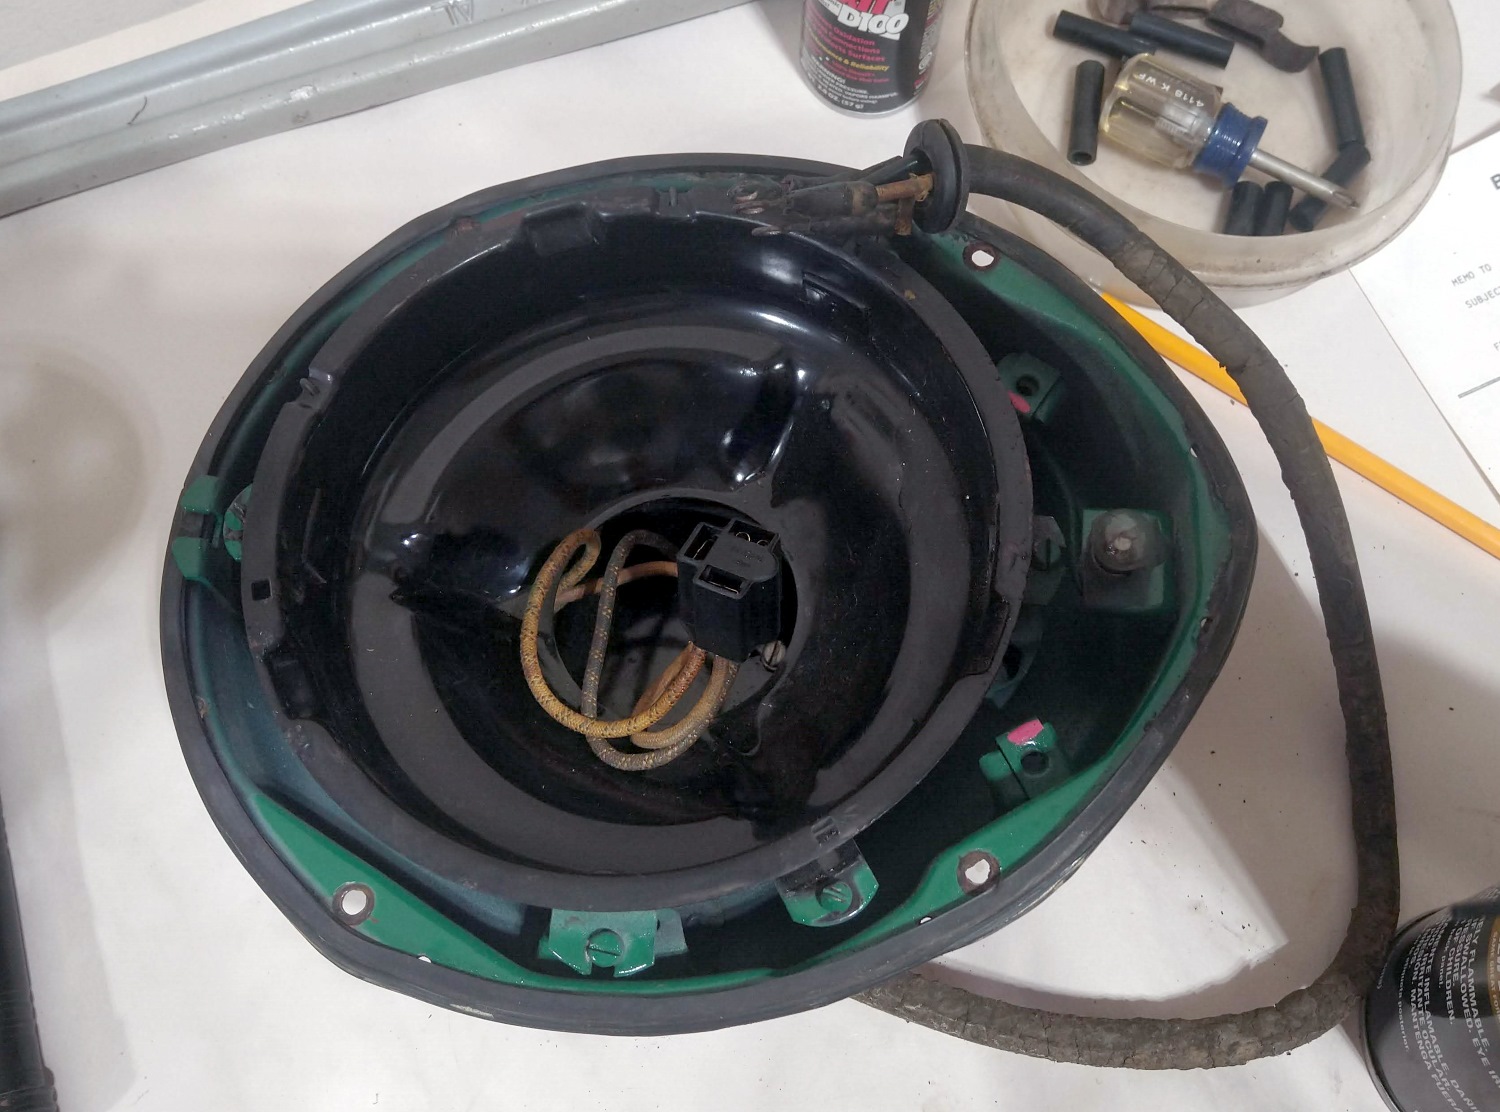
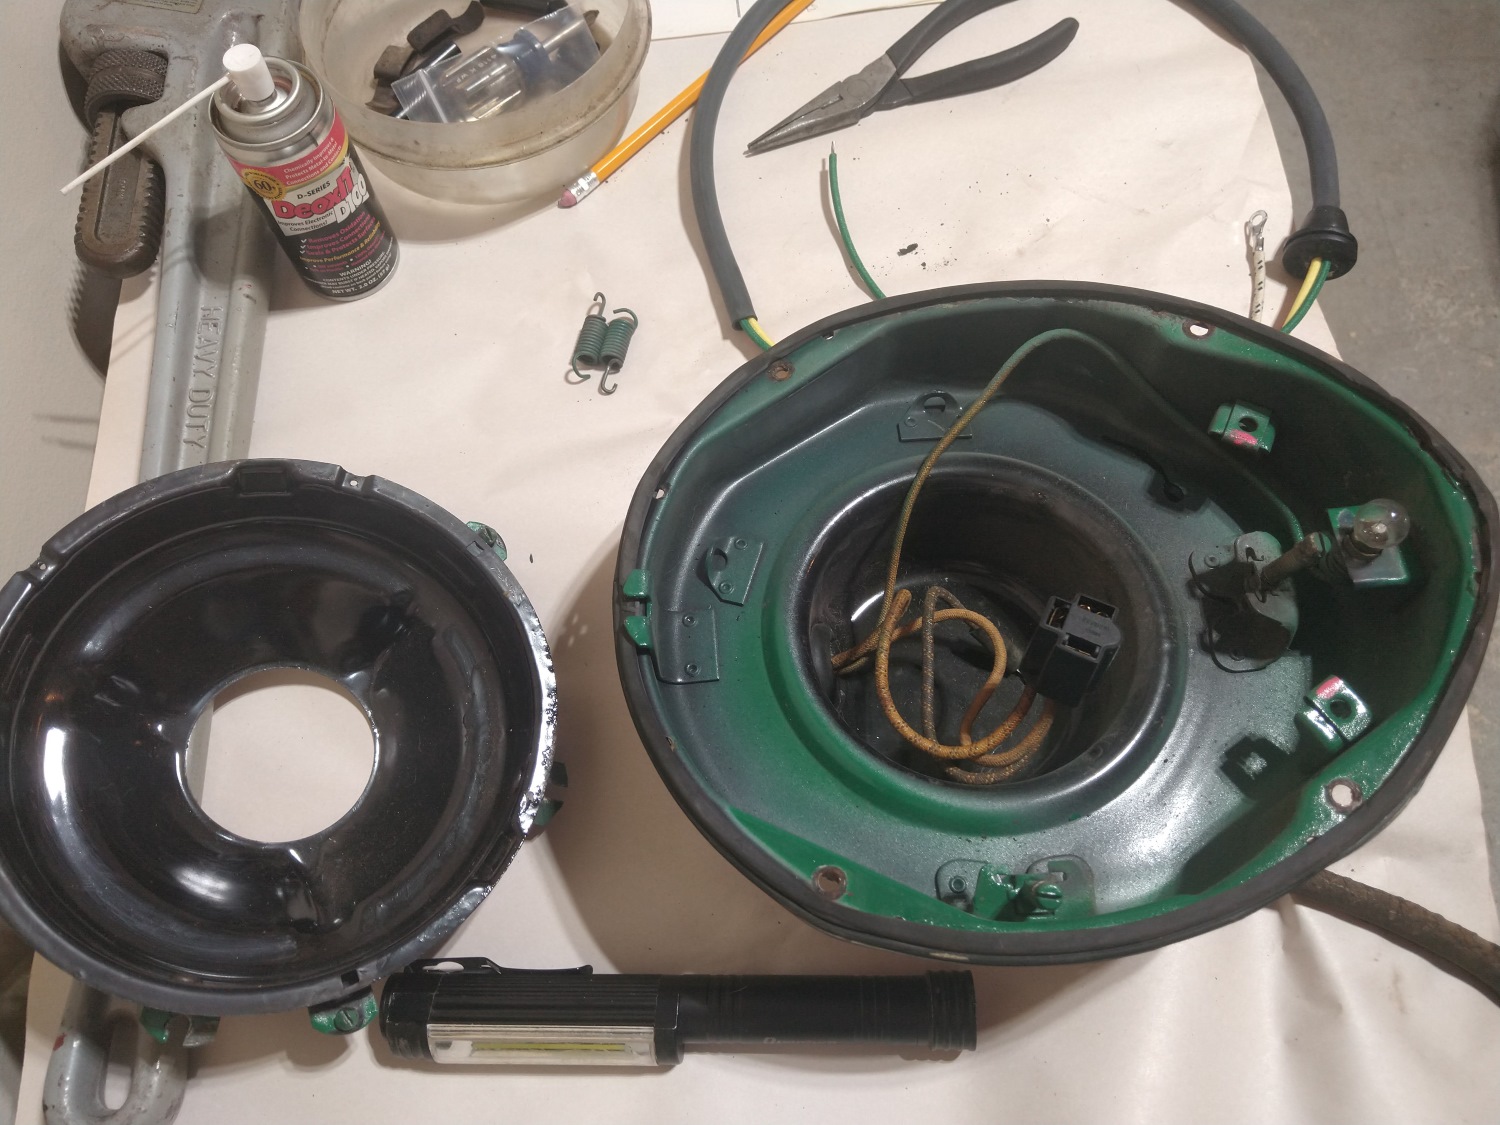
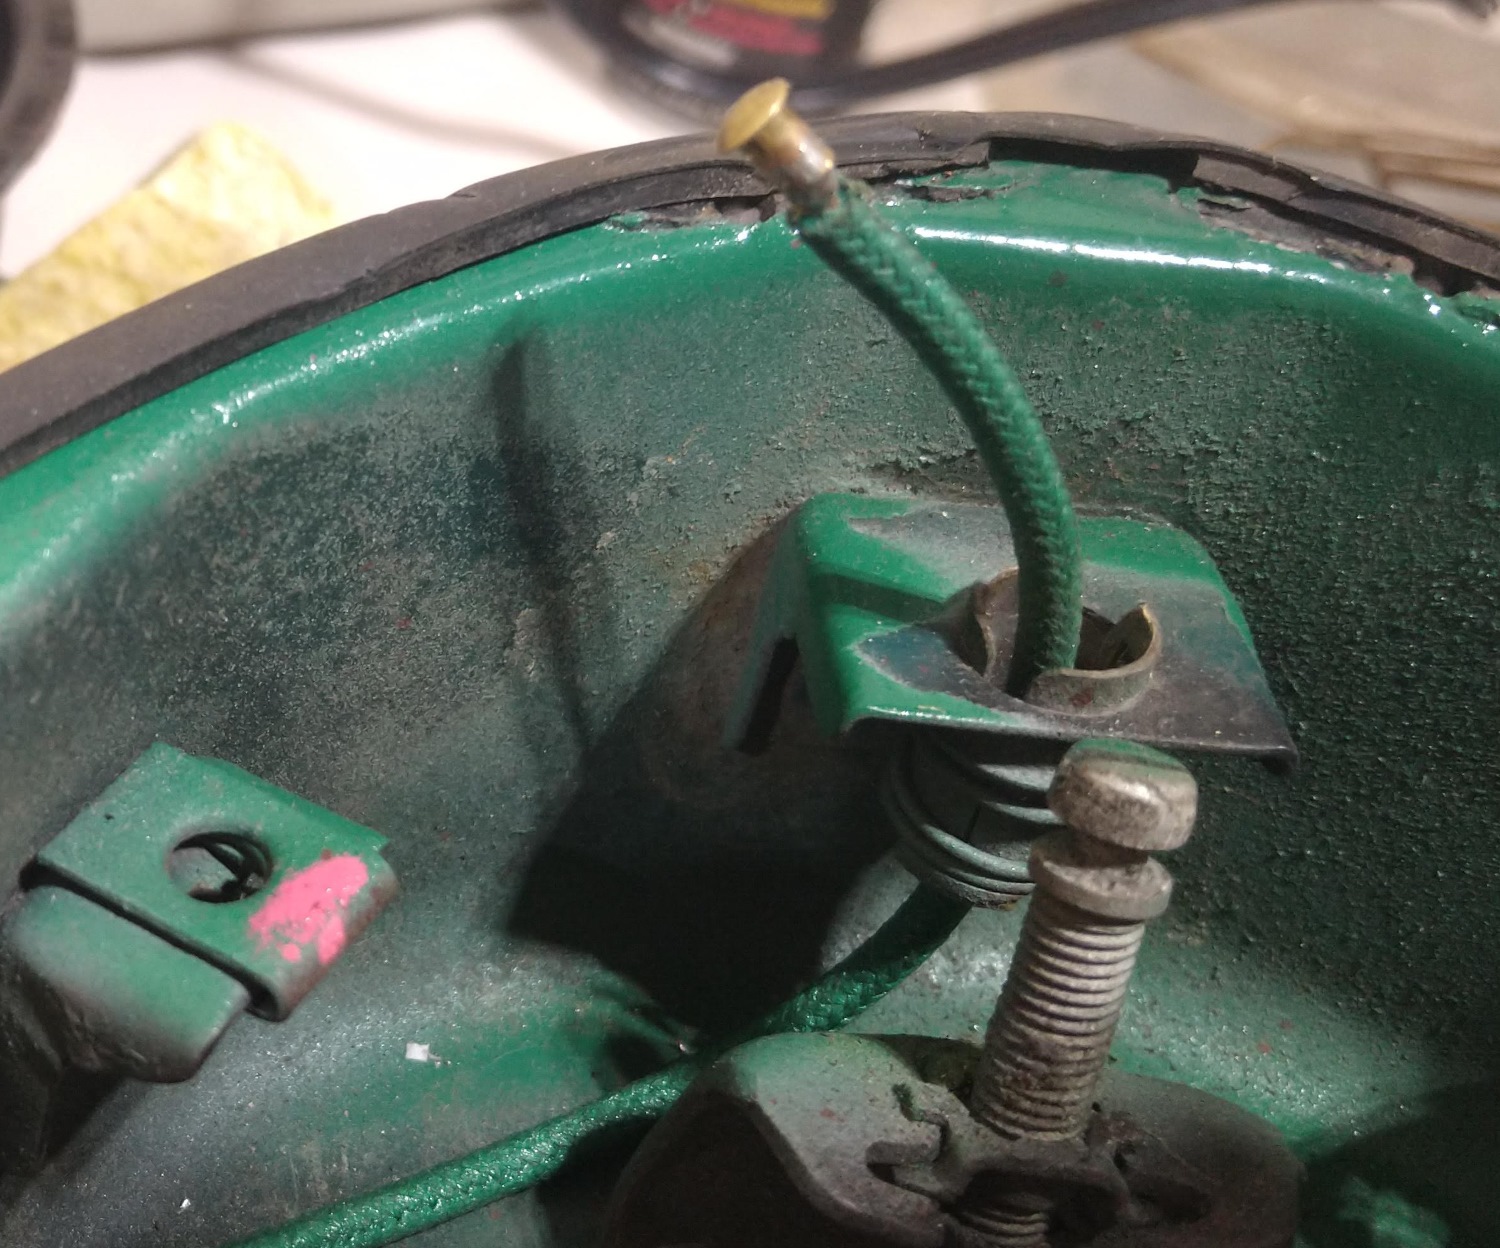
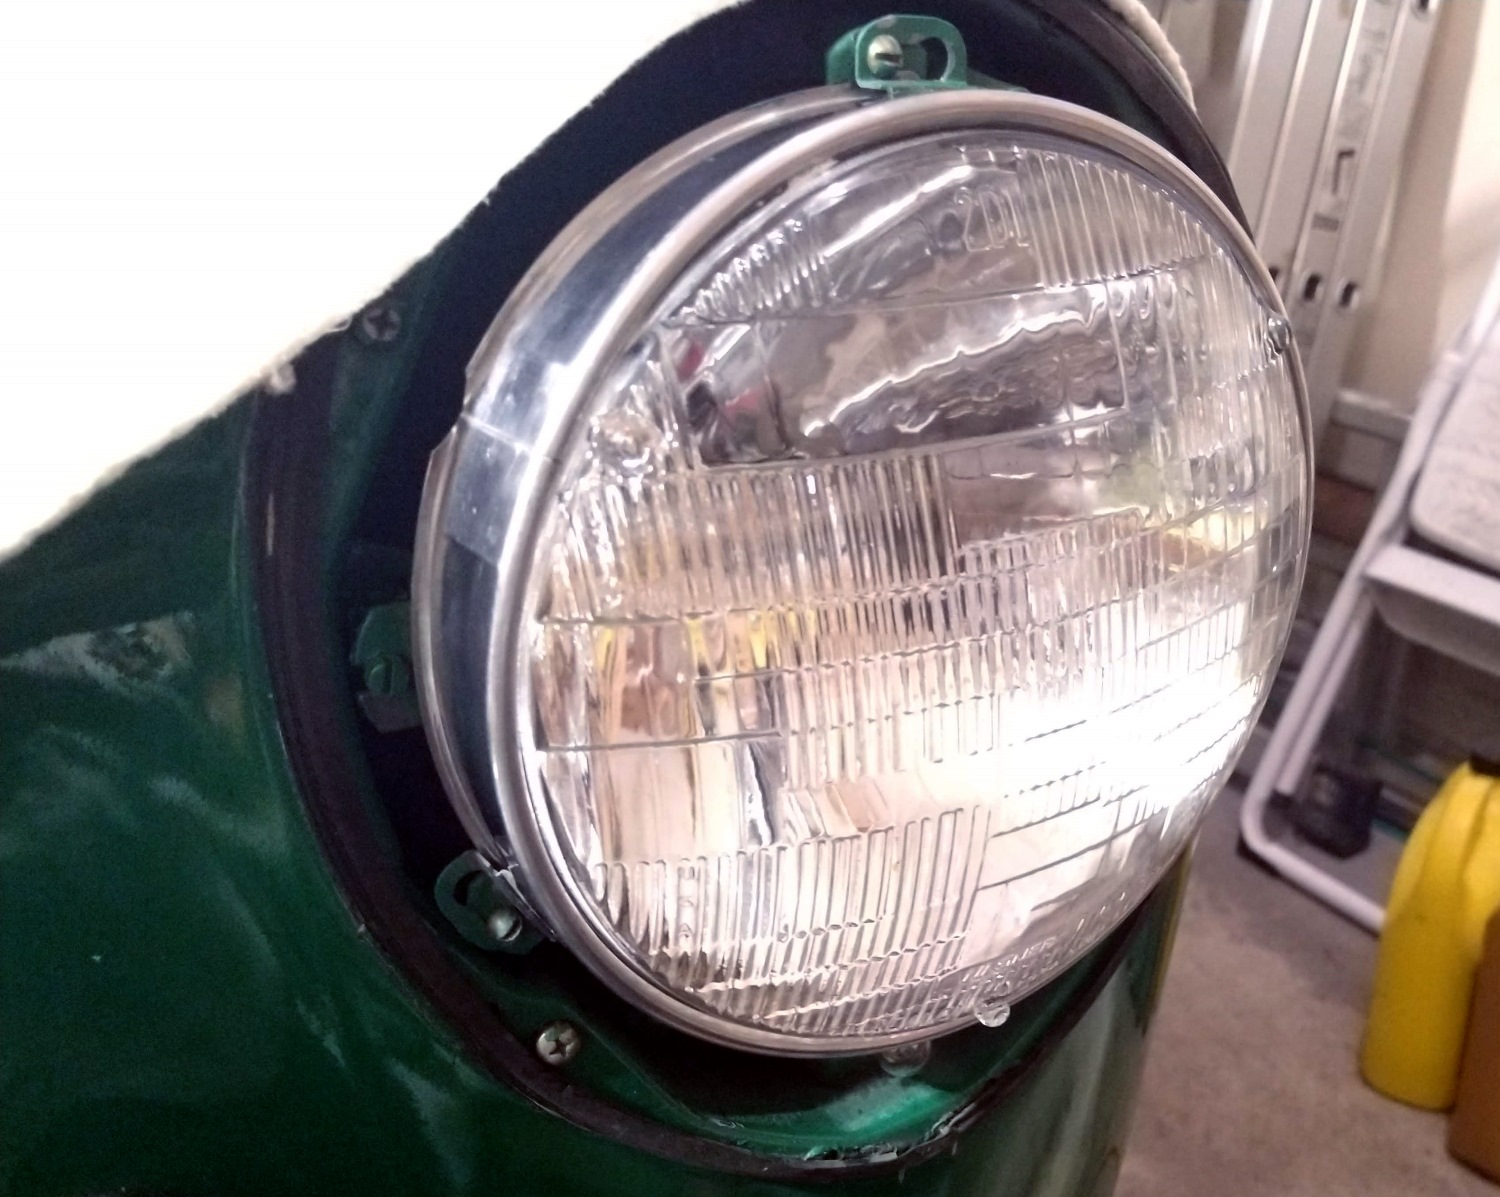
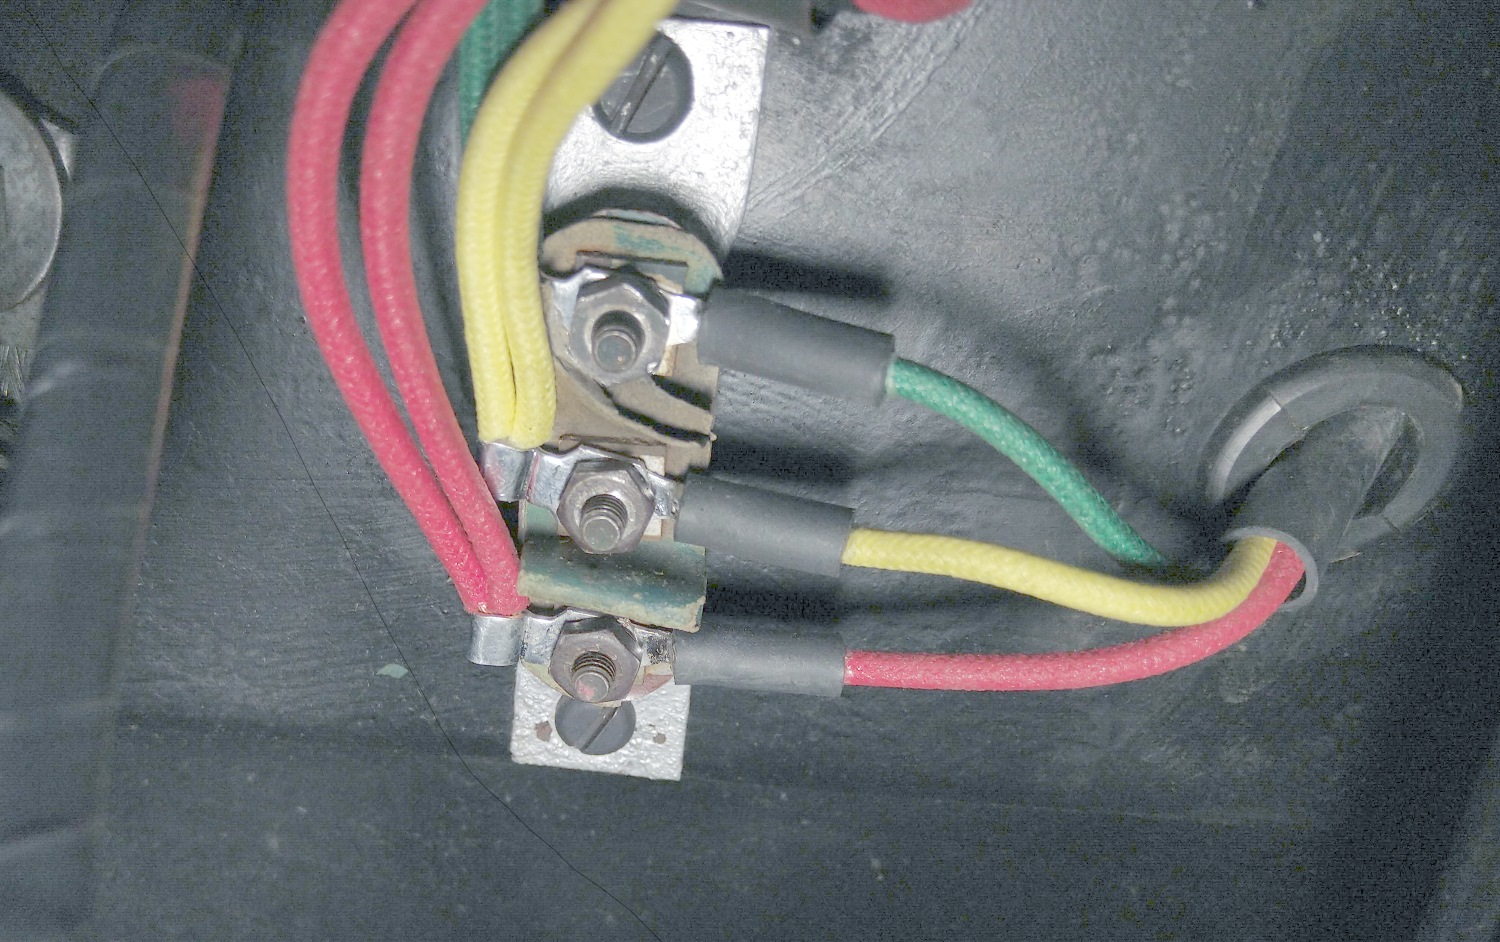
I have been less than thrilled by the quality of the 1-1 connectors that came with the new harness. One of the original factory connectors was broken so I took it apart. The brass insert is much thicker and better shaped than the reproduction connector. And it is plated with tin or maybe even silver. I decided to use the original connectors if I could.The connectors from inside the car were not bad, but the ones from under the car were pretty nasty. I soaked them in solvent, scraped off the undercoating and paint overspray, then blasted them out with brake cleaner and compressed air. Finally I soaked them in vinegar to try and clean the tarnish off the contacts. The results were impressive. I can use these no problem. The first thing to do is get the main chassis harness positioned. To do that I need to join it to the rear chassis harness. So after carefully routing the wires I was ready to connect. The triple-connector here contains the gas gauge and tail-light wires. That went well so I hooked up the rest of the rear chassis harness. I pull-tested each connector, they all held very wll. The ugly wire up top is the blower motor wire. That needs replaced but I will do that later. All these connectors will tuck up into the frame rail. Next I hooked up the brake light switch. Those little clips that hold the bullets in are VERY weak springs. Every time I take them off I have to squeeze them tight again to get them to hold.Once the connections were all made I tucked the harness up in the frame rail and installed the clips to hold it in . You can see one hooked over the frame there. I installed all the clips from the front to the rear axle.Back on the firewall I positioned the harness vertically and held it there with one of the clamps. That let me hook up the high beam switch and the voltage regulator. Moving forward the generator harness goes in. Making progress. As each end of each wire is connected I double-check the location and wire color then check it off on the wire list. Time for the headlights. Driver’s side first.After removing the trim and the headlight bulb the bucket is exposed.Then I fed the wires out through the hole in the inner fender4 screws and the bucket is out. I have to take that apart now.To get the headlight mount out the two springs are removed. Then the headlight mount can be wiggled off the adjusting screws.The parking light socket is built into the bucket so once again I have to fish a bare wire thorough then solder on the contact button. One rebuilt headlight bucket with a new harness.Bucket and headlight are re-installed. Here is how the harness from the bucket is routed though the fender. To complete the headlight the wires just get connected at the terminal block on the inner fender. Almost done but I am out of time for today.