
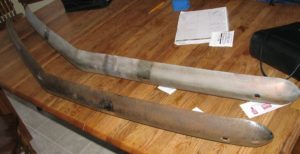
The wrong bumpers were on the car for as long as I have known it. I found this rusty set of bumpers a few years ago and have been waiting for the time and money to get them chromed and on the car.
I also have been tracking down bumper guards. I found several, even one NOS but one two were for a 40 Champion (different bumper profile) and one mangled a little too much. But I can use the NOS and the nicer one above (re-chromed).
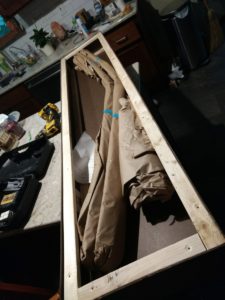
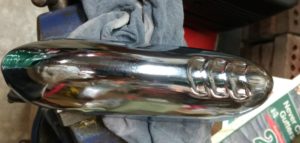
After some calling around I decided to go with Forrester’s Chrome. Jerry Forrester is a Stude owner and I heard good things about their work. So $$$ changed hands and this coffin-like box showed up on my doorstep. Christmas morning!

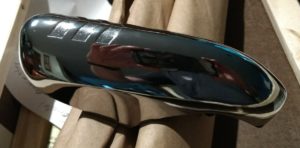
Chrome porn! Looks good.

This is the NOS bumper guard. They just held a stencil over the chevrons and hosed it with spray paint. I tried to clean it up but it looked like crap and the color did not match.
Screw it. I used a little acetone and took all the paint off.

I am not artistic so I enlisted my wife Maria to paint the chevrons. She did a good job but it was hard not to get the paint outside the lines so to speak.
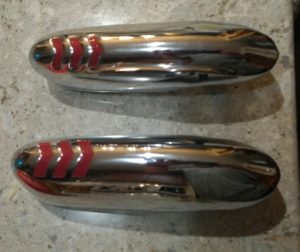
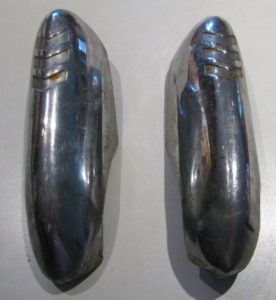
Once the paint set I found a razor blade did a great job cleaning up the edges. Here are the two bumper guards ready to rock. The NOS one is on top. It came in a Studebaker box but the chevrons are a slightly different size and stamped differently. I am guessing Studebaker changed suppliers at some point. Since I only have the two I will put them in the front.
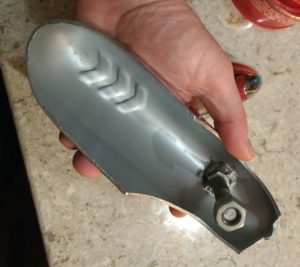
The back of the NOS guard is painted silver. So I decided to do the same thing with the re-chromed one.

Here it is after painting. I also used a die to clean up the threads. You can clearly see the difference in the stamping of the chevrons.

This is exciting. I needed spacers to go between the flat bumper mounts and the curved surface of the bumper. These were used on Commanders and Presidents but not on the lowly Champion. So I had a friend at work draw up these in SolidWorks and I 3D printed them in black PLA plastic. I needed 8 which took about 8 hours to print. If you look closely one is a bit longer than the others. That was the prototype. I made the others shorter to save plastic.
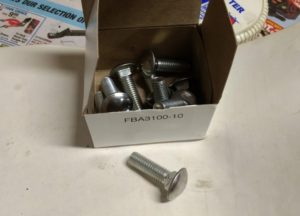
I also picked up these bumper bolts. I bought 10 and ended up using 4 but that is OK.

Old rear bumper is removed and the new one is staged and ready to go on.Each mounting hole got a bumper bolt, one of the plastic spacers, a washer, and a nylon self-locking nut.

Looks great from this angle.

Not so much from this angle. Some nimrod trimmed the rear valence to fit the 51′ bumpers. Bummer. At some point I will have to get some more metal welded on here and repaint this.
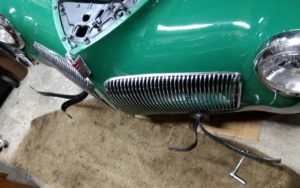
On to the front. I took off the bumper guards first, then the fog lights, then the last two bolts.
Here is a test fitting with just the outside bolts in. The fog lights are going to be a problem here. The old bumper had three holes on each side which allowed the bumper guards to be offset from the fog lights. If I put the lights on the inside they will be blocked by the guards. If I put them on the outside they will be right under the headlights and look stupid. With some effort I could rig up a new mounting bar for the fog lights but I am not sure I care. The lights are useless (I am not driving in any fog with this thing) and poorly wired in. So right now I am leaning towards just scrapping the fog lights. I can sell them as well as the old bumpers and offset the cost of the chrome work.

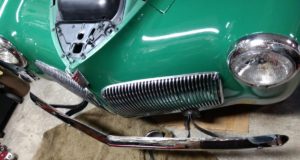
Bumper guards are on. Same deal as the back with the spacer, washer, and self-locking nuts.


Before and after. The new bumpers are much better proportioned and weigh a heck of a lot less. And they don’t stick 4 inches out of each side of the car so I will hit my shins on them a lot less. I am not even sure I want the guards in the back but I will keep my eyes open.