It has been more than 11 years since the last valve adjustment on the Studebaker and it is high time. Last time the engine was out of the car, this time I am not so lucky.
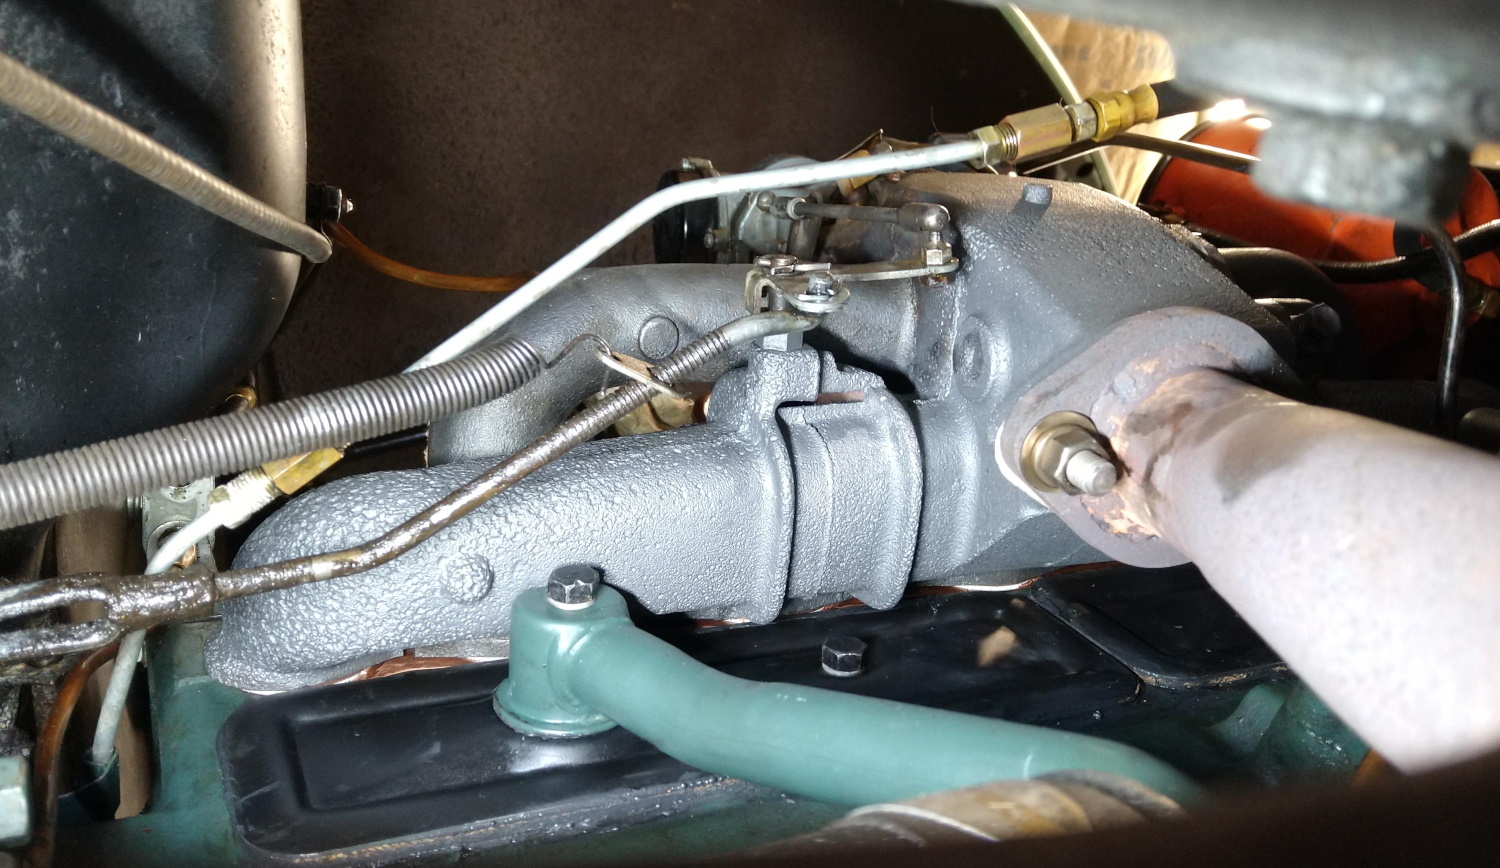
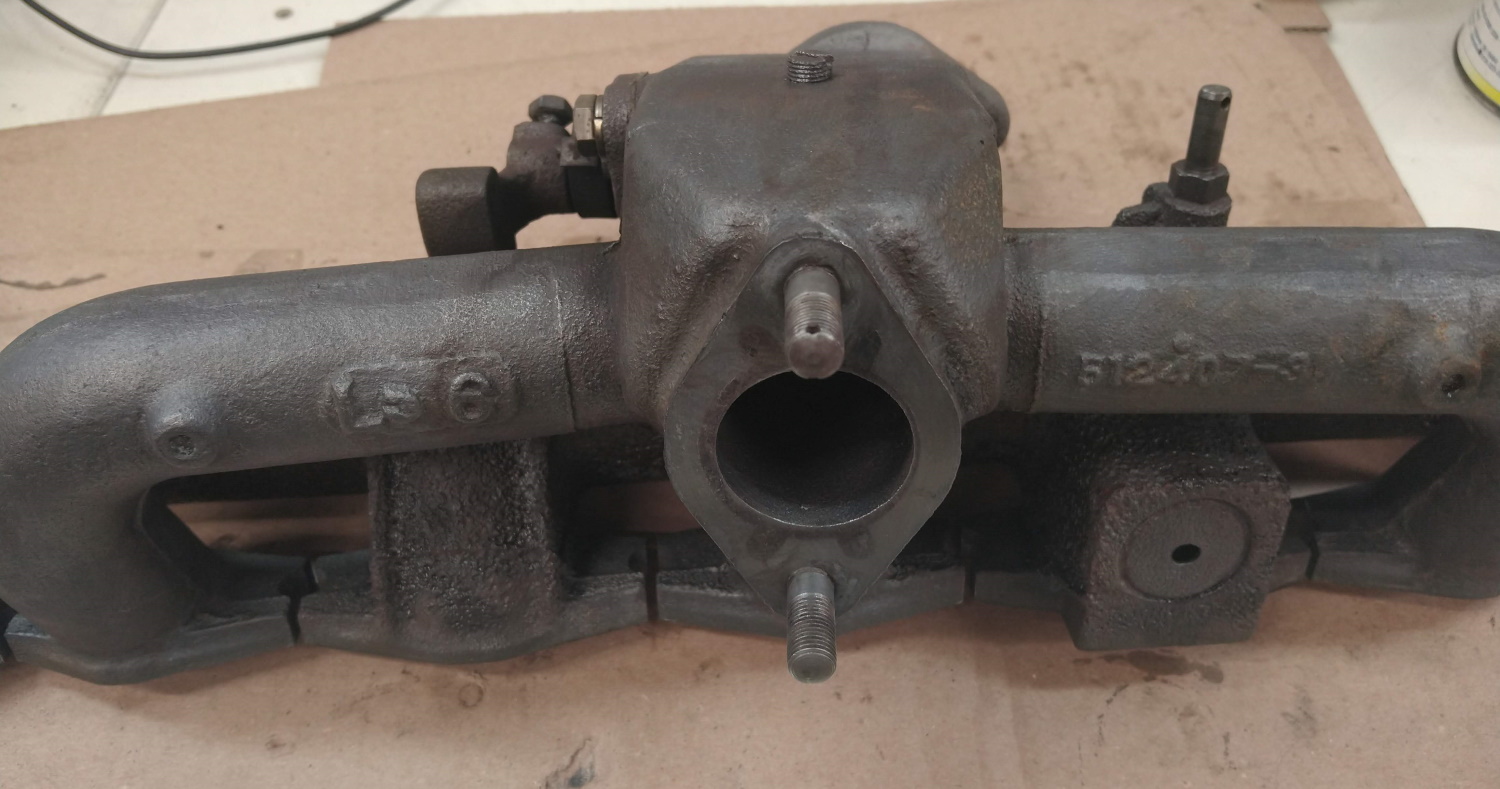
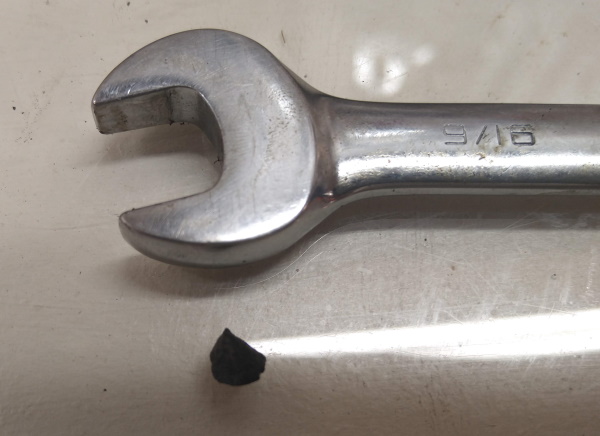
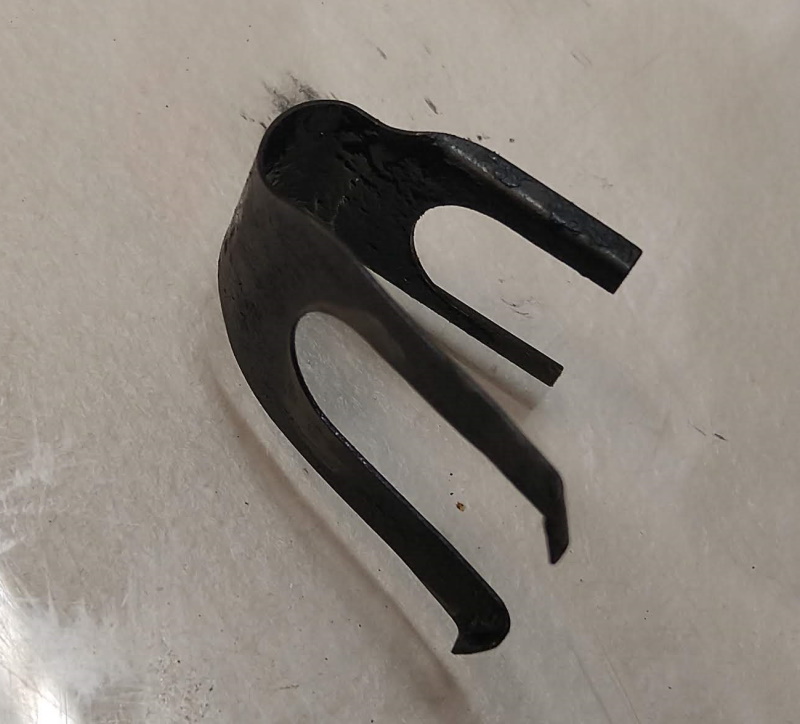
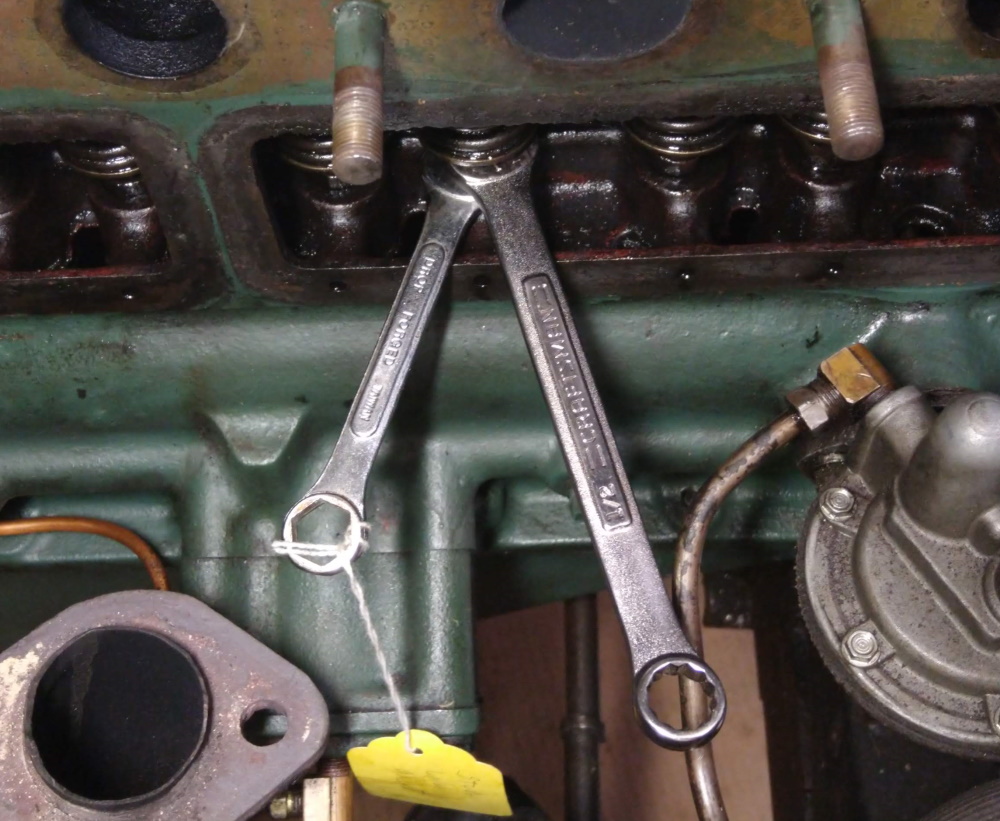
I really wanted to adjust the valves with the manifold in the car but there is just no way. Many flathead cars had panels in the inner fenders you could remove to get at the valves. This car does not. I could remove the front fender but there still is not a lot of room. Better to take out the manifold and work from the top.While I had the car up in the air, I might as well take the exhaust pipe loose.One of my brighter moves was to use stainless hardware on the exhaust pipe. Still looks like new.The gasket was not terrible, but I have a new one so I am replacing it.Back on top of the engine, I removed the spark plugs. They need cleaned and the engine is a lot easier to turn over with them out. They look nice but are probably due for replacement soon.I also positioned the engine at more-or-less at TDC. The flywheel does not have a TDC mark, just Ign. and 1.6 U.D.C. I highlighted the IGN mark with yellow paint a while back, which was also a really good idea.Next I had to remove the fuel and vacuum lines from the carburetor. This is the line for the vacuum advance, which I removed completely. The vacuum line for the wipers and the fuel line also needed disconnected.Modern cars at least try to make things easy to get a socket wrench on. Not this car. First, the oil filter is in the way. So I took it loose and laid it aside. Next, you can get a socket (sort of) on the end manifold bolts but the rest are totally blocked. This ratchet-end wrench works well on the others but I can only get a quarter-turn on the nuts behind the carb. Finally, the accelerator linkage needs disconnected.And it is out. The manifold was sandblasted and painted 11 years ago with Eastwood manifold paint. It was touched up in the car about 5 years ago. It is pretty much done now. The carb is pretty cruddy-looking too. I removed the carb and found that the carburetor gasket was also past its sell-by date. But I had one of those in my parts stash too. At this point I had wire-brushed and cleaned the manifold and it is ready for another coat of paint. By the way, L-6 is a date code. This was cast in June, 1940.This was weird. I found a rock in the intake manifold. How did this get in there?Even with the manifold off, access to the valves is not great. To get a little more room I also removed the side panel. It is just held on with two bolts and several wing nuts. I set it inside my minivan to keep it safe.The service manual says the valve clearance is 20 thou. But the valve covers clearly say 16 thou. I adjusted it to .016 last time. Just to make sure I pulled out my 1951 Motors manual and it said .016 too. Good enough for me! This is a tappet spring clip. The larger end hooks under the valve spring and the smaller end fits on the top of the tappet. I think its job is to “urge” the tappet down against the cam. It is possible to adjust the valves with these in place but it gets in the way so I just popped them out. It takes two 1/2″ open end wrenches to adjust the valves. Normal thickness wrenches will not fit. They used to sell thin “tappet wrenches” just for this job, but I don’t have those. However I did have a junk wrench that is super flimsy. That does fit with a normal 1/2″ wrench. I have a tag on the wrench so I don’t forget and throw it out. The trick is to make sure the valve clearance is as large as it can get before adjusting. I checked them all twice. Once I was satisfied I replaced the valve spring clips.I re-installed the valve covers with new gaskets and silicone rubber. It is critical not to over-tighten the valve covers. That will bend them and they will never be right. I test-fit the manifold gasket and found it hung up slightly on the front valve cover. I loosened up the cover and tapped it down gently with a block of wood. Now it clears.
The new manifold gasket is a thing. It is a Victor gasket (maybe NOS). I used this style during the 2009 engine pull and it leaked immediately. So I replaced it with a Best gasket with a much better design. But I could not source that gasket this time. To improve my odds I hosed the gasket down with copper gasket sealant. If it leaks again I will try harder to find the Best gasket.
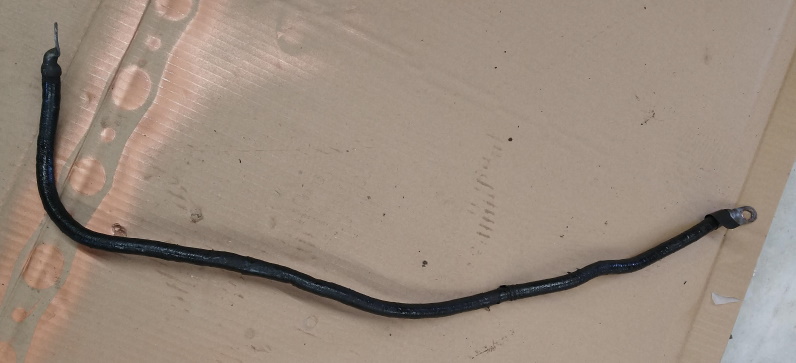
Here is the manifold installed and tight. No way to use a torque wrench on the nuts and no idea what the torque should be be anyway. So I just cranked them down “firm”. The new paint job on the manifold looks good!Re-installed the oil filter housing. The bolts holding it on were a little short so I found ones a bit longer. The rag on the top is to make sure nothing falls in the spark plug holes.Next I installed the carburetor and hooked everything back up. Looks good!Plugs are installed and hooked up! At this point I started the engine and ran it for a while. As the manifold got hot it cured the paint which stunk to high heaven. But the engine sounds great. While I have the engine pans off and the car on the lift it is a good time to install this cable. I bought this when I did the new wiring harness. It runs between the starter switch and the starter. The existing one is mostly electrical tape so it is about time for the new one.The clips that hold the cable use the bolts attaching the bell housing to the engine. They are bent up and needed some work to get them off the old cable.New cable installed. I may tweak the routing of this a little.The old cable in all its glory. I am going to keep this around for a bit just in case. You can see where I sprayed the new manifold gasket.
Comments
Valve adjustment and new starter cable — 2 Comments


Pingback: Found my exhaust leak | 1941 Studebaker Champion
Pingback: Attempt #2 at the valve adjustment | 1941 Studebaker Champion